Showing posts with label CHEESE!. Show all posts

September 6, 2018

Mozzarella Sticks

The best way I've found to get giant unmarked slabs of cheese
is to steal 'em from work. So go shanghai yourself some dairy
Cheese. To some it's a source of nutrition, to others pure flavor. And some people just like taunting milk-producing animals by eating dairy products right in front of their faces. And, as the internet taught us in the early 2000s that there's only so much milk you can drink before bad things happen to you and anyone in your immediate vicinity, cheese is the ideal cow-taunting foodstuff. The one thing I know for sure is that cheese is delicious, versatile, and actively in my fridge at this very moment. And everything is better fried, so mozzarella sticks were pretty much destined to happen. Don't fight destiny. You'll piss off a deity and then the Greeks will have to build a giant wooden horse. It'll be a mess, and it's not worth the hassle.

Ingredients:
Mozzarella Cheese
Seasoned Breadcrumbs
Eggs
Flour
Smoked Paprika
Salt
Oil (something with a neutral flavor and a high smoke point, like peanut oil. Any oil recommended for frying should be good though)

The first thing you may notice upon close inspection is the there are no amounts of anything. Welcome to the wonderful world of winging it. Because we're talking mozzarella sticks here. This is something you should be making until you run out of everything, not until the arbitrary amount of food to complete a recipe is reached. You need flour, eggs, and breadcrumbs to coat the cheese, paprika and salt to season those coverings, and oil to fry it in. You should have about a teaspoon each of salt and paprika for every cup of flour. Beyond that, I have the utmost faith you'll persevere, and fully indemnify against legal action in the event that you set yourself or your loved ones on fire.

Sriracha added for deliciousness purposes
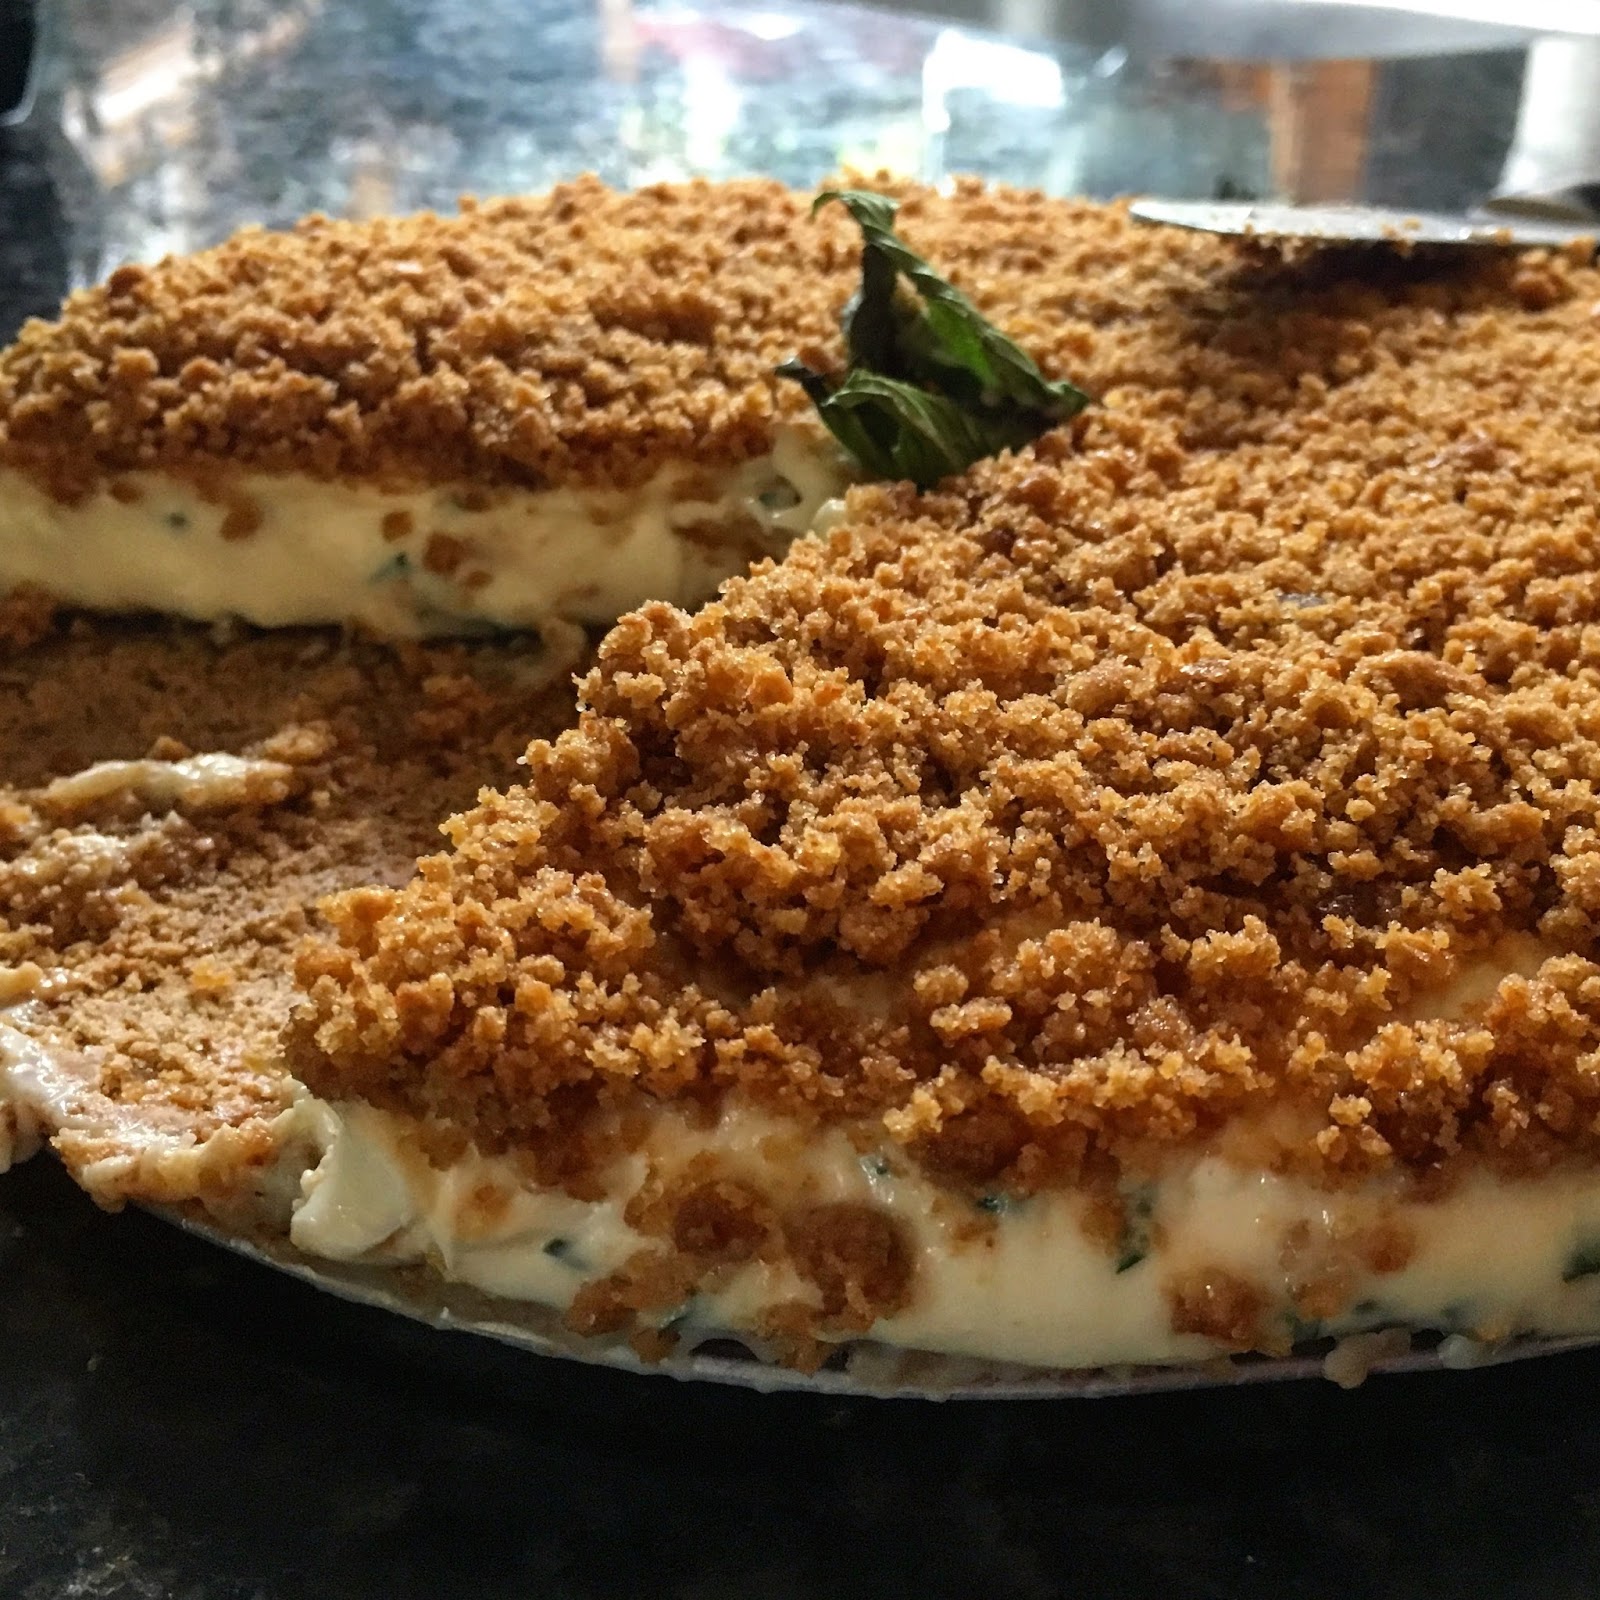
On to the construction. Cut your cheese into rectangular prisms. I like a size of about a half inch by a half inch by 4 inches, but as long as your hunks of cheese are all roughly the same as each other, follow your heart. Mix together your flour, paprika, and salt, and then coat your cheese prisms in it. Mercilessly beat your eggs, then dunk your floury cheese into them, then into your breadcrumbs, then back to your eggs, and back one more time to your breadcrumbs. Confused? You shouldn't be. It's flour, eggs, breadcrumbs, eggs, breadcrumbs. Then lay out your crumby cheese on a baking sheet and freeze it for at least 2 hours. Once they're solidly frozen, heat up your oil over medium heat and get to frying. About one minute on each side should do it, but you can also go by how delicious they look, smell, and taste. Either way. Then just top them with the marinara, hot sauce, or nothing of your choice and eat them until your loved ones think you have a serious problem. You know, the ones you haven't set on fire yet. Enjoy!

July 18, 2018

Cheddar Spaghetti Squash Casserole

"Sometimes life hands you an unreasonable amount of cheese. It is up to each of us as occasionally upright members of the human race to determine how we'll react. Will we let sloth and time turn that cheese to mold while it sits unused in the refrigerator, or will we take bold action? Create something great from nothing, and leave a legacy for the future?"

Rare portrait of Washington kicking the British apart.
When George Washington said these words, they were met with applause by an enthusiastic young nation, tired of war and eager for a prosperous tomorrow. They were also met with some confusion, since the refrigerator wouldn't be invented for another 50 years or so. Which only makes it more inspiring. And it's just as relevant today as it was then. It speaks to our will, determination, and perseverance. When you've got an apartment full of discount cheese from the back of a van and misshapen produce sent to you by the internet, what are you to do? This. This is what you're to do.


Ingredients:

2 reasonably sized Spaghetti Squash 
3 Cups Broccoli Florets (If you want you can totally use fresh broccoli, cutting the florets off and then steaming them before using them in this recipe. But for an application like this, I'm totally cool with using frozen broccoli from a bag that you let defrost. Follow your heart)
3 Cups Cheddar Cheese Sauce (The best way to get cheese sauce is to steal it from work, like I did. If you get caught by security, I've mentioned the method behind making it here. And also here)
1.5 TBSP Pickled Jalapeños 
2 tsp Garlic Powder
1/4 tsp Black Pepper
1/4 tsp Chili Powder
Salt
Olive Oil

The first thing you're going to have to do is deal with your spaghetti squash. If you haven't used this ingredient before, don't worry. It's pretty cool, and also pretty easy to work with, which is cool in and of itself. So it's cool squared (Math puns!) but we still have to prep it a little bit. Cut each of your squash in half with a cold and pitiless stare. Then, with grim efficiency, scoop all of their seeds and guts out in to the trash. Rub the dismembered squash corpses down with your garlic powder, black pepper, chili powder, olive oil, and a large human's pinch of salt. Throw that nonsense in a 375 degree oven for about an hour. While you're cooking your squash, it's time to deal with your cheese sauce. Heat it up over medium heat. Roughly chop your jalapeños, and throw them in to the party so that their flavor can really get in there. Taste it and add salt if needed. That seemed like an hour's worth of work, right? If you have time left over, feel free to use it solving international crises, fighting crime, or sitting motionlessly on your couch while staring at a rectangle on your wall. Whatever floats your boat.

Florescent lighting notwithstanding, that's some
Grade-A deliciousness right there.  
Once your squash is cooked and out of the oven, take two forks and get ready to go to gourd town. As the name might have indicated to some of you, spaghetti squash has this weird thing where it breaks up into strands with roughly the same shape as spaghetti noodles. So shred the crap out of it until you have a big pile of vegetable based pasta substitute. Discard the peel (It knows what it did) and throw your squash strands into a bowl along with your broccoli and your sauce. Splorp that all together until it looks relatively uniform and it makes unpleasant squishing noises. Spread your cheesy gourd goop evenly into a baking dish and throw it a 400 degree oven for about 1/2 an hour. Your telltale signs that it's done are the cheese bubbling and turning a darker color, the edges getting crispy and browned, and it smelling up your entire apartment with deliciousness at 2 in the morning. Then pull it out of the oven, try to resist immediately digging in to the burning hot cheesy goodness, fail, treat your burns in order of severity, and repeat!

May 22, 2018

Eggplant Parmesan

This is an unrelated picture of an
awesome cave I visited last week. Enjoy.
There's a strange pleasure in taking something that's inherently healthy and making it, at the same time, both delicious and decidedly unhealthy. And sure, eggplants aren't that healthy, modern health fads aside. They've got a fair number of nutrients and whatnot in them, but not in any significant amounts. Also, left to their own devices they have the texture and flavor of styrofoam, which isn't commonly associated with either health or deliciousness. But eggplant parmesan is tasty and unhealthy enough to totally bridge those gaps.

Ingredients:

2 Standard Issue Eggplants
4 Standard Issue Eggs
1 lb shredded Mozzarella Cheese
1.5 cups Grated Parmesan Cheese
3 Cups Seasoned Breadcrumbs
2 Cups Flour
2 tsp Smoked Paprika
1 tsp Salt
1/4 tsp Black Pepper
Tomato Sauce (you can use whatever good reasonably hearty tomato sauce you like. I happen to have a pretty awesome recipe right here, but then again I'm more prepared than you.)

The first thing you're gonna need to do is deal with the fact that eggplants are super weird. I actually wasn't kidding before about them pretty much being made up of styrofoam. When you cut it, it's going to squeak like you're cutting through the industrial-strength packing supplies that are still holding your new TV hostage inside of its box. Don't get discouraged by how obviously unappetizing your eggplant is. That's to be expected. That's what we're here to fix. So chop the ends off of your eggplant, and then slice it lengthwise. Exact size doesn't matter, but shoot for each slice to be between 1/8 and 1/4 of an inch thick. Now it's time to get prepped. Find or steal 3 large bowls. Take one and fill it up with your flour, salt, pepper, and paprika, and mix them all together. Take another and fill it with your eggs, which you've taken the time to beat lightly in to submission. Fill your third bowl up with your breadcrumbs, and get ready to get gunk on your hands. Working on small batches, toss your eggplant slices in your flour mix, then in to your eggs, and finally in your breadcrumbs, before laying your finished slices on a baking sheet lined with parchment paper. Throw those suckers in to a 350 degree oven for about 20 minutes, or until the eggplant gets tender and the breadcrumbs turn golden and look delicious.

Now with zero recognizable eggplant bits!
Now it's time to build something great.  Line a baking dish with a layer of your eggplant slices. (You may have noticed that this recipe requires a lot of extras. Bowls, baking sheets, baking dishes, etc. You may accuse me of having betrayed my principles and having made recipes for the borgeouise. Aside from the fact that you can buy versions of everything required for like $2, I'm a fairly certain that I never claimed to have any principles, so shut it) Slather your layer of eggplant with tomato sauce, and sprinkle on some mozzarella. Repeat until you're out of eggplant. Take your parmesan and gently pour it all over the top of that mess, like a caring mother bird, tenderly pouring parmesan cheese on its young. Unlike all but the most callous of mother birds, however, now you're gonna throw that in to a 375 degree oven for about 35 more minutes, or until the top gets bubbly and brown and you pretty much can't stand the thought of waiting any longer to eat it. Wait to eat it until it cools down. Unless you're a fan of mouth, hand, and face burns. Either way, it's no skin off my nose (because I waited until my food cooled down to eat it). Now guzzle it down and lie to yourself about how healthy you're being by eating eggplant. Enjoy!

April 25, 2018

Baked Camembert

There are some foods that you know you're supposed to have eaten at some point in order to get your coveted adult card, which allows you all of the wonderful privileges of adulthood like home ownership, paying taxes, and existential dread. Weird cheese is definitely up there on that list. But what constitutes weird cheese? There are tons of cheese varieties from all over the world. And everything's weird to somebody, right? Wrong. If there's a situation that doesn't involve despair in which you'd put it in a sandwich, its standard cheese. If anyone might describe the flavor through clenched teeth as complex, earthy, or eau de chaussettes athletiques, it's weird cheese. Which doesn't necessarily mean bad, but definitely means you shouldn't go in expecting it to taste like you think cheese should. Because it won't, and you'll be sad. Which brings us to Camembert.

Ingredients:

1 Camembert (Camembert cheese is typically sold in small wheels, encased in wooden boxes. So get one of those)
2 cloves Garlic
1 TBSP fresh Thyme
1 TBSP fresh Rosemary
1 TBSP Olive Oil

The first thing to remember when baking camembert is to have friends. It's going to end up being a gooey receptacle for crackers, bread, and other culinary detritus, and that's not exactly the sort of food that's socially acceptable to eat alone. So if you don't have friends, make some before you start in on this recipe. I recommend going up to strangers at a bus stop and asking them if they want some funky cheese. Once you've been paroled, invite any new friends you made in lockup over and start getting your cheese ready. Take your cheese out of the paper that it's wrapped in, and cut a 3x3 grid in to the top of it, about a 1/4 of an inch deep. Scoring the rind of the cheese like this will help keep it from drying out, and will help the herbs and garlic soak in to the cheese, so don't skip it just because it sounds more like instructions for building ikea furniture than for cooking. Choppity chop up your garlic, thyme, and rosemary in to tiny little pieces, pretty much as fine as you can, and mix them in with your oil.
Protip: Don't bake the knife

Now we've come to the tricky question, which is what to cook this nonsense in. Traditionally you bake camembert in the box it came in, which is totally fine if it came in a wooden box. But sometimes it comes in a cardboard box, so what then? If you put it on a baking sheet it'll just spread out and make a giant mess. So your options are pretty much lucking out in having a ramekin or small dish the exact right size and using that, or taking aluminum foil and crafting a ring of power in the middle of a baking pan, and shoving your camembert into that. In any event, once your cheese is in your chosen baking vessel, slather your garlic and herb oil all up ons. Do your best to get it down into the cracks and crevices. Then toss that sucker in to a 350 degree oven for 15-20 minutes, take it out, find something to dip in to the weird funky goodness, grab some hard cider, and enjoy! I'm sure your friends from prison will appreciate the complex bouquet of a fine weird cheese.

October 4, 2017

Beer Cheese

Beer. Is there anything it can't do?
The midwest and Germany have a lot in common. A love of food and alcohol, a healthy appreciation for tradition, and a tendency to reschedule those traditions out of concern for the weather, which is constantly threatening to kill us all. And it's no surprise that when you've got a bunch of people who love food and alcohol together, they're gonna start blurring the lines between those two things. Because after you've been drinking for long enough, just about any food idea will start to sound reasonable as long as you can make it in less time than it takes to get a pizza delivered. Occasionally, like with beer cheese, it works out. Occasionally it doesn't, but you never admit that a drunken food idea was bad. You just stubbornly tell all of your friends about how great it was, and how they need to try it. This is why the French started eating snails.

Ingredients:

1 Bottle Of Beer (Some people get very specific about what kind of beer has to be used for this. Those people are fools. Use a beer you like, preferably one with a good amount of flavor, but beware that the flavor will intensify somewhat as it's cooked)
8 oz. Cheddar Cheese
2.5 TBSP Butter
2.5 TBSP Flour
1.5 tsp Dried Oregano
1.5 tsp Garlic Powder
1 tsp Worcestershire Sauce
1/2 tsp Hot Sauce
1/2 tsp Mustard (Any mustard will do in a pinch, but I prefer something with a little bit more texture and flavor like a stone ground mustard)
A standard human's pinch of Salt

So, Beer Cheese as a dip was developed in Kentucky. And since Kentucky has pretty much only ever had one thing to brag about (bourbon), they'll tell this to anybody who'll listen. I'm pretty sure that Beer Cheese is the state bird of Kentucky. But combining beer and cheese is by no means unique to them, and was even a thing in medieval Europe. In the USA soups and dips combining the beer and cheese are commonplace throughout the midwest, most notably in Wisconsin where it's technically illegal to eat a meal that doesn't have cheese in it. Now that you know that Kentucky has no reason to feel a sense of accomplishment, it's time to melt your butter over medium heat and stir in your flour to make a roux. As I've mentioned once or twice before, a roux is commonly used to thicken sauces. So once that's good and done, whisk in your beer slowly. You're gonna be beating this thing a lot more than you think you should have to. You're going to stop, thinking that the sacrifice of your arm and shoulder was surely enough to ensure a smooth sauce. Then you'll see a lump and realize that you're not done. You're never done.

Bonus points if, like me, you get off-brand pretzels that look
like a doughier version of The Scream, by Edvard Munch
Once you're done weeping in the corner and your sauce is smooth, stir in the rest of the ingredients. When you're stirring in the cheese, melt it in in batches so that you end up with a beer-and-cheese sauce and not a beer sauce with a giant lump of somewhat melted cheese at the bottom of it. Let it cook on low, stirring regularly, for about 10 minutes so that all of the flavors can get drunk off of the alcohol, relax, and start getting to know each other. And that's it! It's a little spicy, a little sour, a lot cheesy, and full of some awesome flavor. Now all you have to do it grab some soft pretzels, hard vegetables, or...medium pasta? The point is, if you've got a foodstuff, there's a better-than-average chance that this stuff will taste incredible along with it. Plus, you can totally lie to children and tell them they can't have it because there's beer in it. More for you.

August 4, 2017

No-Bake Mint Cheesecake

Mint leaves: making nature kind of worth the hassle
For a long time, I considered no-bake cheesecakes to be in the same classification of hipster-nonsense as waxed moustaches, drinking gin out of mason jars, and judging others for not living a "sustainable" lifestyle while you yourself are living off of a trust-fund. Not much has changed. All right, maybe it's changed a little bit. It takes forever to set up in the fridge. That's a lot of free time. Which can totally be used by unemployed hipsters practicing their ukelele solos for the open mic next week, but can also be used by people who have actual jobs, and not that much free time. Given the right preparation, this can totally be the dessert version of a crockpot dinner. Just get it going in the morning, and enjoy it when you get home at night. I, for one, am totally in favor of taking the hipster nonsense and using it against them like that. Now I just need to find a productive use for kale.

Ingredients:

16 oz. Cream Cheese, softened (You "soften" cream cheese by letting it get to room temperature. You do this so that your cheesecake doesn't have gross lumps running through it, causing your friends and family to rightly shun you at all social gatherings)
14 oz. can Sweetened Condensed Milk
2 pouches Graham Crackers 
1 cup Mint Leaves
1 cup Sour Cream
1/2 cup Unpacked Light Brown Sugar (Typically, brown sugar is measured in one of two ways. "Packed," meaning you measured it out and then smashed it down to take up less space for no discernible reason, and "unpacked," meaning you decided that just measuring it out once like a normal person was all you had time for today)
1.3333333333 sticks Butter
The juice from 1/2 a lemon
Free time

The first thing you're gonna need to do is get rid of that uneasy feeling you have in the back of your brain about making a no-bake cheesecake. I get it. Theres something vaguely unsettling about a cooked food that you don't actually...well, cook. But fear does not exist in this dojo, so get over it. Now that your existential worries have been quenched under a torrent of repression and cautious optimism, take out those uncomfortable feelings on your graham crackers by crushing them in to tiny bits as a warning to the other ingredients. Mix in your brown sugar, and then get to melting your butter. Add your melted butter in with your sugar and the crushed bodies of your graham crackers, and stir it all together. Take about 2/3 of your mixture and dump it into a springform pan (A springform pan is essentially a pan with a clasp that you can release to loosen the sides and take it off. If you don't have one, you can use a pie tin and things will still be mostly ok. But your parents may not love you anymore. I don't make the rules, I just dispassionately inform you about them). Pack down your graham cracker sugar sand into a firm layer along the bottom, and throw that sucker in the fridge while you work on your cheesecake guts.

Bonus points for failing to slice all the way through the crust,
making it impossible to the see the bottom crust deliciousness
So this next part is gonna be complicated. You ready? Ok. Take the rest of your ingredients and...mix them together. Sure, you've gotta choppity chop your mint first, and if you want to make your life easier you'll start this whole mess by mixing the sweetened condensed milk slowly into the cream cheese before adding everything else in. But that's really it. Just mix it all together. Then take your crust out of the fridge, slap that mess on top of it, and top it off with the rest of your graham cracker mix. Then throw that sucker in the fridge for...a long time. I mean a long time. At a conservative estimate, I'd say 2 presidential administrations. You will check on it multiple times, and each time be shocked that it's not ready yet. I just warned you about it, but you will still do this. Eventually it'll set up, and it'll be solid enough to cut pieces of and eat pretty much like a real cheesecake. And it kind of is a real cheesecake. Or, at the very least, an extremely thick milkshake. Enjoy!


April 14, 2017

Matzah Pizza

Here we have Matzah, in its natural habitat. Notice how the
ridges camouflage it, helping the matzah to better elude flavor.
For the...less semitic of my readers, saddle up because this is gonna, without a doubt, be the most jewish-y post I've ever posted. Because, as you may-or-may-not be aware, we're currently deep within the bowels of the Jewish holiday known as "Passover." And, as you may-or-may-not-but-I'm-betting-on-not be aware, one of the key elements of this holiday is eschewing a vast array of foods, including leavened breads. Another is drinking large amounts of wine, which is pretty much the only way to get through a week without leavened bread. What does this all mean, practically? Well, for starters, it means that you should be nice to your Jewish co-workers this week, because they're cranky. It also means that for the more observant Jewish people out there, there's pretty much nothing to eat, so you have to make due with weird facsimiles of real food. Which brings us to Matzah Pizza.

Ingredients:

2 standard-issue Matzahs (A Matzah is an unleavened wheat cracker. Essentially, it's big cracker that has slightly less flavor and nutritional value than the box it comes in. Any supermarket with a kosher section likely has them.)
4 TBSP Marinara Sauce
4 oz. Cheese (What kind of cheese? That's a whole pit of nonsense and terror we'll get into later. But the short answer is, Mozzarella if you can get it)
1/4 tsp Red Pepper Flakes
1/4 tsp Dried Oregano
1/4 tsp Garlic Powder
1 average-sized human's pinch of Salt

The first thing you're gonna need to do is abandon all hope of this thing you're making looking or tasting like pizza. Unless you live in California, in which case this will probably be the most authentic and delicious pizza you've ever had in your life. Take one of your matzahs and slather it up with half of your marinara. Fun fact: because of all of the dietary restrictions involved in Passover, many people won't eat any processed foods that haven't come from a factory specifically monitored to make sure that it's Passover compliant. Another fun fact is that pretty much all of the companies that make food specifically for Passover have absolutely no idea what they're doing when it comes to the making food part. Which is why you'll see a bottle that says something like "Spicy Tomato and Basil Marinara" and take it home, only to realize that it's essentially plain tomato juice with sugar added in for some reason. Anyway, back to our Matzah, which we just spread "marinara" on top of. Take half of your red pepper, oregano, and garlic, and add them on top of the marinara to help make up for its many flaws.

"Pizza cheese." Because who doesn't put a weird combination
of cheddar and mozzarella cheeses on their pizza?
Now we're up to cheese. Which often suffers from the same Passover-related maladies as things like marinara. If you're lucky, you'll be able to find actual cheese, with standard names like "mozzarella," "cheddar," or "whiz." But, often times you'll have to suffer through weird pseudo-cheese blends like "fancy shreds" or "pizza cheese." I prefer "pizza cheese" over the various shreds, because they're at least confident enough that they won't be sued for putting cheese in the name. Add 1 oz. of it on to your marinara. Next, add your second matzah on top of the cheese, and start repeating this process. Because matzah is horrible stuff, and if you want it to have enough sauce to be flavorful, it'll lose all structural integrity, so we need layers. Or pacts with your friendly neighborhood deity. Or both. Anyhow, slather up your second matzah with the rest of your garlic, oregano, and red pepper, along with your salt for good measure. Add on the rest of your cheese, and toss that sucker in a 350 degree oven for 10 minutes. And that's it! Aren't you glad you got sucked into the terrifying world of Jewish cookery during Passover? Me neither


January 11, 2017

Tired Returns

Oh, and waterfalls. There were also waterfalls.
So it's 2017! That apparently happened. And with it came the grim realization that I lied to all of you. I said that I was going to keep updating this blog while I was on vacation. I even implied that I might update it more than usual with random trip nonsense. This was not the case. And sure, I didn't intend to lie to you all. I had no way of knowing that the old unsupported blogger app would finally crap out and keep me from updating from my phone. But that doesn't really matter. What actually counts is that I went to Scotland and played around with frickin' Owls. Seriously...even if all the technology worked all of the time, I would not have been focused on updating whilst on this vacation. I was focused on owls. And castles. And whiskey. And....I dunno...natural splendor? But I'm back! And it turns out that when you get back from a day of about 14 hours of plane travel, you're hungry. And because you've been gone for two weeks, you pretty much only what's in your freezer to work with. Fortunately, my freezer was well stocked....with cheese. And not much else. But cheese, plus tomato/herb crusted mini-pitas that I bought from a supermarket, equals delicious mini pita pizzas! Which will totally soothe your soul after a long day of travel, and distract you for about 45 seconds from the fact that owls and castles are behind you, and you have only your whiskey to remember them by. And the pictures. Mostly the whiskey.

Ingredients:

Mini Tomato/Herb Pitas (Yes, this is kind of weirdly specific. But it's what they had at the grocery store. Get regular mini-pita for all I care and smear some tomato sauce on it. Actually, that sounds better. Do that instead.)
Cheese
Vegetable Oil
Nothing like melted cheese to help you forget the horror
 that is WOW airlines. 

That's right. 2 ingredients. Because one thing you don't want to do when you've been on a plane for 16 hours that day is have to mess around prepping different ingredients, hungry and tired and just wishing you were either back in Scotland or dead, whichever you can get to faster. So simplicity is key here. Take your oil and coat the bottom of a cast iron skillet. Throw down your pitas until you get a solid layer (Yes, you've just come off of 20 hours of plane rides, so you're probably not going to have the energy to literally "throw" anything anywhere. Maybe "listlessly prod.") Cover the top with cheese. How much cheese? If you need to ask that question, you may not be deserving of cheese. It's delicious and you're tired. Go nuts. I had about 5.5 ounces on my batch, but that's just because my weary hands gave out from all of the sprinkling. Toss that sucker in a 450 degree oven for about 10 minutes, and then take it out and enjoy! There's nothing like cheesy deliciousness to welcome you back to your dreary life after crazy travel and adventure.


September 27, 2016

Pasta Salad

Pre-made dried pasta. Imported from Italy, for Reasons.
The first US presidential debate just happened. It was a stark reminder that we, as a nation, are rapidly approaching that important time when Baseball, Football, and Hockey are all happening at the same time. We're gonna need snacks. And since I've already posted some recipes for a whole bunch of different dips, as well as an awesome potato salad recipe, it's time to delve into the world of pasta salad. And let's be clear: there are a lot of different kinds of pasta salad, but when it comes to randomly eating while watching sports, I go with a basic pasta salad. Some people differentiate this kind of salad by calling it "macaroni salad," but I'm not about to limit myself to one kind of pasta to use. I'm not ready for that kind of a long-term commitment.

Ingredients:

1 lb. Pasta (I prefer a rotini or fusilli, but any smallish pasta shape will do. Follow your heart! By which I mean "use whatever you have lying around.")
8 oz. shredded Cheddar Cheese
1/2 cup Mayonnaise
1 Bell Pepper
1 Red Onion
1 TBSP Sour Cream
1 tsp Apple Cider Vinegar
Salt

One of the things I like about this recipe is how simple it is. You could pretty much make it while you're watching the game. So I guess the first thing you'll need to do is make some friends who like watching sports. After you accomplish that, and then somehow convinced these people to come over to your gross home, it's time to make some pasta. Pretty much every pre-made pasta ever has directions on it, and following those is a good way to go. But if you can't be bothered to because you're busy, lazy, or already threw out the container, boil up some water. Add in a large pinch of salt, and then your pasta. Stir it, and then boil it for about 10 minutes or so. The party line is that you want your pasta to be "al dente," which translates to "to the tooth" and means the pasta is cooked but still firm, offering resistance when chewed. Why this is supposed to be implied by "to the tooth" is one of the great mysteries of culinary history, along with the correct pronunciation of worcestershire, and who really killed Chef Boyardee. Once your pasta is sufficiently toothy, drain it and toss it in a bowl.

could have used a green pepper so it wouldn't be the same
dumb color as the cheese. But orange peppers were on sale. 
If you planned ahead, you used the 10 minutes your pasta was cooking to dice your vegetables and to mix together your dressing. But you were watching 30 seconds of football, interspersed between ads for beer and Cialis, so let's do it not. Dice up your pepper and onion, and throw them in with your pasta. Then mix together your mayo, sour cream, and vinegar, and add it in the bowl as well. Toss the whole thing together until it's well coated. And...that's pretty much it. Like I said, simple. Throw it in the fridge so that all the flavors have a chance to get to know each other, hit it off, get married, have little flavor babies, get divorced, and die alone in Utah. At least an hour. Or, as it's known in the NFL, 10 minutes of gameplay. Enjoy!


June 7, 2016

Broccoli Cheese Casserole

Oh, broccoli, cover up your shame. 
Broccoli is delicious. That's a simple fact. The problem is, that broccoli is also healthy. People go out of their way to tell you this. You'll just be out enjoying some broccoli at a meal, on a stroll in the park, or while taking in a spot of opium, and somebody will come at you running their mouths about antioxidants and vitamins and supplements. It's pretty much a nightmare from which the only escape is cutting off your own arm with a rusty knife. Clearly a solution was needed. So by cleverly adding butter, cream, and cheese, I've turned it into something that the roving bands of health nuts won't start an uncomfortable conversation with you about while you're in line at the bank. Sure, we could give up broccoli and just eat other things. But I vaguely remember saying like a minute ago that it's delicious. And besides, everybody knows that impulse control is for foppish dandies, suckers and communists.

Ingredients

20 oz. Broccoli (Usually I like working with fresh ingredients because they ususally taste better and have better texture, but in an application like this you could probably get away with using the frozen stuff and get pretty good results.)
1 cup Sour Cream
1 Standard-Issue Onion
2 cloves Garlic
1/2 cup Seasoned Breadcrumbs
3 TBSP Butter
8 oz. Cheddar Cheese
3 oz. Parmesan Cheese 
3 Eggs
Salt

If you're using fresh broccoli, you're gonna start slightly differently than if you're using the frozen stuff. If you're using fresh broccoli you're gonna need to cut it up and boil/steam it. (Don't worry, you can totally learn how to do that in this old post of mine! Now you can read even more. Hasn't today just been the best?) If you're using the frozen broccoli, forget to let it defrost before making this recipe, and then hastily defrost it in the microwave while you're (SPOILER ALERT) chopping and sautéing your onion. Next, you're gonna slice up your onion, melt your butter over some medium heat, and sauté that sucker for 5 minutes along with an average-sized human pinch of salt. During this time, chop your garlic into tiny little pieces of its former self. Once the onions are soft and have started to pick up a little color, add in your broccoli and garlic, along with another, smaller pinch of salt. Like the pinch that a child, or a dog that mutated a thumb might have. Cook that nonsense for about 2 minutes, until all your flavors start to meld, and it smells like happiness. Turn the heat off, and let that mess cool down to room temperature.

Here lies broccoli, killed by deliciousness. As we eat his tasty
corpse, let us think of the good times. He'd want it that way.
Now it's time for the fun part, and by "fun" I mean "fattening." Which is usually pretty fun. So it all works out. The point is, take your eggs, breadcrumbs, sour cream, and cheddar cheese, and add them in to your broccoli mix, to form a cheesy broccoli goop. Or "ooze", if you want to be scientific. Spread that gunk out into a pan, and form an even layer. Top it of with your parmesan cheese, and then shove that sucker in a 350 degree oven for 25 minutes. Then turn the heat up to 400 degrees and cook it for another 10 minutes to make sure you burn away all of the healthiness, leaving a bubbly layer of deliciousness. Wait for it to cool slightly before shoving your face in the entire pan and gobbling the goodness down. If you're a fancyboy or a communist (This link just leads right back here, because that was a callback to the first paragraph of THIS post. Enjoy). The rest of you, enjoy your pretty serious burns all up in your face and throat. Totally worth it.


May 17, 2016

Stuffed Mushrooms

10 Smurfs were killed in the making of this recipe

It is in the great American spirit of stuffing things into other things, and then eating all of those things together, that I bring you this recipe for Stuffed Mushrooms. First we conquered some basic concepts like scooping eggs out of other bits of eggs, mixing it with other junk, and mashing it all back together into deliciousness. Then we did almost the exact same thing with potatoes, but we cooked the food more afterwards and it was awesome. Now we're taking mushrooms, filling them up with other mushrooms plus a whole bunch of other awesomeness, and cooking it all together. That's right, it's mushroom-ception. It's pretty much the mushroom equivalent of a turducken, or some equivalent yuppie nonsense. Why stuff vegetarian things like mushrooms, instead of stuffing delicious animals into some unholy Russian nesting doll of meat? Well, aside from the fact that no words in the English language sound more disturbing than "Russian nesting doll of meat," I ran out of turkeys.

Ingredients:

4 Portobello Mushroom Caps 
8 oz. Crimini Mushrooms 
1 Onion
1 Fennel Bulb (Note for the unamerican: in foreign lands, Fennel is sometimes referred to as "anise." This also sometimes happens domestically, but we try not to talk about it. You've been advised)
1 Green Pepper
1 Clove of Garlic
6 oz. Cream Cheese
3 oz. Parmesan Cheese
2 TBSP Butter
2 pinches o' Salt
1 pinch o' Black Pepper

Sure, that's a lot of ingredients, but try not to let it freak you out. First of all, because this really isn't all that many ingredients, and secondly because this recipe is ridiculously easy. Take your crimini mushrooms, onion, fennel, green pepper, and garlic, and choppity chop-chop them down into vaguely recognizable bits of their former glory. That's step one: The choppification. Then melt half your butter over medium heat, toss in your onions, fennel, and criminis, and sauté all of that nonsense along with your Black Pepper, and 1 pinch of Salt. After about 5 minutes add in your green pepper, garlic, and the rest of your salt, and cook it for another 3 minutes or so. Turn off the heat, and stir in your cream cheese to form a delicious creamy ooze of vegetables that's somehow enticing and repulsive at the same time.

Yeah, these are awesome. They're also mine. Make your own. 
Melt the rest of your butter, and rub down your portobellos with it until they're good and lubed. Now it's time to for the fun part, and by "fun," I mean "violating the laws of nature and common decency." Turn your portobellos upside down, take your vegetable sludge -consisting largely of mushrooms- and squidge it all up inside the hollow of the portobello caps (That's the bit that would be the attic of a Smurf's house) until they're full and you feel...just kind of wrong. Grate your parmesan cheese all up on top of those mushrooms, and throw them in a 400 degree oven for about 1/2 an hour, or until they get golden brown and smell awesome enough to almost make you forget about what you just did to poor unsuspecting mushrooms. Take them out of the oven and immediately eat them to assuage your guilty conscience. And also because they're awesome. And also, now your mouth is burned. Maybe your throat too. Totally worth it.

April 5, 2016

Chicago Pizza

Chicago: City of broad shoulders and thick pizzas
Let's get one thing clear. This post isn't about bashing New York pizza as inferior. That said, this will be the best pizza you've ever had. Also, New York pizza is terrible. Well, at least it is now. Because when I say "New York pizza," I'm not talking about what New York pizza used to be, which most of us would just call regular pizza. I'm talking about the nonsense that's popped up more recently where New Yorkers, feeling threatened by the thick slab of awesome that is Chicago Pizza, started taking pride in getting their crust as thin as humanly possible, to the point where you're pretty much just eating a cheesy cracker. The point is, there is absolutely nothing wrong with regular pizza. But there's something incredible about Chicago style pizza, which is full of flavor and weighs more than you do. And also, modern New York cracker pizza is an abomination to the pizza lord. Their time will come.

Ingredients;

3 cups Flour
1 cup warm Water (if you can't find warm water at your local supermarket, but some regular water and throw fire at it)
32 oz. Tomato Sauce
10 oz. Mozzarella
10 oz. Spicy Sausage (If, like me, you fall into the religious Jew category of life, or if you fall into the vegetarian category, use vegetarian sausage. If, like me, you've discovered that vegetarian sausage sucks, make your own using fake ground meat, spices, butter, flour, tomato sauce, and fire.)
1/4 cup Vegetable Oil
1/4 cup Olive Oil 
1/4 cup softened Butter
1/4 cup Corn Meal (Chicago Pizza is very 1/4 cup-centric. This dates back decades to the Bears inability to get a decent quarterback. It's a sad story, but it makes for good pizza. I'm gonna call it worth it)
2 tsp Salt
1 packet of Instant Yeast
More Olive Oil!
A cast iron skillet!

The first thing you're gonna need to do is channel your inner Chicagoan. For me, that's not a problem, since my inner Chicagoan happens to also be my outer Chicagoan. So much so that I hunted down a Packers bar out here in LA, and watched a Bears/Packers game there dressed in an array of Bears gear. For the rest of you, just fake it and commit hard. Once you've got that down, mix your Yeast and your Water, and let them sit for a couple minutes to get to know each other. If necessary, play some smooth jazz. Then mix in your Vegetable and Olive oils and whisk until it all looks homogenous. Add in your Corn Meal and your Flour, and get ready for some fun. In case you were wondering, by "fun" I meant "kneading. All of the kneading. All that there could be." Some swanky recipes will tell you to use a "stand mixer," with a "bread hook," to make this part easier on your hands. But since I happen to be a man, and not some sort of nonsensical hipster boychild, we're doing this by hand. Also, I don't own any of those things. Mix your dough until it starts to form a goopy ball of dough in the middle of your bowl (By the way, you should have been mixing these things in a bowl, not just throwing them down on an increasingly messy table) then start to knead the crap out of it. Take the heel of your hand, and press it into your dough mound. Then stretch it over itself. After about 2 minutes, add in your Butter, and then continue until your arm hurts, and you wish you'd never read this blog in the first place. About 5 minutes, all things considered.

I warned you. The best pizza you've ever had. Chicago
pizza: anything less would be uncivilized.
Take your dough ball, and put it in bowl you rubbed down with Olive Oil. Let it sit there for about 40 minutes to rise. Once it rises, punch it down to teach it a valuable life-lesson. Then let it rise again just to give it hope for a better tomorrow. Now it's time to assemble this pizza. Rub some Olive Oil on your cast iron skillet, and plop your dough ball down in the middle. Gently press it down and out towards the edge of the pan, and eventually up the sides of it, forming a thin layer. It will try to spring back down into the pan like a jerk. Keep pulling it back up the sides of the pan. Be persistent, and break its will. Then spread out your sausage in a layer along the bottom. Top it with a layer of your Mozzarella, and finally a layer of Tomato Sauce. Take that whole pan full of awesome and throw it into a 425 degree oven for 40-60 minutes, until the crust gets golden and awesome looking. Once it's ready, try your best to let it cool slightly before digging in. Fail at this, and give yourself consolation points for not just shoving yourself face-first into the pizza, disfiguring burns be-damned. Fail at this too. Enjoy!


January 26, 2016

French Onion Soup Sandwich

No before shot this week folks. Just jumped right
in there and got cooking. Also, I forgot.
Every so often, and idea hits your brain like lightning hitting a hairless cat. It's sudden, there's a lot of commotion (but still not as much as you'd expect), and you largely stop paying attention to what anybody else is saying at the dinner party. That's what happened to me Friday night when somebody mentioned in passing the concept of a French Onion Soup Sandwich. And, much like the hypothetical cat, I was struck. I started planning it out in my head, and before long I had formulated a plan, and I got to work on making some awesome and delicious food. That I didn't share with anybody because whatever cold or flu or bubonic plague I've got is clinging to me like its life depends on it. Which I guess it does, but that doesn't make it any less annoying. The point is, I'm not spreading it to the populace at large, so nobody else gets to try my delicious food. Leftovers are the only perk of being sick. Well, that and having an excuse to take a long shower in the California drought. #BankingOnElNinoGettingItsCrapTogether

Ingredients:

6 Standard Issue Onions
4 Cups Of Vegetable Stock
2 Cups of Water
1 Clove Of Garlic
2 Slices Of Sourdough Bread
2 TBSP Olive Oil
1 TBSP Butter
2 oz. Fontina Cheese
1 average human sized pinch of Black Pepper
An unspecified amount of Salt

The first thing you're gonna need to do is chop the crap out of all of your onions using any technique you'd like. You don't need to go crazy and get tiny bits, because you want larger slices and/or chunks. Heat up your Oil, and half of your Butter in pan over medium heat, add in your Onions and one large human sized pinch of Salt (like the type of Salt pinch you'd expect from a Basketball player, or Neil Flynn) and sauté the crap out of those onions for approximately 3 lifetimes. You want them soft, brown, and delicious. Then mince your Garlic, add it in, and sauté for another minute. Add in your Water, Vegetable Stock, Black Pepper, and another pinch of Salt, bring the whole mess to a boil, and then simmer it for 30 minutes.

Yeah, you won't find that sucker...anywhere probably. Which
is a shame, because it's cuh-razy awesome.
Take the rest of your Butter, and melt it in a pan over medium-high heat. Cook your Sourdough Bread for about a minute, until it's brown and crispy, then flip it. Add your Cheese to one slice, and some onions you fished out of the soup to the other slice. Cook it until the cheese starts to get a little melty. Be careful not to burn the bottom of the bread. Combing the two pieces of bread into one awesome sandwich and keep it on the heat, flipping as necessary, until the cheese melts it into one cohesive unit of sandwich-ness. Then dip that sucker in your soup, and eat the crap out of it. Repeat as necessary until you run out of soup. Or sandwiches. Or sick days.


November 3, 2015

Nachos

Artist's rendition: Me getting terrible restaurant nachos
Nachos are a sore spot for me. Because they're so so very awesome. But nobody ever makes them right, and it pisses me off. I don't know. I grew up with relatively easy access to awesome nachos, and while I know that not everybody shared that experience, they should at least be familiar enough with the concept to not microwave cheese on top of a bag of chips and try to sell it to me for $8.95. This has been more angry ranting and less fun banter with the voices in my head than usual, so let's all watch this to even out again. We all good? Cool. Back to nachos. The point of nachos, at least to me, is to be able to get a little bit of everything in each tiny bite. Not to have a giant disk of chips held together with congealed cheese that you have to rip apart, getting beans everywhere and grossing out everybody at your niece's Bat Mitzva, or Quinceanera, or whatever. The point is, your clothes are stained, your family is ashamed of you, your date left an hour ago, and it's the fault of sub-par nachos.

Ingredients:

2 15 oz cans of Pinto Beans
1 Standard Issue Onion
2 Cloves of Garlic
8 oz Cheddar Cheese
3 Jalapeños 
3 Cups Milk
1/3 Cup Vegetable Stock
3 TBSP Butter
3 TBSP Sour Cream
3 TBSP Flour (You need 3 of a lot of things in this recipe. Try not to let it worry you. It's in no way a hint to some sort of greater conspiracy affecting your life. Almost definitely)
1 TBSP Chili Powder
1 TBSP Olive Oil
2 tsp Ground Cumin
1/4 tsp Cayenne Pepper
An unspecified amount of salt
Tortilla Chips. All the Tortilla Chips (You can use your favorite store bought chips if you like. Or, if you have the will of the warrior, slice up some corn tortillas, fry them in oil, and then toss a little salt on them. Because it's super easy, crazy awesome, and your therapist said you need to try new things)

The first thing you're gonna need to do is make some refried beans. Because Nachos without beans, while technically pretty authentic, are just little edible plates of sadness. So chop up your onion, and throw it in a pan with your Olive Oil and an ASHP (average sized human's pinch) of Salt over medium heat. Saute` the onion for about 5 minutes, until it starts to get soft and golden. Add in your Garlic, Cumin, Chili Powder, and Cayenne, and Saute` another minute. Add in your Pinto Beans along with one more ASHP of Salt, and let it cook for another couple minutes before adding in your Vegetable Stock. Bring the whole mess to a boil, and let it go for another 5 minutes. Now it's time to get an authentic rustic texture, by taking the back of a spoon, and individually crushing your pinto beans for approximately 3 lifetimes (Bonus points if you use this as an opportunity to express some of the anger you've felt over the years at disappointing nachos, which led to a disappointing life). You want a thick and creamy consistency, but you still want whole beans floating around in there, letting people know what it is they're eating, and generally taunting you about the amount of time you've spend smashing beans compared to the amount of unsmashed beans looking up at you with their stupid bean faces.

Next you're gonna make a cheese sauce. Because of course the cheese should be in sauce form. Any other thought you might have had is blasphemy. Do you want to go to Nacho hell? No? Then stop asking questions about the cheese sauce. It's pretty simple. Essentially, you're gonna take the Flour, Butter, and Milk, and another AHSP of salt to make a thick Bechamel sauce. Too lazy to read that link, but somehow not too lazy to read this? Here's a brief overview: melt the butter in a pot, whisk in the flour slowly, and let it cook for a minute. Then add in the Milk slowly, whisking like crazy until your arm wants to fall off, but can't because of your dumb skin. Got it? Good. Chop up 2 of your Jalapeños, and throw them in the sauce. Then melt in your cheese, in a couple batches so that it actually incorporates and doesn't just end up in a cheesy mess on the bottom of your pot. Keep it cooking over low heat until it threatens to boil but isn't actually boiling yet, and then turn off the heat. Jalapeño Cheese Sauce!

Normally I say something like "they taste even better than
they look. Which is clearly impossible here. I'm gonna
go with "as good." They taste as good as they look. 
Now it's time for the assembly. It's important (To me. And now, because I'm forcing you, to you!) to be able to get a little bit of everything with each bite. So lay down a thick layer of Tortilla Chips on whatever you're gonna be eating these things off of/out of. Then drizzle a layer of your Jalapeño Cheese Sauce (!) over it, followed by a loose layer of your beans. Then add on another layer of chips, followed by another layer of beans, and another layer of cheese sauce. Why does the order of the beans and sauce reverse here? Because it's better that way. What's with all the questions? Do you want to go to Nacho purgatory? Then don't question the order of operations. Throw your Sour Cream down in the middle of your pile of awesomeness, chop up your final Jalapeño, and sprinkle it over everything. And that's all there is to some incredible nachos. And the best part is, you can make enough to share with your friends for the price of an individual portion from a restaurant. Just kidding! The best part is that they're awesome. Eat them all yourself until you get sick.


September 13, 2015

Fresh Ricotta

Ricotta: For when you're torturing lemons, and you get hungry
It's the Jewish High Holiday season! Which is why I'm posting this today as opposed my normal Tuesday. In classic Jewish tradition, on Tuesday I'll either be lamenting all of my sins from this past year, or I'll be in an epic food coma. It's pretty much impossible to tell which. And since it's a traditional Jewish Holiday season full of traditional Jewish this and that, we're making something awesome that has absolutely nothing to do with any of that! I've been meaning to get more into the cheese making, and Ricotta is a great place to start. Because it's simple, awesome, only mildly disgusting, and let's us severely question the mental capacity of nursery rhyme characters. You'll see.

Ingredients:

1/2 Gallon of Whole Milk
1.5 Cups Heavy Cream
3 Lemons
1/2 tsp Salt
Cheesecloth. Or, if all of the stores open when you decide to make cheese at 2 AM on a Sunday morning don't sell cheesecloth because fate is capricious and unfair, good quality Coffee Filters.

Some of you might be thinking, "That's a small list of ingredients. This is gonna be easy!" Some of you may be thinking "That's a suspiciously small list of ingredients. This is gonna suuuuuuck." Good news! You're both kind of right! The first thing you're gonna need to do is heat up your Milk and Cream, over medium-low heat. You don't want the Cream and Milk to boil, burn, or scald, so ideally use a heavy-bottomed pan, and stir it relatively regularly. Lots of nonsense recipes will tell you to use frying/candy thermometers to make sure your mixture hits a certain temperature range, and you're welcome to do that if you like wasting your time and effort. Or, you could just make sure that it's warm, but not HOT. Can you handle that? Really? Alright, fine, use your damn thermometer.

Add in the juice from your lemons a little bit at a time while stirring. I add it in by the half-lemon, but if you're one of those "squeeze all of your lemons ahead of time" kinds of people, who probably has a shelf in your cupboard for shelf-liners, add in your lemon juice a Tablespoon at a time. And know that we probably can't be friends. The acid from the Lemons is going to start to curdle the Milk and Cream, separating it into thick, white, floaty curds, and murky, thin, whey (Nobody in their right mind...nobody, would consider this to be a reasonable snack food. Little Miss Muffet was probably on lots and lots of drugs. Which is a different recipe) . It will be very obvious when this separation happens. It looks gross. It's like if milk sneezed and didn't have a tissue. Turn the heat off, and let it sit for about 20 minutes to more fully separate.

Not pictured: 20 minutes spent deciding between
Pita Chips and tortilla chips.
Now comes the fun part, and by "fun" I mean.....squishy, I guess. Take a fine  strainer, or a slotted spoon, and remove your floaty gross curds from your somehow-grosser whey. Throw the curds in a bowl and stir in the Salt. Then stuff them into Cheesecloth, and figure out some way to dangle it over something. The two most preferred methods are just sticking the cheesecloth back in the strainer and putting it in the sink, or using the complicated tie-it-to-a-spoon-and-dangle-it-in-a-pot method. Which isn't actually that hard, but doesn't really have any added value over the infinitely simpler strainer method. Of course, this all assumes you have basic things like cheesecloth and strainers. If life likes to mess with you as much as it does with me, it's time to punch causality in the throat and stuff your Curds in your coffee filters, then stab your coffee filters with chopsticks and dangle them inside of drinking glasses. Let it sit and drain for about 2 hours, and you've got creamy, delicious, Ricotta! Which you can use in about 1000 different recipes. Or you can just dunk pita chips you bought from Walgreens into it and eat  it straight. Which I'm pretty sure is an Italian tradition dating back to the bronze age, when all they had were primitive proto-Walgreens. Enjoy!

July 28, 2015

Broccoli Cheese Soup

Lesson of the Week: Grocery stores apparently don't like it
when you randomly take pictures of their produce.
Let's face it. Cheese is awesome. If we could, we'd all be sitting around eating whole blocks of it. But for some reason "society"says we can't do that and still be elected to government office. Thanks Obama. So the question becomes, how do we get all of that cheesy goodness in us without the social stigma of eating cheese off of our gross bellies like some sort of cheese beaver. The answer is Broccoli Cheese Soup. It's got all of the cheesy creamy awesomeness, and the broccoli gives it the street cred. People hear broccoli and they think "that's probably being eaten by an upstanding member of the community who's never coined a phrase as ridiculous as 'cheese beavers.'"

Ingredients:

3 heads of Fresh Broccoli
5 cups Whole Milk
8 oz Cheddar Cheese
4 oz Pepper Jack Cheese
1 stick Butter
1/3 cup Flour
1 large Onion
2 tsp Salt
1 tsp Black Pepper
1/4 tsp dried Thyme
An average human sized pinch of Nutmeg

The first thing you're gonna need to do is diet. And maybe buy a gym membership that you'll use twice ever. Because this soup is legit. And with legit-ness, comes the calories. And unless you preemptively drop some weight, the calories will bring the shame. Once you've got that taken care of, it's time to cut your Broccoli down to size. It seems intimidating, like a little magical shrub of doom; but it's not so bad. Turn the broccoli upside down, and cut off the florettes at roughly a 45 degree angle (Protip: for best results, wash the damn broccoli first). For a video shot on the world's shakiest camera explaining this process in an unnecessarily complicated way, check this out. Regardless, cut the last inch off of the stalk, and thinly slice the rest if it.

Now it's time for the familiar parts, that we've hopefully done before. Chop an onion. Don't get fancy. The soup won't care if you chop the onion more beautifully than me. The soup will mock you for your wasted time and effort on what's going to be a blended soup. And so will I. Melt your butter over medium heat, and sauté your onion in it for about 5 minutes. Then whisk in your flour, essentially making an onion roux, which isn't too dissimilar from the roux we made for our bechamel sauce which we used in our Mac and Cheese (Hooray for self-promotion! And...a long list of recipes to reference from having done this blog for close to a year). Fully incorporate your flour, and let it cook down for a minute or so before slowly adding in your milk, whisking like a crazy VA vet chef who can only find solace in whisking. And...maybe a couple other things. Add in your Salt, Pepper, Thyme, and Nutmeg, and heat it over medium heat, being careful not to bring it to a boil. Add in the cheese in small batches. Stir it and make sure it fully incorporates before you add in the next batch.
The creaminess is matched only by the deliciousness. And
the...broccoliness?

Now it's time to toss your chopped broccoli into the mix. Make sure it's completely submerged, cover the pot, and turn it down to low. Not "low, but I still kind of want this to boil" low, but "all the damn way down" low. Cook your broccoli all up in there for about an hour, until it's tender. Then grab your handy Electric Whirry Stick of Violent Cookery (or EWSVIC), and blend the crap out of it until you reach your desired consistency. I personally like a smooth and creamy soup, but if you like it a little chunkier, so be it. As long as we're consuming way too much cheese, preferably all in one sitting, I'm happy.