Showing posts with label Snack Food. Show all posts

September 6, 2018

Mozzarella Sticks

The best way I've found to get giant unmarked slabs of cheese
is to steal 'em from work. So go shanghai yourself some dairy
Cheese. To some it's a source of nutrition, to others pure flavor. And some people just like taunting milk-producing animals by eating dairy products right in front of their faces. And, as the internet taught us in the early 2000s that there's only so much milk you can drink before bad things happen to you and anyone in your immediate vicinity, cheese is the ideal cow-taunting foodstuff. The one thing I know for sure is that cheese is delicious, versatile, and actively in my fridge at this very moment. And everything is better fried, so mozzarella sticks were pretty much destined to happen. Don't fight destiny. You'll piss off a deity and then the Greeks will have to build a giant wooden horse. It'll be a mess, and it's not worth the hassle.

Ingredients:
Mozzarella Cheese
Seasoned Breadcrumbs
Eggs
Flour
Smoked Paprika
Salt
Oil (something with a neutral flavor and a high smoke point, like peanut oil. Any oil recommended for frying should be good though)

The first thing you may notice upon close inspection is the there are no amounts of anything. Welcome to the wonderful world of winging it. Because we're talking mozzarella sticks here. This is something you should be making until you run out of everything, not until the arbitrary amount of food to complete a recipe is reached. You need flour, eggs, and breadcrumbs to coat the cheese, paprika and salt to season those coverings, and oil to fry it in. You should have about a teaspoon each of salt and paprika for every cup of flour. Beyond that, I have the utmost faith you'll persevere, and fully indemnify against legal action in the event that you set yourself or your loved ones on fire.

Sriracha added for deliciousness purposes
On to the construction. Cut your cheese into rectangular prisms. I like a size of about a half inch by a half inch by 4 inches, but as long as your hunks of cheese are all roughly the same as each other, follow your heart. Mix together your flour, paprika, and salt, and then coat your cheese prisms in it. Mercilessly beat your eggs, then dunk your floury cheese into them, then into your breadcrumbs, then back to your eggs, and back one more time to your breadcrumbs. Confused? You shouldn't be. It's flour, eggs, breadcrumbs, eggs, breadcrumbs. Then lay out your crumby cheese on a baking sheet and freeze it for at least 2 hours. Once they're solidly frozen, heat up your oil over medium heat and get to frying. About one minute on each side should do it, but you can also go by how delicious they look, smell, and taste. Either way. Then just top them with the marinara, hot sauce, or nothing of your choice and eat them until your loved ones think you have a serious problem. You know, the ones you haven't set on fire yet. Enjoy!

August 9, 2018

Roasted Elotes

We use corn for so many crazy things in America that it's
even starting to weird out the other vegetables
Corn is everywhere, especially in the midwest. Some of you sticklers for language might be thinking "there's no such thing as gradient levels of 'everywhere,'"and you'd think that would be the case. But you're wrong. Go to any grocery store. Look at ingredients. Corn is everywhere. Then go to the midwest and drive for 30 miles in literally any direction. I rest my case. Fortunately, corn is also absurdly delicious, and is kind of synonymous with Summer, which it technically is in case the absurd heat and gaggles of unruly children roaming the streets wasn't enough of a clue for you. The point is, we're being invaded by delicious corn, and it's our duty as patriotic Americans to eat the heck out of it to thin out its numbers so that we don't get completely overrun and end up slaves to our corn overlords, working in a butter mine in Montana.

Ingredients:

4 Ears Corn
4 oz. Cotija Cheese (If you can't find Cotija, you can replace it with Feta, but it won't be quite the same)
1/4 cup Mayo
1/4 cup Sour Cream
2 Limes
2 cloves Garlic
1 tsp Chile Powder
1/2 tsp Smoked Paprika
1/4 tsp Cayenne Pepper
1/4 tsp Kosher Salt

I've managed to make some pretty easy food here once or twice. Once I just mashed up a couple of fruits and froze their goop. This isn't the easiest recipe I've ever made, but it may be the easiest recipe I've ever made that actually requires any cooking. So first thing's first, heat your oven to 400 degrees and toss your corn in, husks and all. You don't even need any bourgeoise luxuries like a pan. Just throw them straight on your oven racks and leave them there for 45 minutes. Which is awesome because, firstly, there's no dishes to clean up, and secondly you now have 45 minutes to prep everything else. 40 minutes later, after you suddenly realize that you completely forgot about your corn because you got sucked in to whatever reality TV show you're addicted to this week, run to your kitchen with a nervous energy that really has no place near sharp knives. Take a sharp knife and chop the bejeezus out of your garlic. You really want to get it fine. Otherwise you're going to end up biting into a giant chunk of uncooked garlic later, which will end up being bad for you and everyone who has to talk to you for the rest of the day.

I wouldn't recommend letting these sit around for too long if
you're not eating 'em right away. This has yet to be a problem.
Combine your mayo, garlic, sour cream, cheese, and the juice from your limes together (oh yeah, you've got to juice your limes. So go retroactively have done that). In a separate container combine your chile powder, paprika cayenne, and salt. You're pretty much good to go. Like I said, easy. Once your corn is cooked all the way through take it out of the oven and pull the husks off of it. If you have delicate, sensitive, effeminate hands that can't handle second degree burns, use a towel for this. Either way, leave the husk at the bottom of the corn so that you can use it as a handle, and take your delicious snack on the go. This allows you the fun of eating your hot food outside in the Summer heat. You know, where the sun is blazing down on you in its endless struggle to murder you. Anyhow, immediately slather your cream mixture on to the hot corn, and then sprinkle it with your spice mixture. I'm a fan of citrus, so I squirt on a little extra lime juice at the end, but that part's optional. And that's it! You've got a snack that's delicious, filling, and a service to your country. You're technically a veteran now.


June 13, 2018

Strawberry Banana Bites

Dramatic reenactment: every picture on the internet ever
A while back a sensation took the internet by storm. To be fair, it's not all that hard to take the internet by storm. Cats and babies do it on a regular basis. But this happened to catch my eye. People make fake ice cream by blending frozen bananas with other flavorings. According to vegan hipster adherents to the trend, it's totally incredible and it tastes exactly like ice cream, and isn't nature wonderful, and by the way if you're not vegan you're basically a war criminal but worse. According to literally everyone else, it's kind of cool. And it tastes...like bananas. If you're expecting ice cream, don't get your hopes up, but if you like bananas then go for it. You see, the thing is, I do like bananas. But since the ice cream thing is a flop anyway, I figured why not blend it up with something that actually tastes good with bananas? And also why bother blending it all up in to an ice cream shape if it doesn't taste like ice cream? Also, I may not have a blender.

Ingredients:

4 Bananas
1 lb. Strawberries

Some of the more mathematically gifted amongst you may have come to the realization that there's not a whole bunch going on in the ingredient department. That's because there doesn't need to be. Bananas are delicious. So are strawberries. They taste great together. End of story. Except I haven't told you how to make them yet, so more like beginning of story. End of the intro of the story? All I know for sure is that the story begins with bananas. As they ripen, bananas turn from green to yellow, and finally to brown. If you leave them too long, to black. If you leave them way too long, probably back to green again. This is important for us to know because bananas also get sweeter as they ripen, as the starch in them is broken down in to fructose. As you may recall, our recipe doesn't have much in the way of ingredients, so we want to make the ones we have count. This is all a long drawn out way of saying that you should make sure to use ripe, sweet bananas. There shouldn't be any green on them, and you should have some brown spots marring the yellow of your peel. Then wash your strawberries, lovingly chop off their green leafy heads, and throw them in a bowl with your bananas.

So what if I like it when my food tries to high five me?
Take your favorite implement of destruction, be it forks, your bare hands, or miscellaneous, and mash the crap out of your bowl of fruit. It doesn't need to be perfectly smooth, but you shouldn't have any major lumps anywhere. Think of it like jazz. If it's too rough, nobody will be able to appreciate the awesomeness. If it's too smooth it loses all of its character and becomes flat and uninteresting. Got it? Good, now let's never speak of this analogy again. Throw that nonsense in the freezer, and then take it out again after about 45 minutes. Mix it together again, breaking up any clumps and crystallization that may have formed. Then splorp it in to some ice cube trays, or the silicon molds you may have bought during your last adventure that you still aren't sick of. Freeze them until they're solid and then enjoy. They're delicious, fairly healthy, and technically frozen which makes them perfect for absurdly hot days. Speaking of which, it's supposed to be in the mid 90s in this weekend in Chicago. So I guess what I'm trying to say is, if you let me stay at your place this weekend, I'll totally bring you frozen fruit mush. Chicagoans need not apply. 

April 17, 2018

Jalapeño Cheddar Bicuits

I've found that the freshest dairy products are bought in alleys
The first thing that you think about when you buy cheese out of the back of a van is safety. How recently was this van serviced? Was the air conditioning on when it drove down from Wisconsin? Is there a Cheese Mafia, and if so does this make me their customer, business partner, or rival? But let me start at the beginning. A guy called the restaurant where I'm working looking to sell some cheese, and gave shockingly few details about where it had come from, who he was, or why he was peddling mystery cheese in the first place. Eventually it was learned that he worked at a new dairy up in Wisconsin that had overproduced for an order, and so he was looking for people to buy some of his discounted sketchy cheese out of the back of his van. Naturally, I jumped at the opportunity. The restaurant bought a fair amount of cheese, and I got some for myself. Then, as suddenly as it had appeared in my life, the cheese van drove off in to the night, leaving me with nothing but a weird story, fond memories, and 9 pounds of discounted cheddar cheese. Which brings us to biscuits.

Ingredients:

2 cups Whole Wheat Flour (I'm doing a whole wheat thing right now, so I used whole wheat flour. If you want to switch it out for regular flour, go ahead)
3/4 cup Grated Cheddar Cheese
1 cup Buttermilk
3/4 stick of Butter (This is 6 TBSP, for you math/unit conversion nerds out there)
2 Pickled Jalapeños 
3 tsp Baking Powder
1/2 tsp Baking Soda
An average adult human's pinch of Salt

So the first thing you're going to want to do, after having bought the rest of your ingredients out of the backs of whatever vans are available in your neighborhood, is to have a long family history of biscuit-making to rely on. If, like me, the closest your family ever came to biscuits was to have had a conversation with someone from Alabama or Georgia (The longest conversation on record in Georgia and Alabama without somebody mentioning biscuits in some way was 5 minutes and 47 seconds, at a funeral in 1937), you may have to fake it a little bit. In any event, take your flour and whisk in your baking powder, baking soda, and salt. Then take your jalapeños and chop them down to size. You're looking for a pretty fine cut on these. You want them to flavor the biscuits throughout, but you're not looking for people to be biting in to giant chunks of jalapeño. That's how friendships are ruined. Take your butter, grate it in to your flour, and work it in until it forms in to little pea-sized globules. It's important that your butter doesn't melt if you want light flaky biscuits instead of dense lumps of sadness. If, like me, you've been cursed with absurdly warm hands, don't be afraid to take a break and stick your flour and butter in the freezer to cool off.

Yes, I made these today. And no, there aren't any left
Once you've got your buttery flour globules all set, add in your cheese, jalapeños, and buttermilk, and very gently stir to combine. You don't want to overwork your dough, or else you'll form a bunch of gluten, melt your butter, and end up sad and alone at the company picnic like last year (for the sake of this example I'm assuming you don't live in the midwest, where picnicking would be a challenge since its still snowing despite technically being mid-April). If you have things like a traditional biscuit cutter and a biscuit pan that your family has passed down since they were originally forged on the Mayflower, good for you. I don't have any of those things, except for the unwarranted sense of puritanical entitlement, so I'm making drop biscuits, so named because you just splorp a spoon in to your dough and drop it on to your pan. Do your best to get your biscuits close together and equally sized. If you're smarter than I was you'll push down lightly with your thumb in the middle of each biscuit so that they rise evenly and you don't end up with a dome on top of each one. Either way, shove those suckers in to a 450 degree oven for about 15 minutes, then take them out and try not to burn your hands and mouth when you refuse to wait for them to cool down and shove them in to your face. You can totally add some butter on top if you can find any before your friends and family (or you. Just you) devours them all. Enjoy!

February 6, 2018

Whiskey Fudge!

If life and the Simpsons have taught me anything, it's that
Yale's motto really should be Semper Fudge
So I'm going to be straight with you all. I've been known to enjoy some whiskey on occasion. And yes, that may have been a contributing factor to my decision that it would be an excellent addition to fudge, but that doesn't change the fact that I was totally right. It gives it a subtle complexity that tastes awesome, and helps keep the fudge from being too sweet. Too sweet sounds like a good thing for fudge, but if you make it a little less sweet then, aside from tasting better, you can totally justify eating significantly more of it at one time, which means you'll feel slightly less bad about yourself when you snork down half of this recipe before lunch. And sure, if you have a super low alcohol tolerance it's entirely possible that this recipe will allow you to literally get drunk on fudge (Drunk On Fudge is definitely going to be the title of my memoir), but that's a risk that I'm willing to take.

Ingredients:

14 oz. can of Sweetened Condensed Milk
12 oz. Semi-Sweet Chocolate Chips
5 oz. Bittersweet Chocolate Chips
1.5 tsp Whiskey (I used Irish Whiskey, which worked really well. Technically, you can use whatever whiskey you want, but if you use garbage whiskey you may end up with garbage fudge.)
1/2 tsp Vanilla Extract

You may have noticed that there's not a whole lot going on in terms of ingredients. You're welcome. The entire point of fudge is to be easy and delicious. And sure, you can add fancy things like caramel sauces or toasted nuts on top if you like, but they're like ketchup on a really good hot dog, or like your appendix. If you like it then sure, go and have fun with it, but it's ultimately not really necessary. And before all of you ketchup lovers and appendix lovers start sending me your angrily worded handwritten emails, let me just remind you that - and I mean this sincerely - I don't care. Anyhow, open up your can of sweetened condensed milk, and let it gloop out of the can into a pot. After about 3 minutes of waiting for it to stop taking its sweet time, try futilely to speed up the process using spoons, spatulas, and other various implements of destruction. Once your can is more or less emptied into your pot dislodge any dust and spiders that may have settled colonies on your person, and crank the heat up to medium-low. Stir occasionally for a couple minutes to let your milk heat up before adding in both your semi-sweet and bittersweet chocolate chips. Add them in in about 3 batches. Keep stirring and let the whole thing melt and smooth out before adding more in. Normally you'd melt chocolate in a double boiler, and be hesitant about stirring it because crystals could form and it could seize up, and you could be the butt of many jokes made by me at your expense. This is all technically true, but in my experience the sweetened condensed milk helps to prevent this, kind of in the same way corn syrup would, by acting as a buffer between potential subversive crystal clumps. Follow your heart.

If possible, it's advisable to eat fudge in mountain form
Once your chocolate is melted in turn the heat off and stir in your whiskey and vanilla. Once they're incorporated and everything is smooth, pour the whole mess into a baking pan that you've thoughtfully lined with aluminum foil, and let it cool down to room temperature for about an hour. How big of a pan to use is up to you, but in my mind it's not really fudge unless it's thick. Otherwise it's just a chocolate bar. Toss your fledgling fudge in the fridge (I want to stop writing things like that, but I don't know how) and wait for it to set up completely, which ostensibly takes a couple of hours, but feels like an eternity. Allow extra time for several misguided attempts at eating your fudge early, wherein you get goop on your hands, refrigerator door, and possibly walls. When it's finally ready, turn the foil upside-down over a plate, and then remove it to reveal your fudgy treasure. Slice it into whatever servings you think are appropriate (e.g. in half, or completely unsliced) and consume it as fast as possible to keep intruders from claiming it as your own. You waited hours for this fudge. Your friends and family can pry it from your cold dead hands. Enjoy!

October 4, 2017

Beer Cheese

Beer. Is there anything it can't do?
The midwest and Germany have a lot in common. A love of food and alcohol, a healthy appreciation for tradition, and a tendency to reschedule those traditions out of concern for the weather, which is constantly threatening to kill us all. And it's no surprise that when you've got a bunch of people who love food and alcohol together, they're gonna start blurring the lines between those two things. Because after you've been drinking for long enough, just about any food idea will start to sound reasonable as long as you can make it in less time than it takes to get a pizza delivered. Occasionally, like with beer cheese, it works out. Occasionally it doesn't, but you never admit that a drunken food idea was bad. You just stubbornly tell all of your friends about how great it was, and how they need to try it. This is why the French started eating snails.

Ingredients:

1 Bottle Of Beer (Some people get very specific about what kind of beer has to be used for this. Those people are fools. Use a beer you like, preferably one with a good amount of flavor, but beware that the flavor will intensify somewhat as it's cooked)
8 oz. Cheddar Cheese
2.5 TBSP Butter
2.5 TBSP Flour
1.5 tsp Dried Oregano
1.5 tsp Garlic Powder
1 tsp Worcestershire Sauce
1/2 tsp Hot Sauce
1/2 tsp Mustard (Any mustard will do in a pinch, but I prefer something with a little bit more texture and flavor like a stone ground mustard)
A standard human's pinch of Salt

So, Beer Cheese as a dip was developed in Kentucky. And since Kentucky has pretty much only ever had one thing to brag about (bourbon), they'll tell this to anybody who'll listen. I'm pretty sure that Beer Cheese is the state bird of Kentucky. But combining beer and cheese is by no means unique to them, and was even a thing in medieval Europe. In the USA soups and dips combining the beer and cheese are commonplace throughout the midwest, most notably in Wisconsin where it's technically illegal to eat a meal that doesn't have cheese in it. Now that you know that Kentucky has no reason to feel a sense of accomplishment, it's time to melt your butter over medium heat and stir in your flour to make a roux. As I've mentioned once or twice before, a roux is commonly used to thicken sauces. So once that's good and done, whisk in your beer slowly. You're gonna be beating this thing a lot more than you think you should have to. You're going to stop, thinking that the sacrifice of your arm and shoulder was surely enough to ensure a smooth sauce. Then you'll see a lump and realize that you're not done. You're never done.

Bonus points if, like me, you get off-brand pretzels that look
like a doughier version of The Scream, by Edvard Munch
Once you're done weeping in the corner and your sauce is smooth, stir in the rest of the ingredients. When you're stirring in the cheese, melt it in in batches so that you end up with a beer-and-cheese sauce and not a beer sauce with a giant lump of somewhat melted cheese at the bottom of it. Let it cook on low, stirring regularly, for about 10 minutes so that all of the flavors can get drunk off of the alcohol, relax, and start getting to know each other. And that's it! It's a little spicy, a little sour, a lot cheesy, and full of some awesome flavor. Now all you have to do it grab some soft pretzels, hard vegetables, or...medium pasta? The point is, if you've got a foodstuff, there's a better-than-average chance that this stuff will taste incredible along with it. Plus, you can totally lie to children and tell them they can't have it because there's beer in it. More for you.

February 23, 2017

Salmon Patties

The best salmon has a mermaid on it. Remember that, as
you're lured to your watery demise.  
They say when life gives you lemons, you should make lemonade. Unless you're allergic to citrus, in which case when life gives you lemons you swell up and die. The point is, we all have to make do with some unfortunate circumstances. For some of us, that may be an embarrassing medical condition, or a weird laugh, or maybe having to stay at work until after midnight because other people screwed up, and the people who should be saddled with responsibility dumped it on you, even though they sure as crap aren't going to pay you any more for doing their stupid jobs for them. You know, hypothetically. The point is, when you get home from your day of being embarrassed, laughing weirdly, or being stuck doing somebody else's job for them, you want to just sit down and do nothing. But you're stir crazy because your brain is working out ways to untraceably burn down your stupid workplace. So you need something to occupy your time and mouth. Something easy, delicious, and made from ingredients that are close at hand. Bonus points if it's something you grew up eating, so it soothes your soul and keeps your dumb workplace unburnt for another day.

Ingreidients:

10 oz. Canned Salmon (You can totally get those cans of salmon with the skin and bone bits still in it so you need to do extra gross work. Or you can, you know....not.)
1/2 a Standard-issue Onion
1/3 Cup Seasoned Bread Crumbs
2 Eggs
1/2 tsp Dijon Mustard
1/4 tsp Black Pepper
1 average-sized human's pinch of Salt
Butter

The first thing you're gonna need to do is somehow will yourself off of your couch and into your kitchen. Allow 20-30 minutes for the standard hemming and hawing about whether you're actually hungry (even though you haven't eaten all day), and whether it's a better idea to just go to Dunkin' Donuts (it isn't). Once you're in the kitchen, drain your salmon and melodramatically throw it in a bowl, even though you're home alone and nobody can see you. Take a grade-3 mashing fork, and mash it into bits. Next, choppity chop your onion down to size, and then throw it in the bowl along with your bread crumbs, eggs, pepper, mustard, and salt. Stir that nonsense together until you've got a relatively homogenous salmon-goop, which makes you really start to question whether you were actually hungry after all. Take a pan and melt some butter in it over medium heat.

Sure, you could use some garlic mayo, or ketchup, or...a
fork. Or you could just gobble them down without
pausing to chew. You know, like a duck.
Now comes the fun part, and by "fun" I mean "gross." Dig your hands into your salmon goop, and form patties, roughly 2 inches in diameter. For those of you who didn't bring your protractors with you to the kitchen today, the patties should be about the same size as the palm of your hand. Take the goop discs you lovingly crafted, and throw them into the pan of hot butter. Cook them on each side for 2-4 minutes, until they're good and brown. Be careful when you're flipping them, otherwise you won't end up with salmon patties so much as you'll have salmon garbage. Once they're done, go collapse in a heap with your prize, and pray for a better tomorrow. Bonus points if you remembered to turn off the stove!

January 25, 2017

Chickpea Onion Dip

The world is a mess, and I just need to....rule it.
We live in tumultuous times. There's violence, strife, and political division, both on a global scale, and also widespread domestically. And that's just about Lady Gaga. Lots of people are scared and angry, and most of them don't seem to even know what they're angry about. But the superbowl's coming up soon! We can all get excited about that, probably! We can all get together and cheer while watching the exciting match between the....Patriots and Falcons. Ok, so the superbowl will be awful. But at least it gives us an excuse to dip food into other food, creating double-food, capable of insane levels of deliciousness. And, when you get down to it, isn't that what America is really all about? The answer is no.

Ingredients:

2  16-oz Cans of Chickpeas (Chickpeas are also known as garbanzos, because life is hard and hates you personally)
1  Standard Bunch of Green Onions (Green Onions, also called scallions, are social creatures that travel from supermarket to supermarket in units known as "bunches." They have developed a symbiotic relationship with another supermarket-dwelling creature known as the "tiny blue rubberband that you immediately lose, but later breaks your vacuum cleaner")
3 TBSP Olive Oil
One large human's pinch of Salt
One smallish and/or puny human's pinch of Black Pepper

This recipe, much like one of my bookshelves and my couch, hails from the proud tradition of shameless stealing things from my mother. I can only assume that with time I'll eventually grow bolder and steal more substantial things, like her car or social security number. Time will tell. The point is, crack open your cans of chickpeas, drain out the weird juice and gunk, and then toss them into a standard-issue mashing bowl. Now it's time to painstakingly mash the chickpeas, pretty much one at a time, with a fork. If you're a fool. Like I apparently was for an embarrassingly long amount of time. Make your life easier and use a potato-masher, which is apparently useful for something other than jamming drawers.

Guaranteed to make your day 50% more delicious. And
13% more full of mashing things. 
Rinse off your green onions, and then choppity chop them into little bits. Mix them, along with the rest of your ingredients, into your mashed chickpeas. And that's it! Well, mostly. Stick it in the fridge for a couple of hours so that the flavors get to know one another. And then that's totally it. For sure this time. Dip anything you like in there, and it'll be delicious. Vegetables, bread, crackers, you name it. Bugs. Probably not bugs. Don't dip gross things and you won't get gross results. Enjoy, and tune in next week for more superbowl food! Because, the world may suck...the game may suck...but at least we can eat good food, drink, and be merry while we endure it! (Next week's recipe may just be on how to find and consume beer. We'll see!)


January 11, 2017

Tired Returns

Oh, and waterfalls. There were also waterfalls.
So it's 2017! That apparently happened. And with it came the grim realization that I lied to all of you. I said that I was going to keep updating this blog while I was on vacation. I even implied that I might update it more than usual with random trip nonsense. This was not the case. And sure, I didn't intend to lie to you all. I had no way of knowing that the old unsupported blogger app would finally crap out and keep me from updating from my phone. But that doesn't really matter. What actually counts is that I went to Scotland and played around with frickin' Owls. Seriously...even if all the technology worked all of the time, I would not have been focused on updating whilst on this vacation. I was focused on owls. And castles. And whiskey. And....I dunno...natural splendor? But I'm back! And it turns out that when you get back from a day of about 14 hours of plane travel, you're hungry. And because you've been gone for two weeks, you pretty much only what's in your freezer to work with. Fortunately, my freezer was well stocked....with cheese. And not much else. But cheese, plus tomato/herb crusted mini-pitas that I bought from a supermarket, equals delicious mini pita pizzas! Which will totally soothe your soul after a long day of travel, and distract you for about 45 seconds from the fact that owls and castles are behind you, and you have only your whiskey to remember them by. And the pictures. Mostly the whiskey.

Ingredients:

Mini Tomato/Herb Pitas (Yes, this is kind of weirdly specific. But it's what they had at the grocery store. Get regular mini-pita for all I care and smear some tomato sauce on it. Actually, that sounds better. Do that instead.)
Cheese
Vegetable Oil
Nothing like melted cheese to help you forget the horror
 that is WOW airlines. 

That's right. 2 ingredients. Because one thing you don't want to do when you've been on a plane for 16 hours that day is have to mess around prepping different ingredients, hungry and tired and just wishing you were either back in Scotland or dead, whichever you can get to faster. So simplicity is key here. Take your oil and coat the bottom of a cast iron skillet. Throw down your pitas until you get a solid layer (Yes, you've just come off of 20 hours of plane rides, so you're probably not going to have the energy to literally "throw" anything anywhere. Maybe "listlessly prod.") Cover the top with cheese. How much cheese? If you need to ask that question, you may not be deserving of cheese. It's delicious and you're tired. Go nuts. I had about 5.5 ounces on my batch, but that's just because my weary hands gave out from all of the sprinkling. Toss that sucker in a 450 degree oven for about 10 minutes, and then take it out and enjoy! There's nothing like cheesy deliciousness to welcome you back to your dreary life after crazy travel and adventure.


August 30, 2016

Blooming Onion

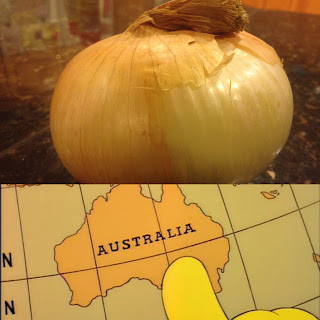
Australia: It's not just for being a jerk while playing Risk
Australia has given us some great things over the years. Kangaroos. A fantastic Simpsons episode. And probably other things. Also, thanks to Australian-American restaurants, blooming onions. Sure, some random diner in New Jersey claims that they invented it in the 70s, but that story has some problems, like how suspiciously far from Australia this diner is, and the fact that I don't know if it's true or not. So I'm assuming it was dreamed up in some dingo-encrusted office at Outback Steakhouse's corporate office. Which I'm totally ok with, because they did an awesome job. It's like an onion that's wrapped in fried deliciousness, and blossomed into the best thing ever. And then gave you a free car. And like 6000 superfluous calories. So it's exactly like Oprah.

Ingredients:

1 cup Flour
3 Eggs
1/2 TBSP Smoked Paprika 
1 tsp Salt
1 large human being's pinch of Cayenne Pepper
Onions! (Yes, this recipe makes enough flour and eggs for more than one onion. Yes, that is a good thing, because after you serve your guests the first one, they'll immediately devour it and want another. Assuming you have guests, and aren't just sitting home alone making party food in an ever-growing sea of sadness and fry oil.)
Oil for frying! Any relatively neutral oil with a high smoke point! Like peanut, or canola! 

 The first thing you're gonna need to do is increase your insurance coverage. Because onions are pretty much full of water, and we're pretty much dumping one in a vat of oil. As you may remember, oil and water have a complicated relationship, whereby they try to kill each other, and then kill you for introducing them. Yes, you can help mitigate this by cutting your onions ahead of time and letting them sit in a sealed container overnight, but you're not gonna do that (For the record, that also would have helped your fried bits cling to your onions. Oh well). The point is, you're either gonna burn yourself, your house, or some combination thereof today. Isn't learning fun? Once you've made peace with your impending doom, whisk together your salt, flour, cayenne, and paprika in a bowl. Then take a separate bowl and whisk your eggs in it. You may be wondering where the onion comes in, given that it's a title character of this little adventure. The answer is now, or more accurately at the beginning of the next paragraph.

Chop the head off of your onion, and peel off its outer layer, like you're some kind of sadistic spanish-inquisition style torturer who's trying to convert onions to Catholicism (For those of you now wondering about onion anatomy, its butt is the brown, round, kind of stringy bit on the bottom, and the head is the bit at the top where the excess skin forms a narrowing point. Just like with people). Take a spoon, hollow out your onion's "core," (read: heart) and cut wedges into it, being careful not to cut all the way through to its butt. I know that was a little complicated, so I'll wait here for a few seconds while you re-read it a couple times and make sure you've got it down. Ready? Cool. Now comes the fun part, and by "fun," I mean "kinda of gross at first, and then a healthy mix of terrifying and potentially deadly." Take your onion, and dunk it in your flour mixture. Make sure to get it in all the nooks and crannies. Use a spoon to help you if you need it. There's no shame in relying on spoons. I'm hardly judging you at all. Once your onion is floured, set it aside for a couple minutes. Use this time to heat up your oil in a pot. How much oil? Enough to cover your onion. How big of a pot? Big enough to hold your oil and onion together. And yes, a smaller pot will mean it'll take less oil to cover your onion, saving you as much as one shiny dollar. But you'll have to make a deal with some sort of cruel and malicious deity to eyeball the amount of oil just right. Otherwise, it either won't cover your onion and you'll end up with garbage, or you'll have too much oil, which will spill all over the place, burning your hands, kitchen, and probably soul. All of which you'll then have to spend an hour cleaning up afterwards. So maybe go with a normal sized pot. 

Don't get me wrong, this tasted awesome. Anecdote over.
Using either a deep fryer, a candy/fry thermometer, or the maniacal guesswork of the damned, heat your oil to 350 degrees. Then take your onion (Remember your onion? It's a recipe about your onion), and dunk it in your egg mixture. Then, like two different OCD personalities trapped in one body, dunk the onion back in your flour mixture, again being certain to get floury goodness into every bit. Toss (or, you know, carefully and gently place) your onion into the oil, and fry it at 350 for about 10 minutes. The whole thing should kind of bloom open like it's inviting you into the halls of deliciousness, or, depending on the previously mentioned deity you made a deal with, valhalla. And that's it! Drain it on a rack, or a plate with some paper towels, grab your favorite dipping sauce (I like sriracha-mayo), and dig in. The pleasant ambiance of the warmth and gentle glow from your burning house is an added bonus.

July 12, 2016

Chilled Avocado Soup

Psychic's depiction: seconds before my death
Well, it's official. Summer is back. You can tell from the longer days, the watermelons in the supermarket, and the sticky parentless children running around everywhere. Oh, and the sun is trying to kill us again. Last year I was living in LA, so the sun attacking me was annoying but manageable. But I made the dumb mistake of moving to Chicago, which was originally swampland that some idiots built huts on. Not much has changed. So nowadays when I say that the sun is trying to kill me,  it's more like the sun, along with his homicidal buddies the lake and the air, are all conspiring to kill me so they can live in my apartment and throw parties. The point is, we're gonna need refreshment. Which usually means something fruity and sweet. But you can only do so much fruity and sweet on a hot day before you start to feel all of that sugar melting into a caramel inside your stomach, and that's not as much fun as it sounds. The answer is avocados. Granted, I've lived in southern California for years, so, legally, I'm required to solve every problem with avocados, but this time it actually makes things better.


Ingredients:

2 Avocados
1 Lime
1/2 a Red Onion
1/3 cup Milk (Thanks to hipsters and their ilk, there are WAY too many options of weird nonsense milks to choose from. So don't. Just get actual milk. The kind that comes from a cow, and has some fat in it. You know, milk.)
1/4 cup Vegetable Stock
1 tsp Kosher Salt
1/4 tsp Cumin
1/4 tsp Cayenne Pepper
An unspecified amount of Sour Cream and Cilantro

The first thing you're gonna need to do is chastise your avocados. Because once you cut them, avocados turn brown and gross. Surprisingly fast, too. It's pretty much their national pastime to wreck your day. So let your avocados know in a firm, but caring tone of voice, that you're not gonna be putting up with their crap today. Keep lecturing until you feel like you've really gotten through to your avocados and made a difference in their lives. Then, like any good parent, start preparing for when they inevitably try to betray you. Once you've gotten that taken care of, choppity chop chop your red onion into tiny bits until no one can identify its remains. Add in the cumin and cayenne, and set it aside. Peel and slice your avocados, and throw them in a bowl along with your kosher salt, and mash them with a fork. The large grains of salt you get with the kosher stuff will help punch through the avocado and break it down into a delicious goop. This is where your avocados will stab you in the back, despite all of the progress we made together. So add in the juice from your lime to keep things in check. Avocados may love turning brown, but citrus is having none of that nonsense. Citrus doesn't deal well with change. This party started off green, and as far as citrus is concerned, it's gonna end up green.

That's good enough to almost make up for the heat. Almost.
Now it's time to add your spiced onions in with the avocado mixture, along with your milk and vegetable stock. Stir that nonsense together, cover it, and throw it in the fridge to think about what it's done. Let it sit there for at least a couple hours, but overnight would be even better. Then, whenever the sun is pulling that "95 degrees with 80% humidity" nonsense, go to your fridge and pull out your avocado sludge. Throw it in a bowl and top it with a tablespoon of sour cream, and some chopped cilantro. Or don't, because it's super hot and you don't even have the energy to produce fully fledged thoughts, let alone add crap on top of your soup. Either way. The point is, even though the air around you is hot and sticky, that doesn't mean you have to be. Well, maybe it does, but you don't have to feel like it. Instead you can feel cool, and refreshed, and full of avocados. Like a conquistador, minus all of the rape and murder!

April 12, 2016

Spinach and Artichoke Dip

If your artichokes aren't heirlooms, you're basically just a
garbage person. Gandhi said that.
So you've decided to finally start eating healthy, and are totally stoked to see how you can make things like spinach and artichokes actually taste like people food! You fool! Yes, some things are better for you than other things. But sometimes, in order to make those healthy things even a little bit palatable, you need to load them up with a bunch of unhealthy things, which kind of kills the point vis-a-vis nutrition. And some things are just awful no matter what you do to them (I'm looking at you, Kale) So congratulations, you're doomed! Well, maybe you're not doomed. But if you're looking for a way to make all those foods you avoid taste awesome without adding in any calories, look elsewhere. Because while this recipe is full of tastiness, it's also very full cheese, cream, and fat. Which is one of the main reasons why, you know, it tastes good. So if that's a deal-breaker for you, so long, and good luck learning how to choke down your daily kale-and-flaxseed breakfast smoothie. I'll be over here, not hating life.

Ingredients:

Fresh Spinach (Way more spinach than you think you'll need. Like 5 cups of spinach
1 can/jar/12-14 oz. containment vessel of Artichoke Hearts
8 oz. Cream Cheese
4 oz. Sour Cream
1 standard-issue Onion
2 cloves of Garlic
The juice of 1/2 a Lemon
1 dash of Hot Sauce 
2 TBSP Olive Oil
An unspecified amount of Salt 

The first thing you're gonna need to do is get over the fact that you think you have too much spinach. We get it. You think you have way too much spinach. You're wrong, so learn to deal with it. Finely dice up your onion into itty-bitty onion bits and sauté it, along with an average human's pinch of salt, in your oil over medium heat for about 5 minutes. Roughly chop your spinach and throw it in with the onions and another average human pinch of salt. Yes, it pretty much overflows out of the pan because there's so much spinach. No, you still don't have too much spinach. Let your spinach cook down with your onions for another 5 minutes or so, stirring occasionally. Rinse and drain your artichoke hearts that were brutally ripped from the beating chests of young sacrificial artichokes. Choppity chop those suckers, along with your garlic, into tiny bits. Turn your head back to your pan and freak out that you don't have enough spinach. Try to appreciate the irony of the situation, and rest-assured that you have enough spinach. Add in your garlic and artichokes, and sauté for another 2 minutes.

Make sure to have a girl named LeAnn suggest that you put
it in a bread bowl. Otherwise it's not authentic. 
Now comes the fun part, and by "fun" I mean "fattening." Splorp your cream cheese down on top of that hot mess of vegetables and stir the whole thing into a nice sludge-like consistency. Make sure to listen for the cries of anguish from passing-by health nuts and vegans. These will make you, and your dip, stronger. Add in your lemon juice, sour cream, and hot sauce, and stir to combine. Taste it and adjust the salt to your liking. But plan ahead. If you're gonna be dipping salty things into it, you want the dip itself to be a little under-salted. And vice-versa. Of course, it doesn't really matter since you stopped reading after the word "taste" because you haven't been able to stop tasting, and you've probably dropped your phone, laptop, microfiche, or whatever it is you're reading this blog on in your efforts to get at that goodness faster. Because while it may not be healthy, this stuff tastes goooood. Healthy food is overrated anyway. The much more important bit is whether your food sounds healthy so that you can lord over your friends how healthy your life-choices are. And Spinach Artichoke Dip fits the bill, despite being about 50% cream cheese. You're welcome.

March 8, 2016

Blueberry Muffins

I prefer wild blueberries over the ones you see in zoos
It was a rainy and dreary morning, so I made muffins. I feel like that needs some explanation, so this one time I'm going to fight my natural impulse to drop a ridiculous statement and just walk away. Or possibly more times, to be determined as I feel like it. The point is, we in the LA part of the world experienced an uncommon phenomenon known as, and I believe I'm spelling this ethnic word correctly, "weather." This made me vaguely nostalgic for my distant homeland, which made me think of all the other things I'm missing that I don't have easy access to here. Like bars that are open late, the ability to go to the bank on Sunday (Well, you can go, but you'll be the only one there), and of course Dunkin' Donuts. I used to get their Blueberry Muffins all the time. And I figure that if a minimum wage employee working for a faceless corporation can pretend to have baked delicious muffins that obviously came from a factory, I, a zero wage employee of cooking crap and writing about it, can totally actually bake delicious Blueberry Muffins from scratch. That totally makes sense.

Ingredients:

1.5 Cups All Purpose Flour
1 Cup Sugar
10 oz. Blueberries
1/2 Cup Butter
1/3 Cup Milk
2 standard-issue Eggs
The Zest from 1 Lemon
The Juice from 1/2 a Lemon (The astute observers among you may have noticed that this leaves you with half of a zested lemon for which you have no use. Fortunately, I have expert advice on the matter: Deal with it.)
2 tsp Baking Powder
1 tsp Vanilla Extract
1 Average Sized Human's Pinch of Salt
Another 1 TBSP of Sugar
1 Small Person's Pinch of Nutmeg

The first thing you're gonna need to do is let your butter come to room temperature. This is gonna take, at a rough estimate, about 2 presidential terms, so prepare some snacks and activities. Maybe bring a sweater of pair up with somebody to make the time pass faster. Pretty much the same rules your 3rd grade teacher gave you on a class field trip apply. Once your butter is nice and room-temperatury, it's time for  the fun part, and by "fun" I mean "whisking until your arm tries to fall off out of spite." Pretty much, you're going to add your cup of sugar in with your butter, and whisk it until it gets an almost fluffy consistency. This is the part where you're really gonna feel the pain if you punked out and only waited 1 presidential term for your butter to warm up. Anyway, once your butter and sugar are together, whisk in your eggs, one at a time (this gives your second egg a chance to watch his fate, and the fear that he develops releases chemicals throughout his egg body that are delicious), followed by your vanilla, lemon juice, and milk. Grab a second bowl from your magic bowl cupboard that has a never-ending supply of bowls, and mix together your flour, baking powder, and salt. This is a good point to get you to start freaking out about the "muffin method," which sounds like the name of a terrible DJ for kids parties. His slogan would be "your ex will gloat about this for years." Pretty much, if you mix flour with any liquid it starts to form more and more gluten, because flour is a jerk. All that gluten will make your baked goods super bready. Which is awesome for bread. Not so much for muffins. So you want to minimize the mixing as much as you can.

Adorable muffin-cups added to show adorable bad-assery 
Add your wet mess of a bowl into your dry floury bowl and mix it for less time than you think you should. The consensus of the internet is about 10 seconds, and the internet directly stole that from Alton Brown. Make sure to nervously watch a clock the entire time you're stirring because of paranoia induced by this paragraph. Now add in your blueberries, and neurotically stir a couple more times, until they're just barely incorporated (Pro-tip: if, like me, you don't live somewhere where magical berry bushes of deliciousness provide fresh berries at reasonable prices year round, and you're using frozen berries, keep them in the freezer until the very last second. Otherwise they'll make everything purple. They might anyway. If you're using fresh berries, toss them in some flour before you mix them into your batter to help keep them from just sinking to the bottom and disappointing us all, like every politician ever). Scoop that goop into a muffin tin, and throw it in a 375 degree oven for 20-25 minutes. 20 seconds after you put your muffins in the oven, frantically run back and take them out because you realized you forgot to add the topping on. Mix your lemon zest, nutmeg, and tablespoon of sugar together, and sprinkle some on top of each fledgling muffin. Then throw them back in the oven for another 19.6-24.6 minutes. And that's all there is to delicious muffins. And you didn't even get paid minimum wage! You didn't get paid anything!

January 26, 2016

French Onion Soup Sandwich

No before shot this week folks. Just jumped right
in there and got cooking. Also, I forgot.
Every so often, and idea hits your brain like lightning hitting a hairless cat. It's sudden, there's a lot of commotion (but still not as much as you'd expect), and you largely stop paying attention to what anybody else is saying at the dinner party. That's what happened to me Friday night when somebody mentioned in passing the concept of a French Onion Soup Sandwich. And, much like the hypothetical cat, I was struck. I started planning it out in my head, and before long I had formulated a plan, and I got to work on making some awesome and delicious food. That I didn't share with anybody because whatever cold or flu or bubonic plague I've got is clinging to me like its life depends on it. Which I guess it does, but that doesn't make it any less annoying. The point is, I'm not spreading it to the populace at large, so nobody else gets to try my delicious food. Leftovers are the only perk of being sick. Well, that and having an excuse to take a long shower in the California drought. #BankingOnElNinoGettingItsCrapTogether

Ingredients:

6 Standard Issue Onions
4 Cups Of Vegetable Stock
2 Cups of Water
1 Clove Of Garlic
2 Slices Of Sourdough Bread
2 TBSP Olive Oil
1 TBSP Butter
2 oz. Fontina Cheese
1 average human sized pinch of Black Pepper
An unspecified amount of Salt

The first thing you're gonna need to do is chop the crap out of all of your onions using any technique you'd like. You don't need to go crazy and get tiny bits, because you want larger slices and/or chunks. Heat up your Oil, and half of your Butter in pan over medium heat, add in your Onions and one large human sized pinch of Salt (like the type of Salt pinch you'd expect from a Basketball player, or Neil Flynn) and sauté the crap out of those onions for approximately 3 lifetimes. You want them soft, brown, and delicious. Then mince your Garlic, add it in, and sauté for another minute. Add in your Water, Vegetable Stock, Black Pepper, and another pinch of Salt, bring the whole mess to a boil, and then simmer it for 30 minutes.

Yeah, you won't find that sucker...anywhere probably. Which
is a shame, because it's cuh-razy awesome.
Take the rest of your Butter, and melt it in a pan over medium-high heat. Cook your Sourdough Bread for about a minute, until it's brown and crispy, then flip it. Add your Cheese to one slice, and some onions you fished out of the soup to the other slice. Cook it until the cheese starts to get a little melty. Be careful not to burn the bottom of the bread. Combing the two pieces of bread into one awesome sandwich and keep it on the heat, flipping as necessary, until the cheese melts it into one cohesive unit of sandwich-ness. Then dip that sucker in your soup, and eat the crap out of it. Repeat as necessary until you run out of soup. Or sandwiches. Or sick days.


January 19, 2016

Baked Zucchini Fries

Is it just me, or do the Zucchini kind of look like they know
what's in store for them? Maybe I've been at this too long.
Ever since the dawn of civilization, when man first began to harness nature and shape the world around him, we've wondered what the hell to do with zucchini. Because they're everywhere. And they grow fast. Not patronizing aunt when you were a kid, "oh, you've gotten so big since I last saw you" fast. Zombie outbreak fast. So for tens of thousands of years we were stuck sitting in giant fields of roaming zucchini, trying to shove them under cheese, put them in soups, anything to thin the herd. Then, one fateful day, a solution was discovered. A way to make zucchini appetizing and stem their rampant growth. The word was spread, zucchini fries totally became a thing, and we never looked back.

Ingredients

4 Zucchini
4 Eggs
2 Cups Seasoned Bread Crumbs (You can either buy the pre-seasoned ones from the store, or add Salt, Pepper, Oregano, and breadcrumbs together yourself)
1 Cup Grated Parmesan cheese
1 Cup Flour
3 TBSP Ketchup
2 TBSP Mayonnaise
1/2 tsp Balsamic Vinegar

1/4 tsp Hot Sauce
1 Average Human Sized Pinch of Salt
Cooking Spray

The first thing you're gonna need to do is get organized. Seriously. Because this is one of those recipes where you're gonna dunk chunks of something into lots of different gunk, and you don't wanna go out like a punk. So dunk your Flour and Salt in one bowl. Lightly beat your eggs until they know who's boss, and toss them in another bowl. Then mix together your cheese and Bread Crumbs in a 3rd bowl. This won't really help much, despite what cooking shows tell you, but the fact that you're so organized will make you feel better. Like you at least tried your best. Which will be comforting when your hand is covered in an inch-thick coating of eggs and breadcrumb gunk all the way up to your wrist, and you can't really pick up the zucchini any more because it just keeps slipping off of your nonsense-coated hand, and your phone rings, and it's an important call, but you don't actually have the manual dexterity to answer the phone while your hands are this messed up. But more on that later.

Zucchini Fries! Technically they're baked. But they're
definitely awesome. Like Mitch Hedberg
Cut your Zucchini into roughly french fry shaped chunks. It's really all a matter of preference. If you like bigger fries, cut them bigger. If you like thinner fries, cut them thinner. It's not that complicated. Use your Cooking Spray to grease up 2 baking sheets.  In small batches, toss your Zucchini bits in the flour. Then in the eggs. Then in the Cheese and Bread Crumb mix. And then lay them on your pans. After half a Zucchini you'll have given up all hope of not making a huge mess. After 2 Zucchini you'll have given up all hope of a brighter tomorrow. Once you're done (allow approx. 15 minutes of work time, interspersed with 3 hours of sobbing and frantically trying to feel clean again), throw those suckers in a 425 degree oven for about 20 minutes. A little longer if your "fries" are thicker, a little shorter if they're super thin (Isn't logic fun?). While they're cooking, combing your Ketchup, Mayo, Balsamic Vinegar, and Hot Sauce to make an awesome dipping sauce. When they're done, eat the crap out of them. Bonus points if you manage to convince yourself that it's totally ok to eat an entire batch of them on your own because they're Zucchini, and they're not actually fried. I'm sure that'll totally work out for you in the long run.


December 15, 2015

Crackers

One thing I've learned so far in my crazy multinational adventuring, is that food can be expensive. And sometimes, even if you have the cash to shell out for that sweet sweet food, anything good can be hard to come by. But pretty much everywhere has some tasty weird gunk you can dunk a cracker into (I'm looking at you, hummus). Or some equally tasty nonsense you put on top of a cracker. Or whatever. Shut up. The point is crackers. They're the key to low-key food consumption on the go. Hung-over breakfasts way too early? Crackers. Car food while you're driving to an Irish castle? Crackers. Can't find your cache of local currency, but you'll be damned if you're going to an ATM when you know full well it's around there somewhere? Crackers. 

Ingredients:

1 Cup All Purpose Flour (Don't let the name fool you. It's pretty much only for food purposes. And sometimes paper mâché purposes.)
2 TBSP Olive Oil
1/4 Cup Water
1 tsp Salt
Extra nonsense (optional)

This is one of those blissfully simple recipes that barely even need to be written down. Mix all your ingredients. Got that? I know it was complicated, so I'll repeat it slower. Mix....all....your....ingredients. Take a rolling pin, or any cylindrical object you have lying around (I'm looking at you, wine bottle), roll your dough flat, and slap it on to a baking sheet. The thinner you get it, the crispier your crackers will be, so use your judgement. Then take out your pent up feelings of helplessness and frustration on your dough by repeatedly stabbing it with a fork. The dough didn't do anything to you, but don't let that stop you. 

Once you've stabbed your dough, sobbed in the corner, put the fork down,  and calmed the voices in your head, throw it (the dough) into a 450 degree oven for about 15 minutes. Cooking time can vary based on thinness (of the dough). Let it cool to room temperature, and then break it into little bits and take it on adventures with you! Or keep it whole, and eat a giant cracker on your own because all that dough stabbing apparently didn't fix all your issues. If you opted to make fancier chips, add whatever nonsense you like when mixing the ingredients. Seeds, garlic and fennel, thyme and rosemary, cheese and more cheese. Whatever floats your boat. Also, if you want a fluffier cracker, add 1/2 tsp of baking soda. This is all. Bye for now from Ireland!

November 3, 2015

Nachos

Artist's rendition: Me getting terrible restaurant nachos
Nachos are a sore spot for me. Because they're so so very awesome. But nobody ever makes them right, and it pisses me off. I don't know. I grew up with relatively easy access to awesome nachos, and while I know that not everybody shared that experience, they should at least be familiar enough with the concept to not microwave cheese on top of a bag of chips and try to sell it to me for $8.95. This has been more angry ranting and less fun banter with the voices in my head than usual, so let's all watch this to even out again. We all good? Cool. Back to nachos. The point of nachos, at least to me, is to be able to get a little bit of everything in each tiny bite. Not to have a giant disk of chips held together with congealed cheese that you have to rip apart, getting beans everywhere and grossing out everybody at your niece's Bat Mitzva, or Quinceanera, or whatever. The point is, your clothes are stained, your family is ashamed of you, your date left an hour ago, and it's the fault of sub-par nachos.

Ingredients:

2 15 oz cans of Pinto Beans
1 Standard Issue Onion
2 Cloves of Garlic
8 oz Cheddar Cheese
3 Jalapeños 
3 Cups Milk
1/3 Cup Vegetable Stock
3 TBSP Butter
3 TBSP Sour Cream
3 TBSP Flour (You need 3 of a lot of things in this recipe. Try not to let it worry you. It's in no way a hint to some sort of greater conspiracy affecting your life. Almost definitely)
1 TBSP Chili Powder
1 TBSP Olive Oil
2 tsp Ground Cumin
1/4 tsp Cayenne Pepper
An unspecified amount of salt
Tortilla Chips. All the Tortilla Chips (You can use your favorite store bought chips if you like. Or, if you have the will of the warrior, slice up some corn tortillas, fry them in oil, and then toss a little salt on them. Because it's super easy, crazy awesome, and your therapist said you need to try new things)

The first thing you're gonna need to do is make some refried beans. Because Nachos without beans, while technically pretty authentic, are just little edible plates of sadness. So chop up your onion, and throw it in a pan with your Olive Oil and an ASHP (average sized human's pinch) of Salt over medium heat. Saute` the onion for about 5 minutes, until it starts to get soft and golden. Add in your Garlic, Cumin, Chili Powder, and Cayenne, and Saute` another minute. Add in your Pinto Beans along with one more ASHP of Salt, and let it cook for another couple minutes before adding in your Vegetable Stock. Bring the whole mess to a boil, and let it go for another 5 minutes. Now it's time to get an authentic rustic texture, by taking the back of a spoon, and individually crushing your pinto beans for approximately 3 lifetimes (Bonus points if you use this as an opportunity to express some of the anger you've felt over the years at disappointing nachos, which led to a disappointing life). You want a thick and creamy consistency, but you still want whole beans floating around in there, letting people know what it is they're eating, and generally taunting you about the amount of time you've spend smashing beans compared to the amount of unsmashed beans looking up at you with their stupid bean faces.

Next you're gonna make a cheese sauce. Because of course the cheese should be in sauce form. Any other thought you might have had is blasphemy. Do you want to go to Nacho hell? No? Then stop asking questions about the cheese sauce. It's pretty simple. Essentially, you're gonna take the Flour, Butter, and Milk, and another AHSP of salt to make a thick Bechamel sauce. Too lazy to read that link, but somehow not too lazy to read this? Here's a brief overview: melt the butter in a pot, whisk in the flour slowly, and let it cook for a minute. Then add in the Milk slowly, whisking like crazy until your arm wants to fall off, but can't because of your dumb skin. Got it? Good. Chop up 2 of your Jalapeños, and throw them in the sauce. Then melt in your cheese, in a couple batches so that it actually incorporates and doesn't just end up in a cheesy mess on the bottom of your pot. Keep it cooking over low heat until it threatens to boil but isn't actually boiling yet, and then turn off the heat. Jalapeño Cheese Sauce!

Normally I say something like "they taste even better than
they look. Which is clearly impossible here. I'm gonna
go with "as good." They taste as good as they look. 
Now it's time for the assembly. It's important (To me. And now, because I'm forcing you, to you!) to be able to get a little bit of everything with each bite. So lay down a thick layer of Tortilla Chips on whatever you're gonna be eating these things off of/out of. Then drizzle a layer of your Jalapeño Cheese Sauce (!) over it, followed by a loose layer of your beans. Then add on another layer of chips, followed by another layer of beans, and another layer of cheese sauce. Why does the order of the beans and sauce reverse here? Because it's better that way. What's with all the questions? Do you want to go to Nacho purgatory? Then don't question the order of operations. Throw your Sour Cream down in the middle of your pile of awesomeness, chop up your final Jalapeño, and sprinkle it over everything. And that's all there is to some incredible nachos. And the best part is, you can make enough to share with your friends for the price of an individual portion from a restaurant. Just kidding! The best part is that they're awesome. Eat them all yourself until you get sick.