Showing posts with label Dessert. Show all posts

June 13, 2018

Strawberry Banana Bites

Dramatic reenactment: every picture on the internet ever
A while back a sensation took the internet by storm. To be fair, it's not all that hard to take the internet by storm. Cats and babies do it on a regular basis. But this happened to catch my eye. People make fake ice cream by blending frozen bananas with other flavorings. According to vegan hipster adherents to the trend, it's totally incredible and it tastes exactly like ice cream, and isn't nature wonderful, and by the way if you're not vegan you're basically a war criminal but worse. According to literally everyone else, it's kind of cool. And it tastes...like bananas. If you're expecting ice cream, don't get your hopes up, but if you like bananas then go for it. You see, the thing is, I do like bananas. But since the ice cream thing is a flop anyway, I figured why not blend it up with something that actually tastes good with bananas? And also why bother blending it all up in to an ice cream shape if it doesn't taste like ice cream? Also, I may not have a blender.

Ingredients:

4 Bananas
1 lb. Strawberries

Some of the more mathematically gifted amongst you may have come to the realization that there's not a whole bunch going on in the ingredient department. That's because there doesn't need to be. Bananas are delicious. So are strawberries. They taste great together. End of story. Except I haven't told you how to make them yet, so more like beginning of story. End of the intro of the story? All I know for sure is that the story begins with bananas. As they ripen, bananas turn from green to yellow, and finally to brown. If you leave them too long, to black. If you leave them way too long, probably back to green again. This is important for us to know because bananas also get sweeter as they ripen, as the starch in them is broken down in to fructose. As you may recall, our recipe doesn't have much in the way of ingredients, so we want to make the ones we have count. This is all a long drawn out way of saying that you should make sure to use ripe, sweet bananas. There shouldn't be any green on them, and you should have some brown spots marring the yellow of your peel. Then wash your strawberries, lovingly chop off their green leafy heads, and throw them in a bowl with your bananas.

So what if I like it when my food tries to high five me?
Take your favorite implement of destruction, be it forks, your bare hands, or miscellaneous, and mash the crap out of your bowl of fruit. It doesn't need to be perfectly smooth, but you shouldn't have any major lumps anywhere. Think of it like jazz. If it's too rough, nobody will be able to appreciate the awesomeness. If it's too smooth it loses all of its character and becomes flat and uninteresting. Got it? Good, now let's never speak of this analogy again. Throw that nonsense in the freezer, and then take it out again after about 45 minutes. Mix it together again, breaking up any clumps and crystallization that may have formed. Then splorp it in to some ice cube trays, or the silicon molds you may have bought during your last adventure that you still aren't sick of. Freeze them until they're solid and then enjoy. They're delicious, fairly healthy, and technically frozen which makes them perfect for absurdly hot days. Speaking of which, it's supposed to be in the mid 90s in this weekend in Chicago. So I guess what I'm trying to say is, if you let me stay at your place this weekend, I'll totally bring you frozen fruit mush. Chicagoans need not apply. 

May 30, 2018

Peanut Butter Frozen Yogurt Bites

dramatization
It's that time of year again. The time of year when the ice has thawed, the flowers have bloomed, and the sun does its absolute best to kill us and burn our corpses in to crispy bits. I enjoy the fun added benefit of having what early settlers to this country referred to as "no stupid air conditioning in my stupid apartment," so I get the full brunt of this. The point is, at times like this it's important to find small bits of comfort and relief from the oppressive heat to try and distract us from the grim reality of our impending doom. Being weirdly kind of healthy is just a fringe benefit.

Ingredients:

1 cup Greek Yogurt
2 TBSP Peanut Butter (I used a natural, no sugar added kind of peanut butter because it just tastes like peanuts, which lets me control the final flavor better. But use what you like)
1.5 tsp Honey
1 tsp Vanilla Extract

So, as those of you who haven't been blinded by the sun may have noticed, there's not a whole lot going on in terms of ingredients here. This is for a couple of reasons. Firstly, this is a recipe designed to give relief from the heat. Spending hours dealing with a vast array of ingredients in a hot sticky kitchen isn't conducive to that. Secondly, this is a basic version. Delicious, but you can totally add optional extras, like some chocolate syrup, hazelnut spread, candied almonds, dulce de leche, or nutmeg. Definitely not all of them together. Probably. The point is, make these. Enjoy them. But don't be afraid to add in a little something extra once you've got the hang of it. That said, the first thing you're going to need to do is take all of your ingredients, splorp them in to a bowl, and mix them together. Seriously, that's like 95% of the work. Again. Heat. The less time I spend not lying on my bed underneath a ceiling fan, the better.
Don't let the cool shape distract you from the deliciousness

Now it's time to contemplate containment vessels. The idea is to get bite-sized bits of frozen refreshing goodness. I happen to have just come back from a trip with some cool silicone molds. If you didn't, you can make weird shapeless blobs by throwing some wax paper on a baking sheet and spooning your yogurt mixture on to it. Or, you could just use an ice-cube tray and make life easy on yourself. In any case, throw those suckers in to your freezer for at least 45 minutes, though an hour and a half would be better. Whenever the heat gets to you (so, you know, all the time), grab one, pop it in your face hole, and forget about life for a while. Enjoy, and if you survive I'll see y'all next week!

January 9, 2018

Peanut Butter and Jelly Cookies

These cookies are delicious. Dancing strangers in banana
suits will try and steal them. Don't let this happen. 
Peanut butter is interesting stuff. It's a key ingredient in delicious spicy soups and tasty sweet desserts alike. Also people slather it on bread along with jelly and call it a meal. There isn't technically anything wrong with this. The flavors go, it tastes pretty good, and it's filling. Also, it's super easy to just slather assorted goops on to bread and call it lunch for your kids, and easy is a valuable thing when you're a parent. I've seen parents. They need all of the help that they can get. Still, given peanut butter's versatility, it seems like we're not getting everything that we can out of this flavor pairing. Because peanut butter and jelly is straight up delicious. We don't think about it much because we associate the flavors with kids, and we tend to dismiss everything about kids because it helps us ignore how jealous we are that they don't have to pay rent. 

Ingredients:

1 Cup Peanut Butter (Now ordinarily when you're cooking you'd use smooth peanut butter. And of course, this is no exception.)
3/4 Cup Brown Sugar
1 Stick Butter
1 Egg
1 typically-sized human's pinch of Salt
3/4 Cup Flour
1 tsp Vanilla Extract
1/4 tsp Baking Powder
1/4 tsp Baking Soda
Raspberry Jam
More Sugar!

The first thing you're going to need to do is wait. Like, forever. Because you need your butter to be room temperature, and warming up to room temperature isn't something that butter takes lightly. It's got to take some time and really learn about itself, maybe travel the world and live a little bit, before it makes that kind of commitment. Eventually, when your butter is ready to settle down, punish it for its indecisiveness by creaming your brown sugar right in to its face. Sure, that may sound violent. But "creaming" sugar in to butter is really just rapidly beating the crystalline structure of the sugar in to the butter so that it rips innumerable tiny holes in it which trap in air. Anyhow, once you're done torturing your butter for toying with your emotions, beat in your peanut butter, egg, and vanilla. In another bowl, whisk together your flour, baking soda, and baking powder, along with your pinch of salt. Slowly add your flour mix in to your peanut butter glop, and stir until it's combined. Grease up a baking sheet, and start portioning out some cookies. Grab about a ping-pong-ball-sized chunk of your cookie dough, and roll it in some sugar until it holds its shape well. Put it on your baking sheet, and repeat until you're out of dough. Bear in mind, these things are going to be light, fluffy, slightly crumbly cookies, and as such they'll need some room to spread out when cooking. Overcrowd your baking sheet at your own peril.

Not pictured: The many cookies I ate before remembering
that I needed to take some pictures.
Take your thumb, and lightly press down on to the cookie ball in order to slightly flatten it and make a little well in your cookie. If you don't have any thumbs, do your best with assorted spoons or mannequin hands, or whatever's lying around. Throw those suckers (the cookies) in a 350 degree oven for about 35 minutes, when they darken in color and start to hold their shape. Now let's talk filling. For the most delicious results, take your cookies out of the oven half-way through their cook time, fill them with your raspberry jam, and throw them back in the oven for the remainder of the time. For the prettiest results, let your cookies finish cooking before filling them up with your jam. It's up to you whether you value form or function more. And, just to be clear, it's going to be delicious either way. Just one way will be more delicious, and the other way will be more the wrong decision to have made. I will say this though: if you decide to make the right decision and go for maximum deliciousness, bear in mind that the jelly is hot when it comes out of the oven. So even though you're tempted by the obvious awesomeness, try and resist the urge to just bite in to one because you'll totally burn yourself. With hot sticky jam, which will stick to you, and then keep on burning you. We both know you're going to do it anyway, but at least now you've been warned.

October 31, 2017

Sugar Cookies

Anything can happen on Halloween. From London to Idaho.
It's Halloween time again, full of festivity, cheer, and little kids dressed up in costumes that cost more than the price of all of the candy they'll get from trick or treating. Also angsty teenagers who vandalize people's houses because they're angry that society has deemed them too old to trick or treat. It's a fun time! So make sure to start partaking in the traditional Halloween activities, such as extortion, alcoholism, and protesting Halloween because it was originally a pagan holiday (So was pretty much every other holiday, but let's pretend we don't know about that to help fuel our outrage). And nothing's quite as in the spirit of the holiday as parents freaking out over the contents of the homemade treats that some creepy neighbor gave out, despite the fact that pretty much nobody has ever tampered with Halloween candy. Who are you to deny them this holiday tradition?

Ingredients:

2.75 Cups Flour
1 Chicken Egg (Raw, by preference)
1 Cup Sugar
1 Cup Butter (For some reason, there seems to be some sort of holy war concerning butter among people who write recipes. Some people measure it in sticks. Others in cups. Neither of them are willing to admit that the other side exists, never mind how much of one equals the other. Our nation needs some unity and healing. One cup equals two sticks of butter.)
1.5 tsp Baking Powder
1 tsp Vanilla Extract
1 small human's pinch of Salt

Optional Frosting!

The first thing you're gonna need to do is get in the holiday spirit. If you're a strict originalist, you can accomplish this by harvesting your crops, dancing around a bonfire, and carving a turnip. If you're not that odd mix weirdly fascinating and incredibly boring, just drink too much at a party and confess romantic feelings to someone who doesn't reciprocate them. Now you're ready to make some cookies. Start by creaming your sugar and butter (mixing the crap out of them so that the sugar crystals tear into the butter and make little air pockets, for those of you who haven't made my chocolate chip cookies before) in a bowl. Then mix in your egg and vanilla and set it aside. In another bowl, whisk together your flour, baking powder, and salt. Then take your dry ingredients and slowly mix them into your wet ingredients. It's best to work in batches so that you can incorporate all of the dry stuff into the wet, and so that flour doesn't fly out of the bowl dousing everything in your kitchen in a fine white powder. This is a pretty thick cookie batter, so for those of you mixing this manually, by the last batch you might need to abandon your whisks and just mix it with your hands despite the very real risk that you may need to lick batter off of your fingers.

Pumpkin sprinkles added to remind you that pumpkins exist.
Once your dough is formed, roll it into balls and put them on a greased up cookie sheet. You should get about 24 out of this recipe. If you're off on that number by one or two it's no big deal. If you're off by 5 or more then re-roll your cookies. If you're off by 10 or more, re-think some major things about how you live your life. Now, personally, I like a big fluffy cookie, so I leave mine as balls. If you prefer a thinner, crispier cookie, flatten them down with a weird gadget you can buy for about 30 bucks. Or, you know, with your thumb which is usually free. In any case, throw those suckers in a 375 degree oven for 10-18 minutes, depending on the thickness of your cookies. Pretty much, about 5 minutes after your house starts to smell delicious, take them out. Make sure to neurotically check on them every couple of minutes to really give them that homemade touch. When they're done, they should just be starting to brown around the edges. Now you've got some delicious homemade cookies to freak out the neighbors! They (the cookies) have got a mild sweetness going that's super awesome for other days, but this is a holiday predicated on threatening your neighbors into giving you sugary treats. So, once your cookies are cool, feel free to douse them in chocolate frosting. And since we've talked a lot about giving these cookies to kids, I'm not going to tell you to add a little bit of bourbon into the frosting. So don't even think about adding in specifically two tablespoons of bourbon into one standard sized can of frosting. See you next week, assuming you haven't been egged into oblivion!


September 19, 2017

Apple Pomegranate Crumble

One of these things is not like the other, one of
these things is 90% seeds.
So the new year is upon us. Not the fun new year at the end of December that starts full of excessive alcohol consumption and excitement, and ends in hilarious tragedy or boredom. The Jewish new year, which is pretty much a time for merriment, introspective self-evalutation, and eating delicious foods until we can't lift our arms to eat any more, at which point a trained staff of hired help will continue to stuff food down our throats until we (or they) pass out. Also, there's a more recent tradition to eat some specific foods for the symbolism, such as pomegranates for a multitude of blessings, or apples and honey for a sweet year. There are like 100 more of these. I won't bore you or me by listing them. Especially since I've already taken this "Jewish Traditions 101" class to its intended conclusion, which was saying the words "apple" and "pomegranate."

Ingredients:

4 Granny Smith Apples
3 Honey Crisp Apples
3/4 Cup Flour
3/4 Cup Oatmeal
1/2 Cup Brown Sugar
6 TBSP Butter
1.5 TBSP Grenadine (Real grenadine. Made out of pomegranates. If you can't make or find it, use Pomegranate Molasses)
1 TBSP Cinnamon
The juice from 1/2 a Lemon (How you convince the lemon to give you its juice is between the two of you, however bribery is the preferred method.)

The first thing you're gonna need to do is skin your apples. This may seem like adding insult to injury after having climbed up into their ancestral homes and kidnapped them by the bushel. But it actually serves the very real purpose of being a warning to the other fruits that you're not to be trifled with. Also something about the skins not softening when the flesh does and creating a tough dish to eat, but that sounds like heathen nonsense to me. Now here's the thing. The second that the flesh of an apple hits the air, it starts to turn into disgusting brown goop. The entire process takes about 3 minutes, so it's time to work fast. As you peel each apple, take a knife and cut it off of the core. Then thinly slice it and toss it in a bowl with a splash of your lemon juice. The lemon juice helps keep the apple from falling completely apart. Sort of like an apple version of a security blanket, a savings account, or functional alcoholism. Repeat until you're out of apples, and then add in your grenadine, cinnamon, and any lemon juice you've got leftover. Stir that sucker up and throw it into a 9x13 pan preferably, but really just any oven-safe containment vessel you have that can hold it. Now the time has come to deal with the crumbly part of this crumble.

Looking at this, all I can think of is that I really need to get
me some of those servants to stuff food down my
throat that I made up in paragraph 1.
Whisk together your flour, oatmeal, and brown sugar. Then chop up your butter (Or butter substitutes, for those intolerant folk who can't abide by dairy) into little bits and add it in. Now it's time to "cut in" the butter, which essentially means to squish it thoroughly into the flour mixture until it incorporates into little crumbs of deliciousness. I've been advised by obvious lunatics to use something called a "pasty cutter" for this task, but I've found that my hands work better and faster. For those of you who don't have access to my hands, use your best judgement. Take your crumbly crumbs and sprinkle them on top of your apple mixture. Then toss that sucker into a 350 degree oven for about 40 minutes, once it gets golden and awesome looking. Then just sit there and let it taunt you while you wait for your guests to arrive. Make sure to ask them to bring dessert, because there's no way this thing is lasting until then.


August 15, 2017

S'mores Cookies

I think my favorite part about this picture is the pierogi stand
towards the back, because it seems so out of place.
It's kind of funny. Last week I worked so much that I didn't have time to post. A non-stop stream of 12-hour shifts, it seemed. This week, I'm working even more because apparently my current employers don't understand the concept of a regular schedule, but that's besides the point. The point is that, despite being overworked to the point of exhaustion/thoughts of sweet sweet vengeance, I managed to make it to a county fair last week. It's one of those things I've always heard about and seen on TV, but never actually experienced myself. And it was pretty awesome. People playing the stupidest games of "chance"you can imagine, rickety rides that were clearly put together wrong by the carnies running them, and food stands selling the most ridiculous foods you can imagine. Deep fried everything, random bits-'o-beef, and even one place that just called themselves "hot Wisconsin cheese," which sounds wrong on at least 3 levels. So I got to thinking about random foods you could make in weird ways. And since s'mores are never far from my mind during the summer (Or winter, or fall. Don't ask about spring.), I got to thinking about how to combine all of that s'morey goodness into something easy the snack on that doesn't require you to have a campfire immediately available. I also got to thinking that I'm avoiding the state of Wisconsin for a while.

Ingredients:

2 sleeves Graham Crackers
1 cup Powdered Sugar
1 cup Chocolate Chips
1.25 sticks Butter
2 Eggs
1 tsp Vanilla
1 largish human's pinch of Salt 
Mini Marshmallows

The first thing you're gonna need to do is stop drooling. Because let's face it: even the concept of S'mores Cookies is enough to set off a pavlovian reaction in any creature with taste buds and the capacity for memory. Once you've got your various excretions under control, unceremoniously shove your graham crackers into a ziploc bag and crush the life out of them with a rolling pin, frying pan, or series of well placed karate chops. Now take a large bowl and throw your butter, which should be room temperature, into it along with your powdered sugar. Realize that you forgot to let your butter warm up, and wait the approximately 3 days that it takes for it to do that. Then beat it together with your sugar until it forms a cohesive paste that already kind of smells awesome. Then take the remains of your Graham Crackers and mix them in. Once the mix gets cohesive, and kind of sludgy, mix in your eggs one at a time, and then your salt and vanilla. Once the whole thing comes together, gently stir in your chocolate chips, and then scoop the cookies out on to a baking sheet (about a teaspoon of cookie dough for each cookie, and leave room because these suckers will totally expand outward trying to escape the terrible heat of the oven you shove them into. Isn't baking fun?)

Not pictured: me writhing on the floor at the taste explosion
going on in my mouth after eating these.
Now comes the fun part, and by "fun" I mean "the heavy burden of decision-making." So I tried these suckers a couple different ways. I tried stirring the marshmallows into the batter, which didn't even kind of work well. Then I tried partially baking the cookies and then shoving marshmallows on top for the second half. And finally I tried completely baking them, then adding marshmallows on top and shoving that whole mess under a broiler for like 30 seconds. The last two ways both worked pretty well. I'd recommend either really, although I think I slightly preferred the half-baked, marshmallowed, and then rest-of-the-way-baked version. In any case, the cookies bake in a 375 degree oven for about 10 minutes. So make them however you choose. Or follow my advice and make them the way I said I prefer. You know, because you ostensibly came here for advice on how to make these things in the first place. Or you came here by mistake thanks to my deceptive advertising. Either way, you're welcome.


August 4, 2017

No-Bake Mint Cheesecake

Mint leaves: making nature kind of worth the hassle
For a long time, I considered no-bake cheesecakes to be in the same classification of hipster-nonsense as waxed moustaches, drinking gin out of mason jars, and judging others for not living a "sustainable" lifestyle while you yourself are living off of a trust-fund. Not much has changed. All right, maybe it's changed a little bit. It takes forever to set up in the fridge. That's a lot of free time. Which can totally be used by unemployed hipsters practicing their ukelele solos for the open mic next week, but can also be used by people who have actual jobs, and not that much free time. Given the right preparation, this can totally be the dessert version of a crockpot dinner. Just get it going in the morning, and enjoy it when you get home at night. I, for one, am totally in favor of taking the hipster nonsense and using it against them like that. Now I just need to find a productive use for kale.

Ingredients:

16 oz. Cream Cheese, softened (You "soften" cream cheese by letting it get to room temperature. You do this so that your cheesecake doesn't have gross lumps running through it, causing your friends and family to rightly shun you at all social gatherings)
14 oz. can Sweetened Condensed Milk
2 pouches Graham Crackers 
1 cup Mint Leaves
1 cup Sour Cream
1/2 cup Unpacked Light Brown Sugar (Typically, brown sugar is measured in one of two ways. "Packed," meaning you measured it out and then smashed it down to take up less space for no discernible reason, and "unpacked," meaning you decided that just measuring it out once like a normal person was all you had time for today)
1.3333333333 sticks Butter
The juice from 1/2 a lemon
Free time

The first thing you're gonna need to do is get rid of that uneasy feeling you have in the back of your brain about making a no-bake cheesecake. I get it. Theres something vaguely unsettling about a cooked food that you don't actually...well, cook. But fear does not exist in this dojo, so get over it. Now that your existential worries have been quenched under a torrent of repression and cautious optimism, take out those uncomfortable feelings on your graham crackers by crushing them in to tiny bits as a warning to the other ingredients. Mix in your brown sugar, and then get to melting your butter. Add your melted butter in with your sugar and the crushed bodies of your graham crackers, and stir it all together. Take about 2/3 of your mixture and dump it into a springform pan (A springform pan is essentially a pan with a clasp that you can release to loosen the sides and take it off. If you don't have one, you can use a pie tin and things will still be mostly ok. But your parents may not love you anymore. I don't make the rules, I just dispassionately inform you about them). Pack down your graham cracker sugar sand into a firm layer along the bottom, and throw that sucker in the fridge while you work on your cheesecake guts.

Bonus points for failing to slice all the way through the crust,
making it impossible to the see the bottom crust deliciousness
So this next part is gonna be complicated. You ready? Ok. Take the rest of your ingredients and...mix them together. Sure, you've gotta choppity chop your mint first, and if you want to make your life easier you'll start this whole mess by mixing the sweetened condensed milk slowly into the cream cheese before adding everything else in. But that's really it. Just mix it all together. Then take your crust out of the fridge, slap that mess on top of it, and top it off with the rest of your graham cracker mix. Then throw that sucker in the fridge for...a long time. I mean a long time. At a conservative estimate, I'd say 2 presidential administrations. You will check on it multiple times, and each time be shocked that it's not ready yet. I just warned you about it, but you will still do this. Eventually it'll set up, and it'll be solid enough to cut pieces of and eat pretty much like a real cheesecake. And it kind of is a real cheesecake. Or, at the very least, an extremely thick milkshake. Enjoy!


November 15, 2016

Mint Chocolate Brownies

Mount Vesuvius of sugar, courtesy of my sugar-free sister
So my sister has been in town, which is something of a rarity. In honor of this, it seemed like a good idea to steal a recipe from her instead of making one up myself. Maybe because of family, and togetherness, and all of that stuff that I learned on the "very special" episodes of 90's sitcoms. Maybe because this way I'll have this blog post to always remember her visit by. Maybe because it's easier than actually making one up myself. It should be noted that my sister is a crazy person who, a long time ago, stopped eating sugar, and white flour, and red meat, and pretty much all of the other things that make life worth living. Which is why it's hilarious to me that the first ingredient in this recipe is a buttload of sugar.

Brownie Ingredients:

3 cups Sugar (Told you)
1.5 cups Oil
1.5 cups Flour
1 cup Cocoa
6 Eggs
1 TBSP Vanilla Extract
1 tsp Baking Powder
1 tsp Salt

Frosting/glaze Ingredients:

1 lb Powdered Sugar
1/3 Cup Oil
6 TBSP Butter
3 TBSP Milk
1 TBSP Mint Extract
1/2 lb Bittersweet Chocolate

The first thing you're gonna need to do is make some brownies. To start, beat your eggs into submission until they stop judging you for how much sugar and fat you're about to consume. Then, take the oil, vanilla, and sugar, and whisk them into the eggs, like some sort of awful egg foie gras. Then take another bowl, and whisk together your flour, salt, baking powder, and cocoa. Bear in mind that powdered cocoa was designed by a mad scientist hell-bent on covering everything you own in a layer of dust. So maybe take some precautions, like using a super large bowl, wearing a smock of some kind, or cooking at someone else's house. Once your flour/cocoa mixture is finished, along with your friendship, slowly add it into your sugary egg-glop in a couple batches, each time fully incorporating it into a homogenous chocolatey goop before continuing. Grease up two 9x11 pans and throw them in a 350 degree oven for about 40-45 minutes, when they're not goopy in the middle any more. Do not just dump it all into one big pan and expect things to generally kind of work out. Because it won't. And your brownies will be burnt on the outside and raw in the middle. And you'll be sad. And I'll be laughing because for once it won't be me.

And that is the true meaning of christmas. 
Once your brownies are out of the oven and cooled down, it's time to make some frosting. Mix together your powdered sugar, oil, milk, and mint into a sugary minty ooze. You can totally add in some green food coloring here just to let everybody know that you're super classy, and also that mint leaves are green. Or not. In any case, splorp your minty nonsense onto your brownies and spread it out evenly. Then heat up your bittersweet chocolate and butter, either in a microwave or on the stovetop (pro-tip: If you're cooking on a stovetop, put it in a pot first to make your cleanup easier). Stir until the chocolate is smooth, and then dump it on top of your frosting which is on top of your brownies, which are in a pan that's probably on top of a counter of some kind. Let it cool, then cut into it and enjoy. Normally I'd say something at this point about how you can totally not wait for it to cool and just dig in, burning away your hands, mouth, and the shameful feeling of having accidentally cocoa-coated your friend's home and loved ones. And, of course, today is no exception.


September 13, 2016

Caramel Cocoa Puff Treats

It kind of makes you wonder what's in their "non-real" cocoa.
I've thought long and hard about the issue that's plaguing our one-great nation. Namely, why I seem bored, or at least unenthused with Rice-Krispy treats. We can all rest easy, because I think I've found it. The weak link in the marshmallowy chain that makes them so...uninspiring. It's the Rice Krispies. They're puffed up bits of rice. That's the worst thing I can think of. It's like taking air, and wrapping it with stale, less flavorful air. And sure, the argument could be made that their bland taste and small flat shape makes them the ideal vehicle for big marshmallowy flavor and texture. If you hate joy and freedom. I don't buy that we have to start off boring to end up with balanced awesomeness. We can go big from the start, and ride that wave of deliciousness as far as it'll go. Or until the diabetic coma sets in. Either way.

Ingredients:

2 Cups Cocoa Puffs Cereal
20 oz. Marshmallows (Some people might say this is too many marshmallows. Some people might point out that you'll end up with more marshmallow than cereal, and cereal is supposed to be the key ingredient. Some people are fools.)
1/2 cup Toasted Hazelnuts 
1/2 stick Butter
2 oz. Caramels (You can totally make your own caramels. Just make the caramel from this awesome recipe, except let it get to about 300 degrees, and when you stir in the butter, also add 1/4 cup of cream. Or you could go to literally any grocery store and buy caramels.)

The first thing you're gonna need to do is toss your cocoa puffs in a bowl along with your Hazelnuts. Then it's time to prep your caramels. When I first started trying to prepare this recipe, I started chopping my caramels into tiny bits before adding them into the cocoa puff bowl (The Cocoa Puff Bowl would be a great name for a rap album from that brief period in the early 2000's when rap stopped taking itself way too seriously, and was ok being goofy and making fun of itself). Which mostly resulted in a sticky mess all over my knife, hands, and very soul. Then I learned that I could totally just rip off little bits of caramel, roll them into balls, and toss them in with the cocoa puffs, which had the result I wanted, and was way easier. So enjoy that tip, that rare glimpse straight through to my mind-brain. Or ignore it and spend all day and night cleaning caramel off of your everything. Either way.

Sure, it's a loose assortment of cereal, nuts, and caramel held
together by marshmallows, but I'm sure there's a down side
Melt your butter over medium-low heat, and then add your marshmallows in. Stir pretty constantly. At first you're gonna think something along the lines of "hey! The butter is keeping the marshmallow from sticking to the pan! This cleanup isn't going to be as bad as I thought!" This is a trap, to lure you into a false sense of security, just to crush your hopes later. But more on that later! Right now, you're stirring your marshmallows until they lose all distinct marshmallow shape, and are pretty much just a viscous white ooze, glopping around in that pot. Turn off the heat and take your bowl of cocoa puffs n' friends, look deep into their soul and then just toss them in the ooze. Stir all of that nonsense together until it forms a goopy and unmanageable wad. Grease up a 9x13 pan, and dump your cereal wad into it. Use your hands to press it down and into the corners. Yes, this will get your hands messy and sticky. Get over it. Stick the whole thing in a fridge for about 1/2 an hour to cool down and set. Then cut it into pieces, and devour. Seriously. Normally, I'd throw in something about how you could just eat it all on your own and hate yourself, or something. But these need to be shared. The word needs to get out. So now you have homework. Enjoy!

August 23, 2016

Chocolate Truffles

I was gonna write about me being a terrible Willy Wonka, but
got distracted by that oompah loompah who looks exactly like
Neil Patrick Harris.
Well, that's it. The olympics have ended. Which means that you've spent 17 days wishing you were in better shape than you were, all while sitting on your couch and eating chips directly out of the bag. It also means that the Paralympics are about to start! Which means you'll get excited for a second thinking that you must be a better athlete than some of them! That'll last 5 seconds, when you'll realize that overcoming crazy physical adversity to still attain a crazy high level of achievement in a sport is something you could never in a million years do. The bad news is, you're totally right. A couch dwelling chip-eater like yourself isn't destined for athletic greatness. The good news is, that means you can pretty much stay on that couch forever, and eat whatever you want. Even balls of chocolatey goodness topped with deliciousness, and rolled into a bite-size ball of awesomeness! Or take-out. Whichever's faster, because the opening ceremony is about to start.

Ingerdients:

1 lb. Dark Chocolate
1 cup Heavy Cream
2 TBSP Butter
1/2 tsp Vanilla
1 largish-sized human's pinch of Salt
Toppings!

The first thing you're gonna need to do is chop your chocolate into oblivion. You don't want any large chunks. This will get a never ending supply of chocolate smudges conveniently stuck to your knife, cutting board, body, clothing, and walls. You may have to move. But you'll end up with little chocolate bits, which you're gonna plop in a glass bowl. Now take your cream, butter, and salt, and bring all that nonsense just barely to a boil. Take it off the heat and immediately dump it on top of your meticulously melted chocolate. Whisk the crap out of your rapidly melting chocolate until the whole thing is smooth and uniform. Add in the vanilla, and stir lightly to combine. And that's it! Except totally not! Now we play the waiting game. Shove your bowl of chocolate goo (Ganache, to you people who either are culinarily inclined or have watched way too much food network) in to your friendly neighbor refrigerator, and let it cool for about an hour.

You may gain 3-5 delicious pounds by looking at this picture.
Line a flat surface with parchment paper/ Take your somewhat cooled goo and spoon a shapeless blob, roughly a tablespoon large, onto your parchment paper. Repeat until you run out of goop. Take your flat surface full of shapeless chocolate blobs, and shove the whole thing back in the fridge for another hour. (You may have noticed that this recipe has a whole bunch of waiting around time. I haven't noticed, because I'm an experienced cook-type person, and as such may-or-may-not have consumed a large quantity of culinary-grade liquor). Take your tray of solid goo balls out of the fridge, and roll them into vaguely spherical spheres. Any part of you and your home that wasn't previously covered in chocolate will be now, but that's cool because you're moving anyway. Now it's time to contemplate toppings. Because you have pretty much unlimited options. Just fill up a bowl with a topping, and roll a truffle in it until you, surprise, get chocolate all over everything! Stick the truffles back in the fridge for a couple minutes, and try again. I went with four toppings, sprinkles, cinnamon and sugar, cocoa powder, and crushed peppermint candies. But the sky's the limit! Are my flavorings better than yours? Sure, but don't let the fact that you haven't outclassed a professional (Gross exaggeration) at their own game get you down. You've got the Paralympics for that. 

August 9, 2016

Orange Chocolate Cake

I can do that, but I don't wanna
The Olympic Games are in full swing right now. Those of us who care are spending our days watching the world's best athletes perform astounding feats of athleticism to try and bring home medals for their home countries. Also, synchronized diving is happening. Because while there are many Olympic events and incredible ordeals that you can look on with awe and wonder, some of them are really ridiculous. Who decided that ping pong is an Olympic sport? I don't know, but they were obviously smoking something. The point is, however, that we're all watching incredible athletes perform at the highest levels in front of the entire world. And watching something like that isn't really complete unless you're stuffing your face with cake.

Ingredients:

2 cups Flour
1.5 cups Sugar
1 Orange
3 Eggs
1/2 cup Butter
1/2 cup Milk
1 TBSP Baking Powder
1 tsp Vanilla Extract 
1 average human sized pinch of Salt
Powdered Sugar
Cocoa Powder
More Milk!

The first thing you're gonna need to do is develop the unrealistic opinion that you could totally do what those Olympians on TV are doing if you just started working out a little more. Once you've got that taken care of, you're in prime cake-gorging mode. So whisk together your salt, flour, and baking soda in a bowl. Then take another, even better bowl, and throw in your butter and sugar. Whisk the crap out of them to cream your butter ("creaming" butter is a concept we've dealt with here once or twice. Basically, it means violently whisk together your sugar and butter, forcing the sugar crystals to rip into the unsuspecting butter until the whole thing turns into a smooth sludge. This works best with room temperature butter, but if you want to be a rebel, use cold butter, and end up sobbing in the corner over your life choices, be my guest). Once your butter is creamed to death, whisk in your eggs, one at a time. Zest your orange, and chop the zest into itty bitty zest bits. Then add them in to your butter and egg mixture, along with the juice from the orange, your 1/2 cup of milk, and your vanilla. If you're smarter than I was, save a little bit of zest for later, to sprinkle daintily on top of your cake like you're fancy and have tuxedo pajamas, which apparently are actually a thing somehow.

Remember, if you watched people exercise while you ate it,
it totally has 1/2 the calories. 
Once you've finished mixing your second bowl, googling tuxedo pajamas, and subsequently buying tuxedo pajamas (you're welcome), add your dry ingredients into your wet gloppy ones in 3 equal batches, taking time between each batch to whisk everything together and freak out over whether your batter is getting too thick or not. Once you're done, grease up 2 round 9-inch baking pans, cover your grease in a thin coating of flour, and distribute your sludgy batter equally between the two pans. Throw them into a 350 degree oven for about 40 minutes. While you've got 40 minutes or so to kill, it's time to think about some frosting. Because shoving unfrosted cake into your mouth while watching fantastic feats of athleticism happen is un-American. Or maybe partially American. Like Guam. Don't be Guam. So take 3 parts powdered sugar, one part cocoa powder, and one part milk, and mix it together. The actual amounts don't really matter. Make as much or as little as you like on your cake. But keep the proportions 3 to 1 to 1 if you want it to taste right. Now that your kitchen is a powdery mess, take your cakes out of the oven. Slather frosting on top of each layer, and if you're already fancy enough to be rocking those tuxedo pajamas, add the layers on top of each other to make a double decker cake to shove in your face hole in a flurry of sweet orange flavor, denial, and calories. Happy Olympics!

July 19, 2016

Brownies

Artist's rendition: Me at every party
Brownies hold a special place in my heart, and several other major organs. They're the perfect combination between a cookie, a cake, and licking delicious raw batter off of a mixing spoon, FDA-be-damned. You can eat them plain, or add various toppings like fruit, whipped cream, or caramel sauce. And yes, your mouth just watered when you read that, yet again confirming Pavlov's famous experiment where he annoyed the crap out of his neighbors. But let's be honest. Your mouth started watering back when you first read the word "brownies." Because brownies are special. They're exciting, and awesome, and if you're lucky enough to have some in your life don't let them go. If you have to stab other partygoers with a fork, so be it.

Ingredients:

1.75 Cups Sugar
1 Cup standard-issue Flour
2/3 Cup Vegetable or Canola Oil
2/3 Cup Cocoa Powder (It's important to note that Cocoa Powder straddles the fine line between "powder" and "gas." It will get everywhere if you're not carfeful with it. It probably will regardless, but at least this way you have the sweet illusion of control.)
4 Eggs
1 tsp Baking Powder
1 tsp Vanilla Extract
1 tsp Peppermint Extract
1/2 tsp Salt

Before we get started, it's important to note that this is part of a number of recipes I got from my mom and then gussied up (from the latin GUH, to blatantly steal, and SEED, to alter very slightly to assuage guilt). Why is it important to note this? Mostly so that I don't get sardonic phone calls all this week. The point is...well, I don't remember what the point is, which makes this a good time to start the actual cooking part of the recipe. Whisk or sift together your flour, baking powder, and cocoa powder. Allow 3-5 minutes to adequately curse at your cocoa powder, and at the stylish cocoa powder stains covering everything you're wearing. In another bowl, because we're high class snobs like that, whisk together your eggs, and beat them until they're light and a little fluffy, so you know they're no longer a threat. Then add in your sugar and beat it for about a minute, just to show it who's boss and keep it from getting ideas.

Words fail me. All I can say is: you're welcome.
Add the rest of your ingredients, including your cocoa mixture, into your egg/sugar ooze. It's gonna get pretty hard to stir. It's gonna be a thick gloppy mess. That's how you know it's good. Take a pan and oil it up, or cooking-spray it up, or whatever. How large of a pan should you get? That's really up to you. The larger the pan, the more spread out the brownies will be, which means they'll be crispier, and cook faster. Which is great if you hate joy and liberty, and love things like kicking puppies and siphoning gas out of the school-buses at the orphanage. The rest of us know that brownies are supposed to be gooey and thick and delicious. So we're all gonna take a 9x13 pan, lube it up, load it up with our brownie sludge, and bake that sucker at 350 degrees for 40 minutes. We might even say that this time we're not gonna eat the leftover batter off the spoon and/or bowl. But we are lying.

March 8, 2016

Blueberry Muffins

I prefer wild blueberries over the ones you see in zoos
It was a rainy and dreary morning, so I made muffins. I feel like that needs some explanation, so this one time I'm going to fight my natural impulse to drop a ridiculous statement and just walk away. Or possibly more times, to be determined as I feel like it. The point is, we in the LA part of the world experienced an uncommon phenomenon known as, and I believe I'm spelling this ethnic word correctly, "weather." This made me vaguely nostalgic for my distant homeland, which made me think of all the other things I'm missing that I don't have easy access to here. Like bars that are open late, the ability to go to the bank on Sunday (Well, you can go, but you'll be the only one there), and of course Dunkin' Donuts. I used to get their Blueberry Muffins all the time. And I figure that if a minimum wage employee working for a faceless corporation can pretend to have baked delicious muffins that obviously came from a factory, I, a zero wage employee of cooking crap and writing about it, can totally actually bake delicious Blueberry Muffins from scratch. That totally makes sense.

Ingredients:

1.5 Cups All Purpose Flour
1 Cup Sugar
10 oz. Blueberries
1/2 Cup Butter
1/3 Cup Milk
2 standard-issue Eggs
The Zest from 1 Lemon
The Juice from 1/2 a Lemon (The astute observers among you may have noticed that this leaves you with half of a zested lemon for which you have no use. Fortunately, I have expert advice on the matter: Deal with it.)
2 tsp Baking Powder
1 tsp Vanilla Extract
1 Average Sized Human's Pinch of Salt
Another 1 TBSP of Sugar
1 Small Person's Pinch of Nutmeg

The first thing you're gonna need to do is let your butter come to room temperature. This is gonna take, at a rough estimate, about 2 presidential terms, so prepare some snacks and activities. Maybe bring a sweater of pair up with somebody to make the time pass faster. Pretty much the same rules your 3rd grade teacher gave you on a class field trip apply. Once your butter is nice and room-temperatury, it's time for  the fun part, and by "fun" I mean "whisking until your arm tries to fall off out of spite." Pretty much, you're going to add your cup of sugar in with your butter, and whisk it until it gets an almost fluffy consistency. This is the part where you're really gonna feel the pain if you punked out and only waited 1 presidential term for your butter to warm up. Anyway, once your butter and sugar are together, whisk in your eggs, one at a time (this gives your second egg a chance to watch his fate, and the fear that he develops releases chemicals throughout his egg body that are delicious), followed by your vanilla, lemon juice, and milk. Grab a second bowl from your magic bowl cupboard that has a never-ending supply of bowls, and mix together your flour, baking powder, and salt. This is a good point to get you to start freaking out about the "muffin method," which sounds like the name of a terrible DJ for kids parties. His slogan would be "your ex will gloat about this for years." Pretty much, if you mix flour with any liquid it starts to form more and more gluten, because flour is a jerk. All that gluten will make your baked goods super bready. Which is awesome for bread. Not so much for muffins. So you want to minimize the mixing as much as you can.

Adorable muffin-cups added to show adorable bad-assery 
Add your wet mess of a bowl into your dry floury bowl and mix it for less time than you think you should. The consensus of the internet is about 10 seconds, and the internet directly stole that from Alton Brown. Make sure to nervously watch a clock the entire time you're stirring because of paranoia induced by this paragraph. Now add in your blueberries, and neurotically stir a couple more times, until they're just barely incorporated (Pro-tip: if, like me, you don't live somewhere where magical berry bushes of deliciousness provide fresh berries at reasonable prices year round, and you're using frozen berries, keep them in the freezer until the very last second. Otherwise they'll make everything purple. They might anyway. If you're using fresh berries, toss them in some flour before you mix them into your batter to help keep them from just sinking to the bottom and disappointing us all, like every politician ever). Scoop that goop into a muffin tin, and throw it in a 375 degree oven for 20-25 minutes. 20 seconds after you put your muffins in the oven, frantically run back and take them out because you realized you forgot to add the topping on. Mix your lemon zest, nutmeg, and tablespoon of sugar together, and sprinkle some on top of each fledgling muffin. Then throw them back in the oven for another 19.6-24.6 minutes. And that's all there is to delicious muffins. And you didn't even get paid minimum wage! You didn't get paid anything!

February 9, 2016

Butterscotch Oatmeal Bars

Butterscotch and Oatmeal: a tale of seduction
Sometimes, as upstanding members of society, it's our historical duty to bake something awesome using oatmeal. Because without that bloody string of battles on the Oatmeal Plains, the Quakers would never have gained their independence (citation needed). Even if not for that absolutely true historical imperative, oatmeal gets a bad rap, especially when it comes to baked goods. Which is pretty crazy, considering how awesome oatmeal is, especially in baked goods. Yes, I get it. You love chocolate chip cookies, reached for what you thought was on when you were 5, and was sad to find out it was an oatmeal raisin cookie. Because you were 5, and had already had more raisins than you could possibly want. And now, in your PTSD addled mind, all oatmeal is that one cookie that hurt you all those years ago. But no matter how much deliciousness you deny yourself, and no matter how much innocent oatmeal you destroy with your vendetta, it will never be enough. So maybe man up, get over it, and make some deliciousness.

Ingredients:

1.5 Cups Oatmeal
1.5 Cups Flour
1 Cup Butter (That's 2 sticks of Butter, which is much easier for everybody. Or at least everybody in the US. But all the fancy recipes measure Butter in cups, so now we all have to google how much Butter we're supposed to be using, like suckers. Thanks Obama.)
3/4 Cup Sugar
3/4 Cup Brown Sugar
2X 11 oz. package of Butterscotch Chips
1.5 tsp Baking Powder
1 tsp Baking Soda
1 tsp Salt
2 standard issue Eggs

The first thing you're gonna need to do is let your Butter sit on the counter until it's pretty much room temperature. You're gonna convince yourself that if you just do all the other parts of the recipe first, the butter will be warmed up. This is a trap that your brain is setting because it thinks it's funny to watch you suffer. Brains can be jerks. The point is, it's gonna take a long while for that Butter to do its thing. So take a nap or paint a fence or something. Then whisk together your Oatmeal, Flour, Baking Powder, Baking Soda, and Salt in a bowl. Then take a separate bowl, and dunk in your Sugar, Brown Sugar, and Butter. Mix them together violently so that the sugar crystals rip through the fat of the butter, and air pockets form in the desiccated buttery remains. A process called "creaming." Mix your eggs, one at a time, into your creamed butter mixture, along with one of your bags of Butterscotch Chips. Now it's time to end the segregation in your community and bring everybody together into one bowl. But take your time. Don't rush things, or it'll never take. Dump about 1/3 of your Oatmeal mixture into your Butter mixture, combine, and then repeat until it's all in there. By the end it's gonna be pretty thick. You may have to get your delicate hands dirty from physical labor. If you're not used to it, you can find some awesome advice here.

Yes, the recipe makes more than this. But after you sit down
and write a recipe, this might be all you have left.
Lube up a pan (a 9x13 pan works well, or a couple 8x8 pans. You're welcome), and press your clumpy oatmeal dough into it. Spread it out, and make sure your get as close to an even layer as you have the energy for. Leave some room on top because this thing will rise a bit while it's cooking. Take your remaining back of Butterscotch Chips, and sprinkle them on top evenly. I said evenly. Don't bother trying to spell out something with them, it won't work. Bake that nonsense at 350 degrees for about 45 minutes, or until it's all browned on top, and smells ridiculous. Fight the urge to grab at the pans with your bare hands and shove that burning hot goodness down your gullet. Fight it harder. Seriously, I know it looks and smells awesome, but let it cool first. Your patience will be rewar-- you already ate it, didn't you?

November 24, 2015

Pumpkin Pie

Alice's Restaurant is one of many traditional
Thanksgiving songs passed down from the
pilgrims to Arlo Guthrie, and then to us.
Well, we finally made it to the week of Thanksgiving. We made it through endless buzzfeed-style lists about things like "the best 450 ways to cook a Thanksgiving turkey," and "700 Thanksgiving Entrees that aren't turkey." And we've made it through the Christmas decorations in the stores which, by law, is blasphemy. I'm pretty sure you can be prosecuted for treason in the US for putting up Christmas decorations before Thanksgiving, but here these corporate jerks are, bold as brass, just flouting it in our faces like some sort of delicious pie. Not in my America. In my America, delicious pie is made out of actual pie, not out of department stores selling you things. It's made out of pumpkin, and spices, and it's so good that it makes all of the "pumpkin spice" everything that you've been guzzling down since the beginning of October taste hollow and meaningless. It's the flavor you finish off Thanksgiving with, and some things you just don't mess with. Don't even get me started about Black Friday.

Ingredients:

1 Can of Pumpkin (You technically can replace this with an actual pumpkin. It's kind of hard to work with, it doesn't taste much better, and it's a huge pain to get the texture right, but if you're the type of insecure person who needs to lord over everybody else how your pumpkin pie is more pumpkinny than theirs, go for it.)
2 Eggs
Approximately 3/4 Cup Soy Milk (Why soy milk? Because my pie is dairy free. Got a problem with that? Then use regular milk. What do I care?)
1/2 Cup of standard issue Sugar
1/3 Cup Dark Brown Sugar
1 tsp Ground Cinnamon
1/2 tsp Salt
1/2 tsp Ground Ginger
1/4 tsp Ground Cloves
An average human sized pinch of Ground Nutmeg
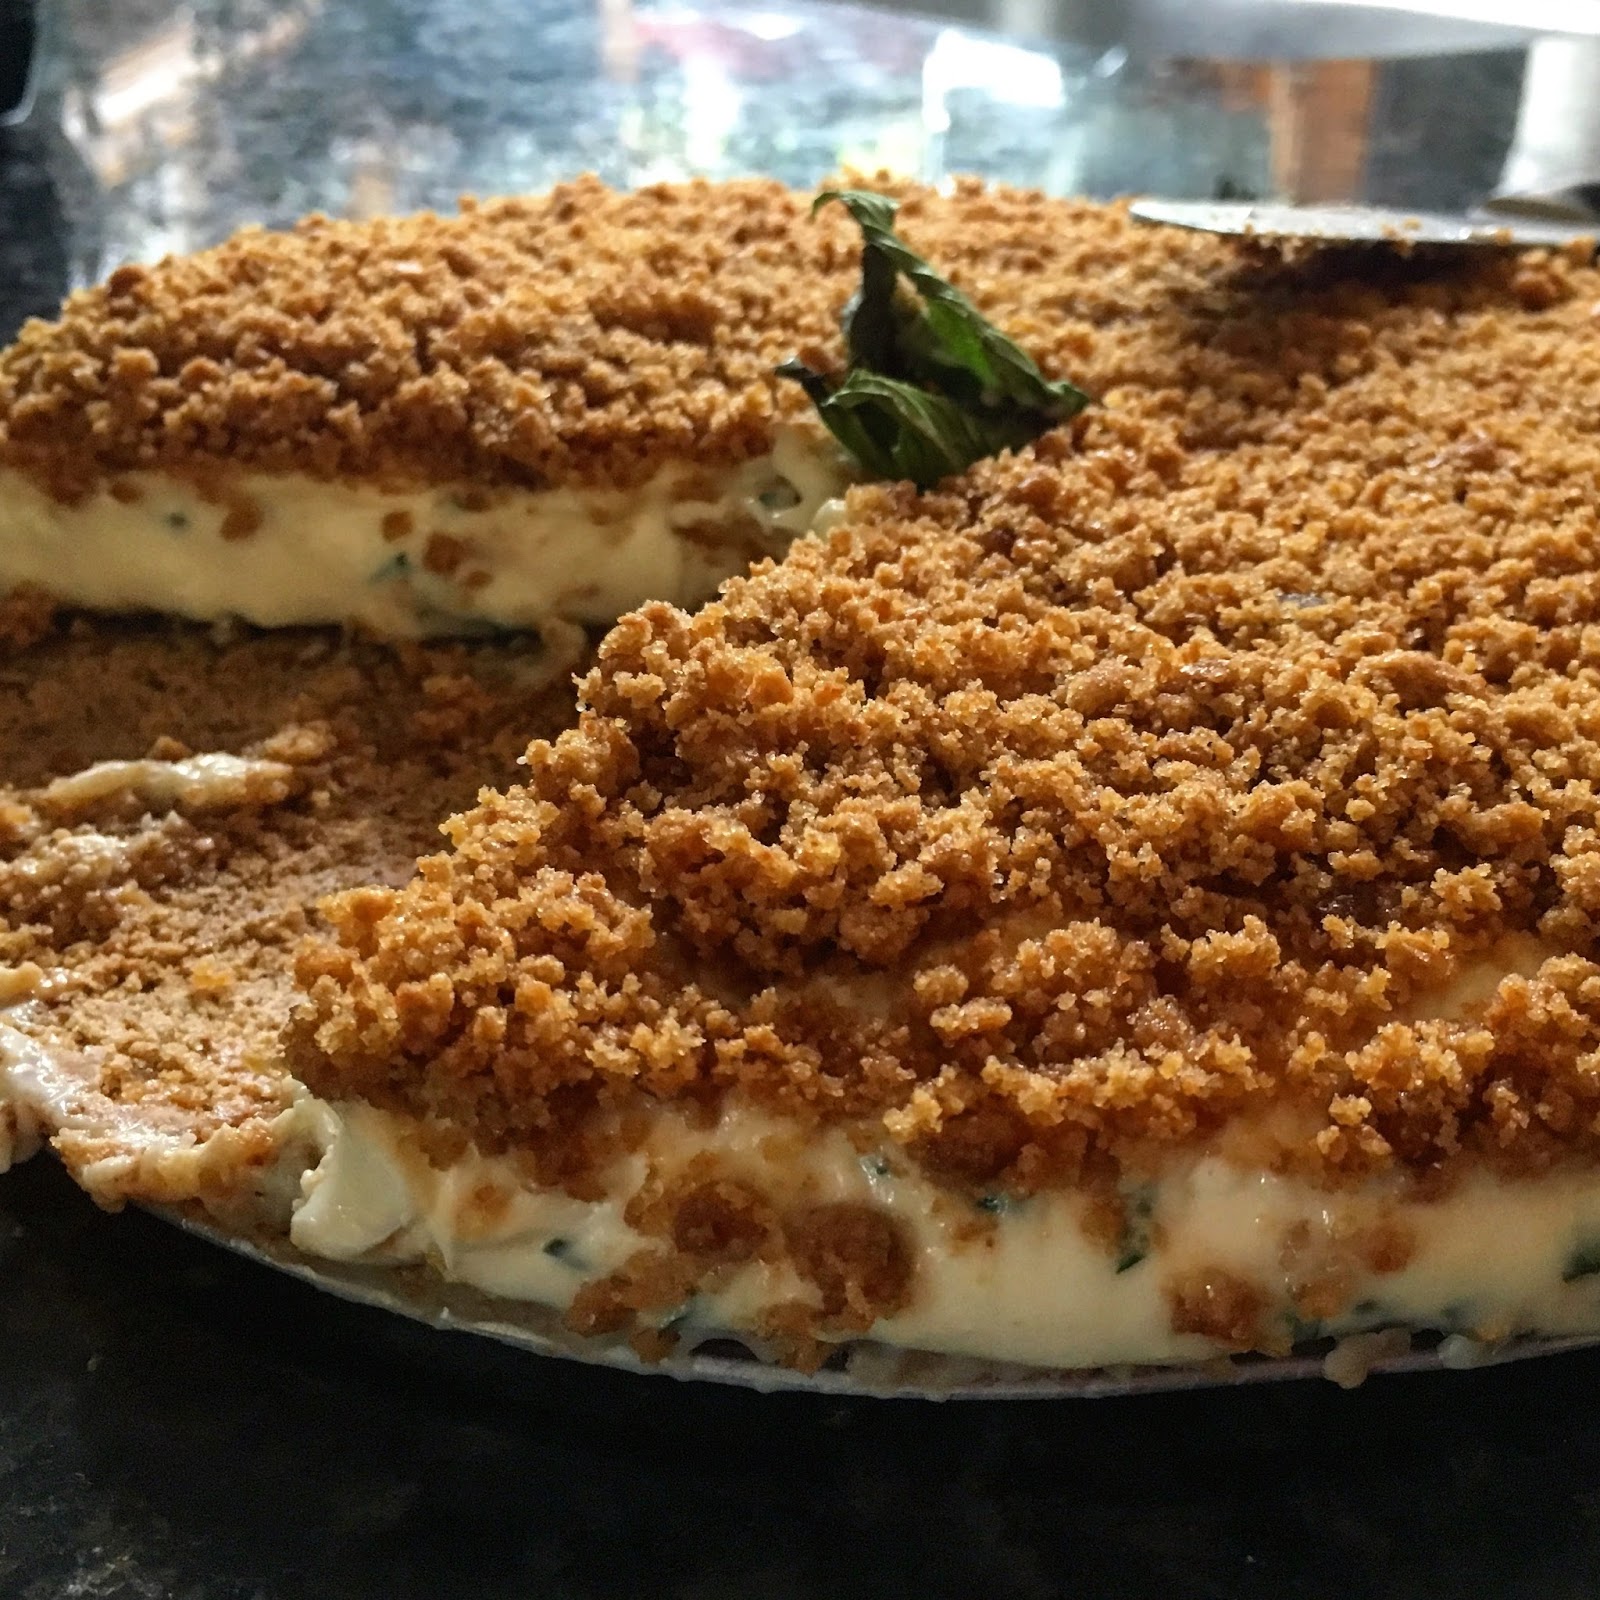
1 Pie Crust (If you want to go traditional, just use regular pie crust. You can buy it in the store, or make your own. If you want to get funky, make a gingersnap crust. How? Take the graham cracker crust from my cheesecake recipe, and replace the graham crackers with crushed gingersnaps. You're welcome.)

The first thing you're gonna need to do is punch Christmas in the throat. It's started stretching all the way through November, and it frankly needs to learn to wait its turn. That's the lesson here. If you're a holiday, and you don't wait your turn, you get punched in the throat (I'm looking at you Valentine's Day). Once your holidays are straightened out, and have stopped acting like jerks, pour your Pumpkin, Eggs, Salt, Sugar, Brown Sugar, Cinnamon, Ginger, Cloves, and Nutmeg into a bowl and stir them together to combine. Did you catch that? That's all of the ingredients, except for the Soy Milk and the Pie Crust. And when I say "stir to combine" I don't mean "gently twirl a spoon into the pumpkin mixture with your dainty fingers." I mean stir. Until you can't point out any specific ingredients in the mix, and the whole thing looks homogenous. Then slowly stir in your Soy Milk, until your mixture is just liquidy enough to start making you nervous about whether it's still gonna turn into pie.

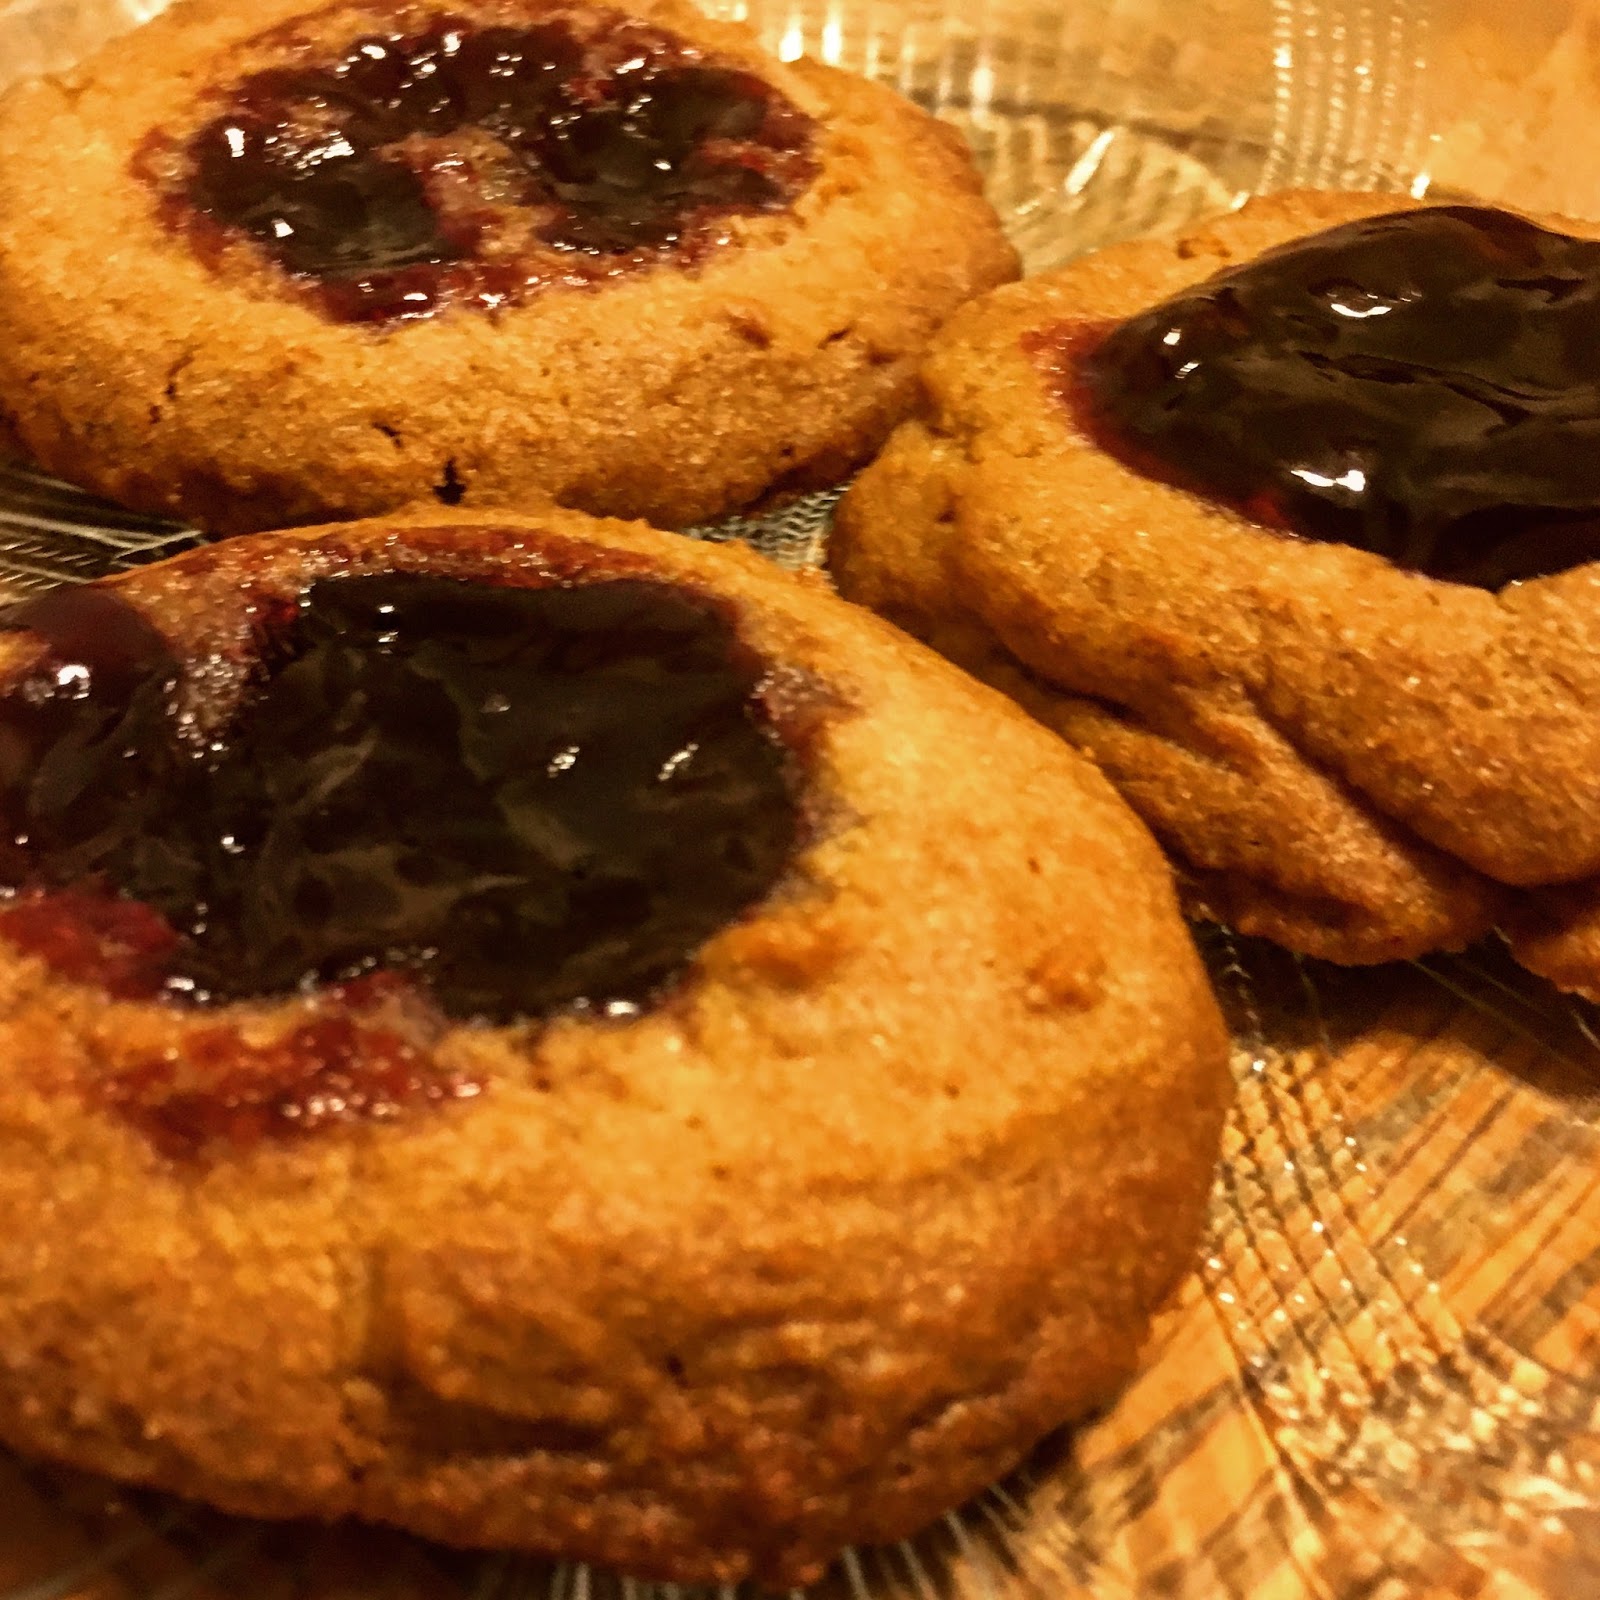
You ate twice your bodyweight in turkey and stuffing, and
you swore you'd never eat anything again. Then pie happened.
Now it's time to be terrified that something will go horribly wrong! Will it? Who knows? Because now it's time to pour your filling into your crust, throw the whole thing into a 350 degree oven, and let it sit for an hour. Without opening the oven and checking on it. Seriously, opening the oven will lower the heat which will change the cooking. So leave the oven shut and try not to think about all of the things that could be happening in there. After an hour, open your oven and check on it. It should be firmed up all around the edges, and just a tiny bit jiggly in the center. If it's not, it could be for a number of reasons, including the fact that you didn't listen and you opened your oven early to check on it. If despite your best efforts, you've got a puddle instead of "slightly jiggly," put it back in for another 15 minutes. Then let the pie cool for 2 hours, and then refrigerate it for another 2 hours. Because as awesome as it smells right now, it'll taste so much better once it's properly cooled. Trust me, your patience will be rewarded. Then slice it, top it with some whipped cream, and serve it. To yourself, and the other loyalists who haven't abandoned you in the name of shopping. Everybody else can put terrible nonsense pie into their mouths. The good stuff is reserved for the real Americans.


October 27, 2015

Caramel Popcorn Balls

It looks innocent, but those kernels will mess you up man
The Halloween times are upon us again. Which means it's time to misappropriate a harvest festival as an excuse to drink and party! And that also means drunk people will be angrily trying to defend their costume choice. Or the assertion that their costume is a costume at all. And finally, that means it's time for the annual fear-a-palooza that news stations run each year about people putting crap in candy to harm trick or treaters. Which has almost never happened in history. But that doesn't stop us from freaking the hell out and watching the news, which lets them sell more advertising! But don't worry about fictional poisoned candy this year, because this year you're going to be that super creepy guy in the neighborhood giving out creepy homemade treats. Why? Because they're awesome.

Ingredients:

9 Cups of popped Popcorn
1.5 Cups Brown Sugar
1 Cup Water
1/2 Cup Standard-Issue Sugar
1 Cup Light Corn Syrup (No, this isn't the same as high-fructose corn syrup, and yes, you should actually use it. Unless you like grainy caramel and sadness.)
2 and 1/4 tsp of White Vinegar
3/4 tsp Salt
1/2 Cup of Butter
More butter
All of the butter

The first thing you're gonna need to do is take your popcorn, and dump it into a large pot or bowl. Wasn't that easy? Don't get used to it. Now combine your Brown Sugar, Regular Sugar, Corn Syrup, Water, Vinegar, and Salt in a sauce pan and get ready to not leave the kitchen for a while. Crank the heat up to around a medium-high, and, without stirring, move the pan around to combine the ingredients. And bring it to a boil. Oh, it's boiling? Good, now you get to freak out. Because it really really looks like you should be stirring it. But too much, or in some cases any stirring, will lead to crystallization, which leads to crappy foodstuffs, which leads to a life of depression and alcohol abuse, which leads to mixed dancing. So freak out, and maybe stir or maybe don't, but always feel guilty about it. For how long? Until your fledgling caramel reaches the "Hard Ball" stage. What the crap does that mean? It means that your mixture is between 250 and 265 degrees. Which is super useful if you have a candy/frying thermometer like me, and actually remember to use it....unlike me. For those of us without the financial or mental capacity to make our lives easier, we're gonna rely on the more archaic method. Drop a little bit of your mixture into some cold water. If it's at the "Hard Ball" stage, it'll form thick threads of sugary goodness, which you can pick up and form into a ball that maintains its shape when you set it down. Also, Keanu Reeves will be there for some reason.

Orr'Vill the Terrible, accepting tribute from his subjects
Once your caramel is playing hardball, turn the heat down to low, and add in your Butter. Stir it until it's fully incorporated, and then stir it a couple more times to make up for all of the pent up stirring you didn't get to express earlier on. Turn off the heat, and pour the goop on to the popcorn. Try not to spill any on yourself. Seriously. What's worse than burning yourself? Burning yourself with something sticky, that stays stuck to you and keeps burning you because it loves the way you taste, but wants you a little more well done. Once you've finished treating your burns and weeping softly in the corner, stir the caramel and the popcorn together and then let it cool for 5-10 minutes. Take some Butter, and lube up a cookie sheet, plate, or some other containment vessel. Also butter up your hands. Because this stuff is sticky. Form the popcorn goop into balls, and place it on your plate/cookie sheet/whatever. Re-butter your hands as necessary. And there you have it! Homemade treats that will creep out your neighbors, until they taste it, at which point they'll beg you for more. Assuming it hasn't pulled out all of their teeth. Maybe even then.