Showing posts with label Dairy. Show all posts

December 13, 2018

Changua

It's funny because it's true
Every now and again you stumble across a recipe that seems so simple and easy that it seems like it's legitimately suspicious. For instance, if a Tasty™ video starts off with them flattening a slice of white bread, I'm pretty sure it's going to end up with me going on a cross-country road trip to find the person who stole my identity. That said, sometimes delicious food is just simple. This is especially true of old cultural recipes passed down over generations. Most cultures have had some good times and some bad, and if a recipe has lasted throughout both, there's a decent chance that it's going to taste good, and that it's something you could reasonably whip up while on the run from various dangers like neighboring tribes, wild beasts, or slowly dying of dysentery. Notable exceptions are pretty much any traditional British or Australian foods, as these were developed as pranks for unsuspecting tourists.


Ingredients:

2 cups Milk
1.5 cups Water
4 Eggs (Chicken eggs for preference. You know, the things we all think of when somebody says "Eggs." Though I guess you could really use whatever bird eggs you have handy in a pinch. So if you're a creepy bird enthusiast you might have some options)
3 Green Onions
1/2 cup Cilantro
1/4 tsp Black Pepper
Salt

Changua is a traditional Columbian soup that's allegedly been passed down generation to generation amongst the native peoples of the Andes for...pretty much ever. It's typically eaten for breakfast, often on weekends, and is thought to be a pretty decent hangover cure, so it's easy to see why it has remained popular. The fact that it takes like 5 minutes to make and is super tasty doesn't hurt either. That said, the first thing you're going to do here is casually glorp together your milk and water in a pot along with your black pepper and a big pinch of salt. The kind of pinch that a professional athlete or circus performer might have. Add it in with your milk and water and crank up the heat. While you're waiting for that to boil, chop up your green onions and your cilantro. This should take you about a minute, which means you only have about 150 minutes left to go for your pot to boil. Or you can just get busy. Scientific research has shown that being too busy to deal with it can cause your food to heat up almost immediately. Once you've got your pot boiling, it's time to drop in your eggs like little paratroopers plummeting to their untimely egg deaths. So crack each egg into a bowl or cup and then gently pour it in to the boiling liquid. Don't rush or drop them from too high or else you'll end up with scrambled eggs inside of your soup. And probably some burns around your face and hands.

Here we see the noble egg, playing dead to try and evade
the deadly predators native to its environment.
Once all of your eggs are cooking in the liquid, cover the pot. Let them continue to poach for 4-5 minutes, depending on how well-done you like your eggs. Use this time to prep your bowls. That sounds intense. Divide up your chopped onions and cilantro evenly between 4 bowls. That's all you actually need to do. Prep accomplished. Once your eggs are cooked to your liking, turn off the heat under your pot. Using a spoon, strainer, or your bare hands and grit that defy concerns like utensils, hygiene, and second degree burns, put one egg in the bottom of each of your bowls. Then top them off with your milky soup and enjoy! Traditionally, this soup is served with bread, or sometimes topped with more cilantro. You can totally do that if you'd like. Personally, I like some heat, so I added in a bit of sriracha straight in my broth. That's part of the fun of traditional recipes. They've been passed down for forever, and different people have totally developed their own versions over the centuries/millennia. As long as the core of the recipe is right and the food tastes good, there's not really a wrong way to do it. Unless you have dysentery. Then there's totally a wrong way to do it. Enjoy!

November 28, 2018

Cream of Mushroom Soup

A noble soup embiggens
the smallest man

So you managed to survive the many perils of Black Friday. The changing weather, the crazed drivers, the advertisers ripping families out of the back seats of cars and forcibly marching them into department stores. You've bested them all. All that's left is for you to enjoy the late Autumn weather, have some sort of festive holiday drink, and celebrate life. Unless you live in Chicago where, despite over a century of searching, nobody has been able to find the user manual and change the weather setting off of "random." We have snow on the ground, ice everywhere, and by the weekend it's supposed to be 50 and stormy. So going outside isn't the best idea right now. You're better off huddling for warmth in your home and waiting out the rest of the Holiday Season™ in the comfort of your home or survival bunker. In the even that you're forced to leave your home and venture out into the Elements® it's important to remember that you have delicious soup to warm you up at home. So either get to work on your vivid hallucinations, or make some soup.

Ingredients:

1 lb. Cremini Mushrooms
1 standard-issue Onion
5 cups Milk (Preferably milk from a cow of some kind)
2 cloves Garlic
1 TBSP Butter
1 TBSP Olive Oil
2 TSBP Flour
1/4 tsp Black Pepper
1/4 tsp Rubbed Sage
1/4 tsp Ground Cumin
Salt

Cream of mushroom soup has the distinguished honor of being one of the most readily available things you can grab in a can at any supermarket's soup aisle. If you've ever eaten those soups, you know they taste like gelatinous salt. And I'm not knocking gelatinous salt. At the very least, it would be an excellent name for a debut album in the 90s. But we're striving for something better with this recipe, so the first thing you'll need to do is forget everything you know about cream of mushroom soup. Other than the name, and the fact that you're about to make some. Those are important tidbits to hold on to. But forget everything else. Once your amnesia is complete, dice your onion. Saute it in your butter and oil over medium heat along with a standard-sized human's pinch of salt. Let your onions cook down, stirring occasionally, for about 6 minutes, during which you'll be cleaning and slicing your mushrooms. It doesn't really matter how big or small you cut your mushrooms as long as you're consistent, so it's down to what your preference is. But keep in mind that this is a soup, so ideally everything should be able to fit easily into a spoon.

Welcome to flavor country. US passport line to the left.
Once your onions are soft and golden, toss your mushrooms into the party along with your black pepper, sage, cumin, and another standard-sized human's pinch of salt. Let that whole mushroom butter onion nonsense cook together for about 4 minutes, or when the mushrooms get soft and the whole room starts to smell like deliciousness. Mix in your flour and wait for everything to get kind of gross and sludgy. You know, like you after Thanksgiving dinner. Now it's time to slowly add in your milk, stirring all the while so that all of your flour mix incorporates, and you don't end up with any sad lumps left in there. Heat that whole thing up and keep it stirring to get it to thicken, but be careful not to boil it. Then salt it to your taste, and guzzle it down while  you watch other suckers dealing with the snow, wind, hail, rain, and then snow again.

September 6, 2018

Mozzarella Sticks

The best way I've found to get giant unmarked slabs of cheese
is to steal 'em from work. So go shanghai yourself some dairy
Cheese. To some it's a source of nutrition, to others pure flavor. And some people just like taunting milk-producing animals by eating dairy products right in front of their faces. And, as the internet taught us in the early 2000s that there's only so much milk you can drink before bad things happen to you and anyone in your immediate vicinity, cheese is the ideal cow-taunting foodstuff. The one thing I know for sure is that cheese is delicious, versatile, and actively in my fridge at this very moment. And everything is better fried, so mozzarella sticks were pretty much destined to happen. Don't fight destiny. You'll piss off a deity and then the Greeks will have to build a giant wooden horse. It'll be a mess, and it's not worth the hassle.

Ingredients:
Mozzarella Cheese
Seasoned Breadcrumbs
Eggs
Flour
Smoked Paprika
Salt
Oil (something with a neutral flavor and a high smoke point, like peanut oil. Any oil recommended for frying should be good though)

The first thing you may notice upon close inspection is the there are no amounts of anything. Welcome to the wonderful world of winging it. Because we're talking mozzarella sticks here. This is something you should be making until you run out of everything, not until the arbitrary amount of food to complete a recipe is reached. You need flour, eggs, and breadcrumbs to coat the cheese, paprika and salt to season those coverings, and oil to fry it in. You should have about a teaspoon each of salt and paprika for every cup of flour. Beyond that, I have the utmost faith you'll persevere, and fully indemnify against legal action in the event that you set yourself or your loved ones on fire.

Sriracha added for deliciousness purposes
On to the construction. Cut your cheese into rectangular prisms. I like a size of about a half inch by a half inch by 4 inches, but as long as your hunks of cheese are all roughly the same as each other, follow your heart. Mix together your flour, paprika, and salt, and then coat your cheese prisms in it. Mercilessly beat your eggs, then dunk your floury cheese into them, then into your breadcrumbs, then back to your eggs, and back one more time to your breadcrumbs. Confused? You shouldn't be. It's flour, eggs, breadcrumbs, eggs, breadcrumbs. Then lay out your crumby cheese on a baking sheet and freeze it for at least 2 hours. Once they're solidly frozen, heat up your oil over medium heat and get to frying. About one minute on each side should do it, but you can also go by how delicious they look, smell, and taste. Either way. Then just top them with the marinara, hot sauce, or nothing of your choice and eat them until your loved ones think you have a serious problem. You know, the ones you haven't set on fire yet. Enjoy!

June 5, 2018

Yogurt Muesli

I grabbed this hipster cat picture for the muesli pun, but
it's honestly pretty adorable. 
Breakfast times are serious times. They say it's the most important meal of the day. Who this mysterious "they" are, and why they're so deep in the pockets of the French Toast industry has yet to be uncovered by Wikileaks. But unless you want to hear your friends and coworkers constantly lecture you about how terrible it is to skip breakfast, you'd better give in and start eating it. And making sure that you're eating something at least plausibly healthy, or else you're still in for idiots talking to you about your food choices. Isn't peer pressure fun? The problem here, aside from everything, is that while many breakfast foods are undeniably delicious, none of the good ones seem quick or simple to make. You can't roll out of bed 5 minutes before you have to leave for work and make pancakes, fresh squeezed orange juice, and an omlette. So we're faced with the burden of finding tasty, healthy-ish food that we can just grab and go in the morning. Which brings us to muesli.

Ingredients:

1/2 cup Steel Cut Oats
1/4 cup Greek Yogurt
1/4 cup Walnuts
1 TBSP Orange Juice
1/4 tsp Honey
Assorted Berries

The first thing you're going to have to deal with when contemplating muesli is its dumb name. Based on some cursory internet research, there seem to be two schools of thought on how to pronounce it. Thre's team "stupid hipster name for a cat "(Mewsly), and team "describing someone who looks kind of like Bullwinkle" (Moosely). Which of these pronunciations is right? I stopped caring like a week before I even thought about making this. On to the actual food. The goal here is to prep this the night before, so you can just grab it and munch in the morning super quickly. Normally I'm not a fan of this sort of devil's math where you sacrifice free time at night for free time in the morning. But this stuff takes like a minute to put together, so it's actually pretty worth it. Mix your oats, yogurt, honey, and orange juice together in a container with a lid. In another container, crush up your walnuts and toss in some berries. Don't worry about crushing up your walnuts, because it's super easy. Walnuts are the cowards of the nut world, and they tend to crumble at the first sign of trouble, as opposed to better organized nuts such as almonds or pistachios. The point is, take your two containers and shove them in your fridge. This entire process should have taken you about 2 minutes. Then go do whatever it is you do at night. Sleep. Drink the blood of innocent. Whatever. The less I know the better.

Frozen berries make this even faster and
easier. You're welcome.
When you wake up in the morning, and the alarm gives out a warning, and you don't think you'll ever make it on time, you'll be grateful for the 2 minutes of work you put in last night. Because you pretty much did all of the work last night, and it wasn't even much work. Just grab your walnuts and berries, toss them in with your yogurt and oats, and consume. You don't even have to mix them together if you want to just go at it parfait style. Whatever floats your muesli boat. It's pretty simple. It's also pretty tasty, healthy, and technically food. Kind of everything you need to consume to not have to listen to the guy from mail room going on for 25 minutes about the health benefits of chia, or his acai bowls, or whatever other absurd fads that nonsense people with no sense of personal boundaries are into these days. Probably yak's milk mixed with powdered horseradish and chamomile tea. You laugh, but it's only a matter of time before internet hipsters are doing that. Anyhow, enjoy your morningtime food and freedom.


May 30, 2018

Peanut Butter Frozen Yogurt Bites

dramatization
It's that time of year again. The time of year when the ice has thawed, the flowers have bloomed, and the sun does its absolute best to kill us and burn our corpses in to crispy bits. I enjoy the fun added benefit of having what early settlers to this country referred to as "no stupid air conditioning in my stupid apartment," so I get the full brunt of this. The point is, at times like this it's important to find small bits of comfort and relief from the oppressive heat to try and distract us from the grim reality of our impending doom. Being weirdly kind of healthy is just a fringe benefit.

Ingredients:

1 cup Greek Yogurt
2 TBSP Peanut Butter (I used a natural, no sugar added kind of peanut butter because it just tastes like peanuts, which lets me control the final flavor better. But use what you like)
1.5 tsp Honey
1 tsp Vanilla Extract

So, as those of you who haven't been blinded by the sun may have noticed, there's not a whole lot going on in terms of ingredients here. This is for a couple of reasons. Firstly, this is a recipe designed to give relief from the heat. Spending hours dealing with a vast array of ingredients in a hot sticky kitchen isn't conducive to that. Secondly, this is a basic version. Delicious, but you can totally add optional extras, like some chocolate syrup, hazelnut spread, candied almonds, dulce de leche, or nutmeg. Definitely not all of them together. Probably. The point is, make these. Enjoy them. But don't be afraid to add in a little something extra once you've got the hang of it. That said, the first thing you're going to need to do is take all of your ingredients, splorp them in to a bowl, and mix them together. Seriously, that's like 95% of the work. Again. Heat. The less time I spend not lying on my bed underneath a ceiling fan, the better.
Don't let the cool shape distract you from the deliciousness

Now it's time to contemplate containment vessels. The idea is to get bite-sized bits of frozen refreshing goodness. I happen to have just come back from a trip with some cool silicone molds. If you didn't, you can make weird shapeless blobs by throwing some wax paper on a baking sheet and spooning your yogurt mixture on to it. Or, you could just use an ice-cube tray and make life easy on yourself. In any case, throw those suckers in to your freezer for at least 45 minutes, though an hour and a half would be better. Whenever the heat gets to you (so, you know, all the time), grab one, pop it in your face hole, and forget about life for a while. Enjoy, and if you survive I'll see y'all next week!

April 25, 2018

Baked Camembert

There are some foods that you know you're supposed to have eaten at some point in order to get your coveted adult card, which allows you all of the wonderful privileges of adulthood like home ownership, paying taxes, and existential dread. Weird cheese is definitely up there on that list. But what constitutes weird cheese? There are tons of cheese varieties from all over the world. And everything's weird to somebody, right? Wrong. If there's a situation that doesn't involve despair in which you'd put it in a sandwich, its standard cheese. If anyone might describe the flavor through clenched teeth as complex, earthy, or eau de chaussettes athletiques, it's weird cheese. Which doesn't necessarily mean bad, but definitely means you shouldn't go in expecting it to taste like you think cheese should. Because it won't, and you'll be sad. Which brings us to Camembert.

Ingredients:

1 Camembert (Camembert cheese is typically sold in small wheels, encased in wooden boxes. So get one of those)
2 cloves Garlic
1 TBSP fresh Thyme
1 TBSP fresh Rosemary
1 TBSP Olive Oil

The first thing to remember when baking camembert is to have friends. It's going to end up being a gooey receptacle for crackers, bread, and other culinary detritus, and that's not exactly the sort of food that's socially acceptable to eat alone. So if you don't have friends, make some before you start in on this recipe. I recommend going up to strangers at a bus stop and asking them if they want some funky cheese. Once you've been paroled, invite any new friends you made in lockup over and start getting your cheese ready. Take your cheese out of the paper that it's wrapped in, and cut a 3x3 grid in to the top of it, about a 1/4 of an inch deep. Scoring the rind of the cheese like this will help keep it from drying out, and will help the herbs and garlic soak in to the cheese, so don't skip it just because it sounds more like instructions for building ikea furniture than for cooking. Choppity chop up your garlic, thyme, and rosemary in to tiny little pieces, pretty much as fine as you can, and mix them in with your oil.
Protip: Don't bake the knife

Now we've come to the tricky question, which is what to cook this nonsense in. Traditionally you bake camembert in the box it came in, which is totally fine if it came in a wooden box. But sometimes it comes in a cardboard box, so what then? If you put it on a baking sheet it'll just spread out and make a giant mess. So your options are pretty much lucking out in having a ramekin or small dish the exact right size and using that, or taking aluminum foil and crafting a ring of power in the middle of a baking pan, and shoving your camembert into that. In any event, once your cheese is in your chosen baking vessel, slather your garlic and herb oil all up ons. Do your best to get it down into the cracks and crevices. Then toss that sucker in to a 350 degree oven for 15-20 minutes, take it out, find something to dip in to the weird funky goodness, grab some hard cider, and enjoy! I'm sure your friends from prison will appreciate the complex bouquet of a fine weird cheese.

April 17, 2018

Jalapeño Cheddar Bicuits

I've found that the freshest dairy products are bought in alleys
The first thing that you think about when you buy cheese out of the back of a van is safety. How recently was this van serviced? Was the air conditioning on when it drove down from Wisconsin? Is there a Cheese Mafia, and if so does this make me their customer, business partner, or rival? But let me start at the beginning. A guy called the restaurant where I'm working looking to sell some cheese, and gave shockingly few details about where it had come from, who he was, or why he was peddling mystery cheese in the first place. Eventually it was learned that he worked at a new dairy up in Wisconsin that had overproduced for an order, and so he was looking for people to buy some of his discounted sketchy cheese out of the back of his van. Naturally, I jumped at the opportunity. The restaurant bought a fair amount of cheese, and I got some for myself. Then, as suddenly as it had appeared in my life, the cheese van drove off in to the night, leaving me with nothing but a weird story, fond memories, and 9 pounds of discounted cheddar cheese. Which brings us to biscuits.

Ingredients:

2 cups Whole Wheat Flour (I'm doing a whole wheat thing right now, so I used whole wheat flour. If you want to switch it out for regular flour, go ahead)
3/4 cup Grated Cheddar Cheese
1 cup Buttermilk
3/4 stick of Butter (This is 6 TBSP, for you math/unit conversion nerds out there)
2 Pickled Jalapeños 
3 tsp Baking Powder
1/2 tsp Baking Soda
An average adult human's pinch of Salt

So the first thing you're going to want to do, after having bought the rest of your ingredients out of the backs of whatever vans are available in your neighborhood, is to have a long family history of biscuit-making to rely on. If, like me, the closest your family ever came to biscuits was to have had a conversation with someone from Alabama or Georgia (The longest conversation on record in Georgia and Alabama without somebody mentioning biscuits in some way was 5 minutes and 47 seconds, at a funeral in 1937), you may have to fake it a little bit. In any event, take your flour and whisk in your baking powder, baking soda, and salt. Then take your jalapeños and chop them down to size. You're looking for a pretty fine cut on these. You want them to flavor the biscuits throughout, but you're not looking for people to be biting in to giant chunks of jalapeño. That's how friendships are ruined. Take your butter, grate it in to your flour, and work it in until it forms in to little pea-sized globules. It's important that your butter doesn't melt if you want light flaky biscuits instead of dense lumps of sadness. If, like me, you've been cursed with absurdly warm hands, don't be afraid to take a break and stick your flour and butter in the freezer to cool off.

Yes, I made these today. And no, there aren't any left
Once you've got your buttery flour globules all set, add in your cheese, jalapeños, and buttermilk, and very gently stir to combine. You don't want to overwork your dough, or else you'll form a bunch of gluten, melt your butter, and end up sad and alone at the company picnic like last year (for the sake of this example I'm assuming you don't live in the midwest, where picnicking would be a challenge since its still snowing despite technically being mid-April). If you have things like a traditional biscuit cutter and a biscuit pan that your family has passed down since they were originally forged on the Mayflower, good for you. I don't have any of those things, except for the unwarranted sense of puritanical entitlement, so I'm making drop biscuits, so named because you just splorp a spoon in to your dough and drop it on to your pan. Do your best to get your biscuits close together and equally sized. If you're smarter than I was you'll push down lightly with your thumb in the middle of each biscuit so that they rise evenly and you don't end up with a dome on top of each one. Either way, shove those suckers in to a 450 degree oven for about 15 minutes, then take them out and try not to burn your hands and mouth when you refuse to wait for them to cool down and shove them in to your face. You can totally add some butter on top if you can find any before your friends and family (or you. Just you) devours them all. Enjoy!

February 6, 2018

Whiskey Fudge!

If life and the Simpsons have taught me anything, it's that
Yale's motto really should be Semper Fudge
So I'm going to be straight with you all. I've been known to enjoy some whiskey on occasion. And yes, that may have been a contributing factor to my decision that it would be an excellent addition to fudge, but that doesn't change the fact that I was totally right. It gives it a subtle complexity that tastes awesome, and helps keep the fudge from being too sweet. Too sweet sounds like a good thing for fudge, but if you make it a little less sweet then, aside from tasting better, you can totally justify eating significantly more of it at one time, which means you'll feel slightly less bad about yourself when you snork down half of this recipe before lunch. And sure, if you have a super low alcohol tolerance it's entirely possible that this recipe will allow you to literally get drunk on fudge (Drunk On Fudge is definitely going to be the title of my memoir), but that's a risk that I'm willing to take.

Ingredients:

14 oz. can of Sweetened Condensed Milk
12 oz. Semi-Sweet Chocolate Chips
5 oz. Bittersweet Chocolate Chips
1.5 tsp Whiskey (I used Irish Whiskey, which worked really well. Technically, you can use whatever whiskey you want, but if you use garbage whiskey you may end up with garbage fudge.)
1/2 tsp Vanilla Extract

You may have noticed that there's not a whole lot going on in terms of ingredients. You're welcome. The entire point of fudge is to be easy and delicious. And sure, you can add fancy things like caramel sauces or toasted nuts on top if you like, but they're like ketchup on a really good hot dog, or like your appendix. If you like it then sure, go and have fun with it, but it's ultimately not really necessary. And before all of you ketchup lovers and appendix lovers start sending me your angrily worded handwritten emails, let me just remind you that - and I mean this sincerely - I don't care. Anyhow, open up your can of sweetened condensed milk, and let it gloop out of the can into a pot. After about 3 minutes of waiting for it to stop taking its sweet time, try futilely to speed up the process using spoons, spatulas, and other various implements of destruction. Once your can is more or less emptied into your pot dislodge any dust and spiders that may have settled colonies on your person, and crank the heat up to medium-low. Stir occasionally for a couple minutes to let your milk heat up before adding in both your semi-sweet and bittersweet chocolate chips. Add them in in about 3 batches. Keep stirring and let the whole thing melt and smooth out before adding more in. Normally you'd melt chocolate in a double boiler, and be hesitant about stirring it because crystals could form and it could seize up, and you could be the butt of many jokes made by me at your expense. This is all technically true, but in my experience the sweetened condensed milk helps to prevent this, kind of in the same way corn syrup would, by acting as a buffer between potential subversive crystal clumps. Follow your heart.

If possible, it's advisable to eat fudge in mountain form
Once your chocolate is melted in turn the heat off and stir in your whiskey and vanilla. Once they're incorporated and everything is smooth, pour the whole mess into a baking pan that you've thoughtfully lined with aluminum foil, and let it cool down to room temperature for about an hour. How big of a pan to use is up to you, but in my mind it's not really fudge unless it's thick. Otherwise it's just a chocolate bar. Toss your fledgling fudge in the fridge (I want to stop writing things like that, but I don't know how) and wait for it to set up completely, which ostensibly takes a couple of hours, but feels like an eternity. Allow extra time for several misguided attempts at eating your fudge early, wherein you get goop on your hands, refrigerator door, and possibly walls. When it's finally ready, turn the foil upside-down over a plate, and then remove it to reveal your fudgy treasure. Slice it into whatever servings you think are appropriate (e.g. in half, or completely unsliced) and consume it as fast as possible to keep intruders from claiming it as your own. You waited hours for this fudge. Your friends and family can pry it from your cold dead hands. Enjoy!

December 26, 2017

Eggnog Milkshake

Desolate winter snowscapes: the cause of adding booze to
things for roughly 1000 years.
Eggnog, it's commonly believed, was derived from a British drink popular in the middle ages called Posset. It is a classic British recipe consisting of taking stuff that doesn't have alcohol in it, and throwing some alcohol in it because it was Britain and the middle ages, and life wasn't especially worth living unless you were drunk enough to forget those things. Some people have theorized that alcohol was added in to preserve the drink and prevent people from getting sick. This is technically possible, but seems to be crediting a fair amount of scientific and medical knowledge to a group of people who literally used to bore holes in to each other's skulls to try and cure migraines. A more likely scenario is that alcohol was added to proto-eggnog in order to give people something to look forward to during the year so that they could better cope with the constant ridiculous insanity of their daily lives. It's used for pretty much the same purpose today. Adding ice cream and making it into a milkshake helps too.

Ingredients:

1 Cup Eggnog
1 Cup Vanilla Ice Cream (You want to get a decent vanilla ice cream here. The sort of vanilla that makes you think "delicious" instead of "boring.")
1/2 Cup Heavy Cream
1.5 TBSP Sugar
1/4 tsp Allspice
Cinnamon
Nutmeg
Whiskey!

So the first thing you're gonna need to do is find some eggnog. You can make it yourself, steal it, or buy it from a store. Homemade stuff will probably have a somewhat richer flavor and consistency, but we're mixing this with spices and ice cream, so it doesn't make that much of a difference. Though I've heard that eggnog won is twice as sweet as eggnog earned, so if you see any contests with an eggnog prize they might be worth entering. In any case, take your eggnog and toss in your allspice and cinnamon. If you want the best cinnamon flavor you can get, take some cinnamon sticks and throw them in a saucepan with your nog while heating it (Gently heating it. It's got dairy and eggs in it, neither of which you want curdling) for 20-30 minutes, and then let the mixture cool completely. If you have better things to do than spend upwards of an hour teasing out the the best flavor from your cinnamon, just add in half a teaspoon of ground cinnamon and call it a day. Sure, it won't taste quite as deliciously cinnamon-y, but again: we're mixing this with ice cream and whiskey. Take your spiced nog and throw it in your fridge while you whip up your cream. 

Alcohol, ice cream, and eggnog. That'll hold you over until
it's warm outside again.
Take your cream, sugar, and a small sprinkling of nutmeg, and whip that nonsense together until it forms a thick and delicious cream. This should take about 5 minutes, or roughly until your arm has wanted to fall of for a minute and a half. Now it's time to talk about whiskey. Traditionally (at least in the USA), bourbon is added to eggnog. Personally, I think that Irish Whiskey has a much better flavor for a drink like this, but feel free to experiment. There are no wrong answers with whiskey (there are so many wrong answers with whiskey. Evan Williams happens to be one.) As for how much of it to use, you can really add in as much or as little as you'd like. It's just about personal taste and your specific level of alcoholism and depression. Personally, I like it when the whiskey is one flavor that melds with the other flavors in the eggnog to make something new and awesome. That's about 2 TBSP of whiskey in this recipe. But if you drink eggnog more to forget the pains of all the times that Santa wronged you than to drink delicious drinks, feel free to up that to 2 liters, or whatever amount of whiskey soothes the violent raging storm in your soul. Then add your whipped cream on top and maybe some sprinkles because sprinkles are fun, especially when alcohol is involved, and maybe I've already had a few. Enjoy! 

December 19, 2017

Spiced Hot Chocolate

There's nothing like a pyramid for some good old-fashioned
religious ceremony, sacrifice, and chocolate
Chocolate is pretty ubiquitous. You pretty much can't go to any store without finding enough of the stuff to choke an oompa-loompa to death. This wasn't always the case. The Aztecs used to use cocoa beans as a currency, and would drink a bitter hot chocolate mixed with chiles, spices, and vanilla for religious events which, since they were Aztecs, meant weddings and human sacrifices. Fun times. Then the Spanish came "liberated" Mesoamerica from its owners and "civilized" the inhabitants by introducing modern inventions like steel and gunpowder, often at very rapid rates. They brought chocolate back with them to Spain where it slowly gained popularity despite tasting like hot garbage because nobody had thought to add milk or sugar to it yet. The Spanish did make some changes to the recipe though. They added whale vomit. Seriously, they totally did. Sure, the Aztecs had just lost an empire, but watching the Spanish choke that down had to have brought some smiles to their faces.

Ingredients:

2 cups Whole Milk
1.25 cups Heavy Cream
1/2 cup Sugar
6 oz. Dark Chocolate (I used chocolate chips, but bars or whatever are fine. Just break them up into small chunks before using them)
5 Cardamom Pods
2 Star Anise Pods
2 Cinnamon Sticks
1 Serrano Pepper
1/4 tsp Allspice
1/4 tsp Vanilla Extract
1/8 tsp Ground Ginger
Nutmeg
Salt

So this is kind of a blending of some modern hot chocolate sensibilities combined with some flavors reminiscent of the original, more human-sacrificy version. Spices and flavor galore, but also creaminess and some sweetness, and probably no whale vomit. So get started by slicing your serrano pepper in half and removing the seeds. Then throw it in a pot along with your milk and 1/4 cup of your cream. Add in your cardamom, anise, vanilla, cinnamon, half your allspice, and half of your sugar and crank that sucker up to medium. Now it's times to deal with the nutmeg. Nutmeg is one of those things that tastes awesome as long as you don't use enough of it for anybody to be able to tell that it's in there. Otherwise it just kind of tries to overpower everything else and ruins the whole party, kind of like you when you're drunk. So add a tiny little sprinkling of nutmeg to your milk. Just enough that you can see it floating there before you stir it together. Once your sugar is dissolved, turn the heat off and let that sucker sit for about 20 minutes or so. We in the "sitting around and doing nothing for 20 minutes" game call this "steeping." While you're steeping, feel free to start making your whipped cream. Take a bowl and toss in your remaining cream, sugar, and allspice, along with your ginger. Then take a whisk and stir it around until if forms whipped cream and your arm hurts bad enough that you wish you could just take it out on somebody by sacrificing them to the gods. Careful though. If you whip your cream too much it will turn in to butter, which totally sounds like a punishment from the gods for insufficient sacrifices to me. 

Sure, you don't have to put in so much whipped cream that
it starts to drip down the side. Joy isn't mandatory.
Once your whipped cream is made and you're good and steeped, turn your heat back up to medium and add your chocolate in to the milk and spice mixture along with an oompa-loompa sized pinch of salt. Stir that sucker pretty continuously until your chocolate melts and the whole thing looks and smells incredible. Turn off the heat and strain out the various peppers and pods from the liquid. Or don't bother with any straining, and just be careful when you drink it. Either way. Just don't blame me if a small liquorice-flavored starfish gets lodged in your esophagus. Anyhow, put your chocolatey goodness into a cup, top it off with your whipped cream, and enjoy! It's sweet, but not too sweet, and just kind of awesome in every way. You're welcome. This recipe should make two good sized cups of hot chocolate, which is perfect because it's totally a drink that you should share with a friend or loved one. And if you don't have a friend or loved one, now you have an extra cup of hot chocolate to drown your lonely lonely sorrows in. Happy Holidays!

October 31, 2017

Sugar Cookies

Anything can happen on Halloween. From London to Idaho.
It's Halloween time again, full of festivity, cheer, and little kids dressed up in costumes that cost more than the price of all of the candy they'll get from trick or treating. Also angsty teenagers who vandalize people's houses because they're angry that society has deemed them too old to trick or treat. It's a fun time! So make sure to start partaking in the traditional Halloween activities, such as extortion, alcoholism, and protesting Halloween because it was originally a pagan holiday (So was pretty much every other holiday, but let's pretend we don't know about that to help fuel our outrage). And nothing's quite as in the spirit of the holiday as parents freaking out over the contents of the homemade treats that some creepy neighbor gave out, despite the fact that pretty much nobody has ever tampered with Halloween candy. Who are you to deny them this holiday tradition?

Ingredients:

2.75 Cups Flour
1 Chicken Egg (Raw, by preference)
1 Cup Sugar
1 Cup Butter (For some reason, there seems to be some sort of holy war concerning butter among people who write recipes. Some people measure it in sticks. Others in cups. Neither of them are willing to admit that the other side exists, never mind how much of one equals the other. Our nation needs some unity and healing. One cup equals two sticks of butter.)
1.5 tsp Baking Powder
1 tsp Vanilla Extract
1 small human's pinch of Salt

Optional Frosting!

The first thing you're gonna need to do is get in the holiday spirit. If you're a strict originalist, you can accomplish this by harvesting your crops, dancing around a bonfire, and carving a turnip. If you're not that odd mix weirdly fascinating and incredibly boring, just drink too much at a party and confess romantic feelings to someone who doesn't reciprocate them. Now you're ready to make some cookies. Start by creaming your sugar and butter (mixing the crap out of them so that the sugar crystals tear into the butter and make little air pockets, for those of you who haven't made my chocolate chip cookies before) in a bowl. Then mix in your egg and vanilla and set it aside. In another bowl, whisk together your flour, baking powder, and salt. Then take your dry ingredients and slowly mix them into your wet ingredients. It's best to work in batches so that you can incorporate all of the dry stuff into the wet, and so that flour doesn't fly out of the bowl dousing everything in your kitchen in a fine white powder. This is a pretty thick cookie batter, so for those of you mixing this manually, by the last batch you might need to abandon your whisks and just mix it with your hands despite the very real risk that you may need to lick batter off of your fingers.

Pumpkin sprinkles added to remind you that pumpkins exist.
Once your dough is formed, roll it into balls and put them on a greased up cookie sheet. You should get about 24 out of this recipe. If you're off on that number by one or two it's no big deal. If you're off by 5 or more then re-roll your cookies. If you're off by 10 or more, re-think some major things about how you live your life. Now, personally, I like a big fluffy cookie, so I leave mine as balls. If you prefer a thinner, crispier cookie, flatten them down with a weird gadget you can buy for about 30 bucks. Or, you know, with your thumb which is usually free. In any case, throw those suckers in a 375 degree oven for 10-18 minutes, depending on the thickness of your cookies. Pretty much, about 5 minutes after your house starts to smell delicious, take them out. Make sure to neurotically check on them every couple of minutes to really give them that homemade touch. When they're done, they should just be starting to brown around the edges. Now you've got some delicious homemade cookies to freak out the neighbors! They (the cookies) have got a mild sweetness going that's super awesome for other days, but this is a holiday predicated on threatening your neighbors into giving you sugary treats. So, once your cookies are cool, feel free to douse them in chocolate frosting. And since we've talked a lot about giving these cookies to kids, I'm not going to tell you to add a little bit of bourbon into the frosting. So don't even think about adding in specifically two tablespoons of bourbon into one standard sized can of frosting. See you next week, assuming you haven't been egged into oblivion!


October 4, 2017

Beer Cheese

Beer. Is there anything it can't do?
The midwest and Germany have a lot in common. A love of food and alcohol, a healthy appreciation for tradition, and a tendency to reschedule those traditions out of concern for the weather, which is constantly threatening to kill us all. And it's no surprise that when you've got a bunch of people who love food and alcohol together, they're gonna start blurring the lines between those two things. Because after you've been drinking for long enough, just about any food idea will start to sound reasonable as long as you can make it in less time than it takes to get a pizza delivered. Occasionally, like with beer cheese, it works out. Occasionally it doesn't, but you never admit that a drunken food idea was bad. You just stubbornly tell all of your friends about how great it was, and how they need to try it. This is why the French started eating snails.

Ingredients:

1 Bottle Of Beer (Some people get very specific about what kind of beer has to be used for this. Those people are fools. Use a beer you like, preferably one with a good amount of flavor, but beware that the flavor will intensify somewhat as it's cooked)
8 oz. Cheddar Cheese
2.5 TBSP Butter
2.5 TBSP Flour
1.5 tsp Dried Oregano
1.5 tsp Garlic Powder
1 tsp Worcestershire Sauce
1/2 tsp Hot Sauce
1/2 tsp Mustard (Any mustard will do in a pinch, but I prefer something with a little bit more texture and flavor like a stone ground mustard)
A standard human's pinch of Salt

So, Beer Cheese as a dip was developed in Kentucky. And since Kentucky has pretty much only ever had one thing to brag about (bourbon), they'll tell this to anybody who'll listen. I'm pretty sure that Beer Cheese is the state bird of Kentucky. But combining beer and cheese is by no means unique to them, and was even a thing in medieval Europe. In the USA soups and dips combining the beer and cheese are commonplace throughout the midwest, most notably in Wisconsin where it's technically illegal to eat a meal that doesn't have cheese in it. Now that you know that Kentucky has no reason to feel a sense of accomplishment, it's time to melt your butter over medium heat and stir in your flour to make a roux. As I've mentioned once or twice before, a roux is commonly used to thicken sauces. So once that's good and done, whisk in your beer slowly. You're gonna be beating this thing a lot more than you think you should have to. You're going to stop, thinking that the sacrifice of your arm and shoulder was surely enough to ensure a smooth sauce. Then you'll see a lump and realize that you're not done. You're never done.

Bonus points if, like me, you get off-brand pretzels that look
like a doughier version of The Scream, by Edvard Munch
Once you're done weeping in the corner and your sauce is smooth, stir in the rest of the ingredients. When you're stirring in the cheese, melt it in in batches so that you end up with a beer-and-cheese sauce and not a beer sauce with a giant lump of somewhat melted cheese at the bottom of it. Let it cook on low, stirring regularly, for about 10 minutes so that all of the flavors can get drunk off of the alcohol, relax, and start getting to know each other. And that's it! It's a little spicy, a little sour, a lot cheesy, and full of some awesome flavor. Now all you have to do it grab some soft pretzels, hard vegetables, or...medium pasta? The point is, if you've got a foodstuff, there's a better-than-average chance that this stuff will taste incredible along with it. Plus, you can totally lie to children and tell them they can't have it because there's beer in it. More for you.

August 4, 2017

No-Bake Mint Cheesecake

Mint leaves: making nature kind of worth the hassle
For a long time, I considered no-bake cheesecakes to be in the same classification of hipster-nonsense as waxed moustaches, drinking gin out of mason jars, and judging others for not living a "sustainable" lifestyle while you yourself are living off of a trust-fund. Not much has changed. All right, maybe it's changed a little bit. It takes forever to set up in the fridge. That's a lot of free time. Which can totally be used by unemployed hipsters practicing their ukelele solos for the open mic next week, but can also be used by people who have actual jobs, and not that much free time. Given the right preparation, this can totally be the dessert version of a crockpot dinner. Just get it going in the morning, and enjoy it when you get home at night. I, for one, am totally in favor of taking the hipster nonsense and using it against them like that. Now I just need to find a productive use for kale.

Ingredients:

16 oz. Cream Cheese, softened (You "soften" cream cheese by letting it get to room temperature. You do this so that your cheesecake doesn't have gross lumps running through it, causing your friends and family to rightly shun you at all social gatherings)
14 oz. can Sweetened Condensed Milk
2 pouches Graham Crackers 
1 cup Mint Leaves
1 cup Sour Cream
1/2 cup Unpacked Light Brown Sugar (Typically, brown sugar is measured in one of two ways. "Packed," meaning you measured it out and then smashed it down to take up less space for no discernible reason, and "unpacked," meaning you decided that just measuring it out once like a normal person was all you had time for today)
1.3333333333 sticks Butter
The juice from 1/2 a lemon
Free time

The first thing you're gonna need to do is get rid of that uneasy feeling you have in the back of your brain about making a no-bake cheesecake. I get it. Theres something vaguely unsettling about a cooked food that you don't actually...well, cook. But fear does not exist in this dojo, so get over it. Now that your existential worries have been quenched under a torrent of repression and cautious optimism, take out those uncomfortable feelings on your graham crackers by crushing them in to tiny bits as a warning to the other ingredients. Mix in your brown sugar, and then get to melting your butter. Add your melted butter in with your sugar and the crushed bodies of your graham crackers, and stir it all together. Take about 2/3 of your mixture and dump it into a springform pan (A springform pan is essentially a pan with a clasp that you can release to loosen the sides and take it off. If you don't have one, you can use a pie tin and things will still be mostly ok. But your parents may not love you anymore. I don't make the rules, I just dispassionately inform you about them). Pack down your graham cracker sugar sand into a firm layer along the bottom, and throw that sucker in the fridge while you work on your cheesecake guts.

Bonus points for failing to slice all the way through the crust,
making it impossible to the see the bottom crust deliciousness
So this next part is gonna be complicated. You ready? Ok. Take the rest of your ingredients and...mix them together. Sure, you've gotta choppity chop your mint first, and if you want to make your life easier you'll start this whole mess by mixing the sweetened condensed milk slowly into the cream cheese before adding everything else in. But that's really it. Just mix it all together. Then take your crust out of the fridge, slap that mess on top of it, and top it off with the rest of your graham cracker mix. Then throw that sucker in the fridge for...a long time. I mean a long time. At a conservative estimate, I'd say 2 presidential administrations. You will check on it multiple times, and each time be shocked that it's not ready yet. I just warned you about it, but you will still do this. Eventually it'll set up, and it'll be solid enough to cut pieces of and eat pretty much like a real cheesecake. And it kind of is a real cheesecake. Or, at the very least, an extremely thick milkshake. Enjoy!


June 28, 2017

Chocolate Chip Cookies

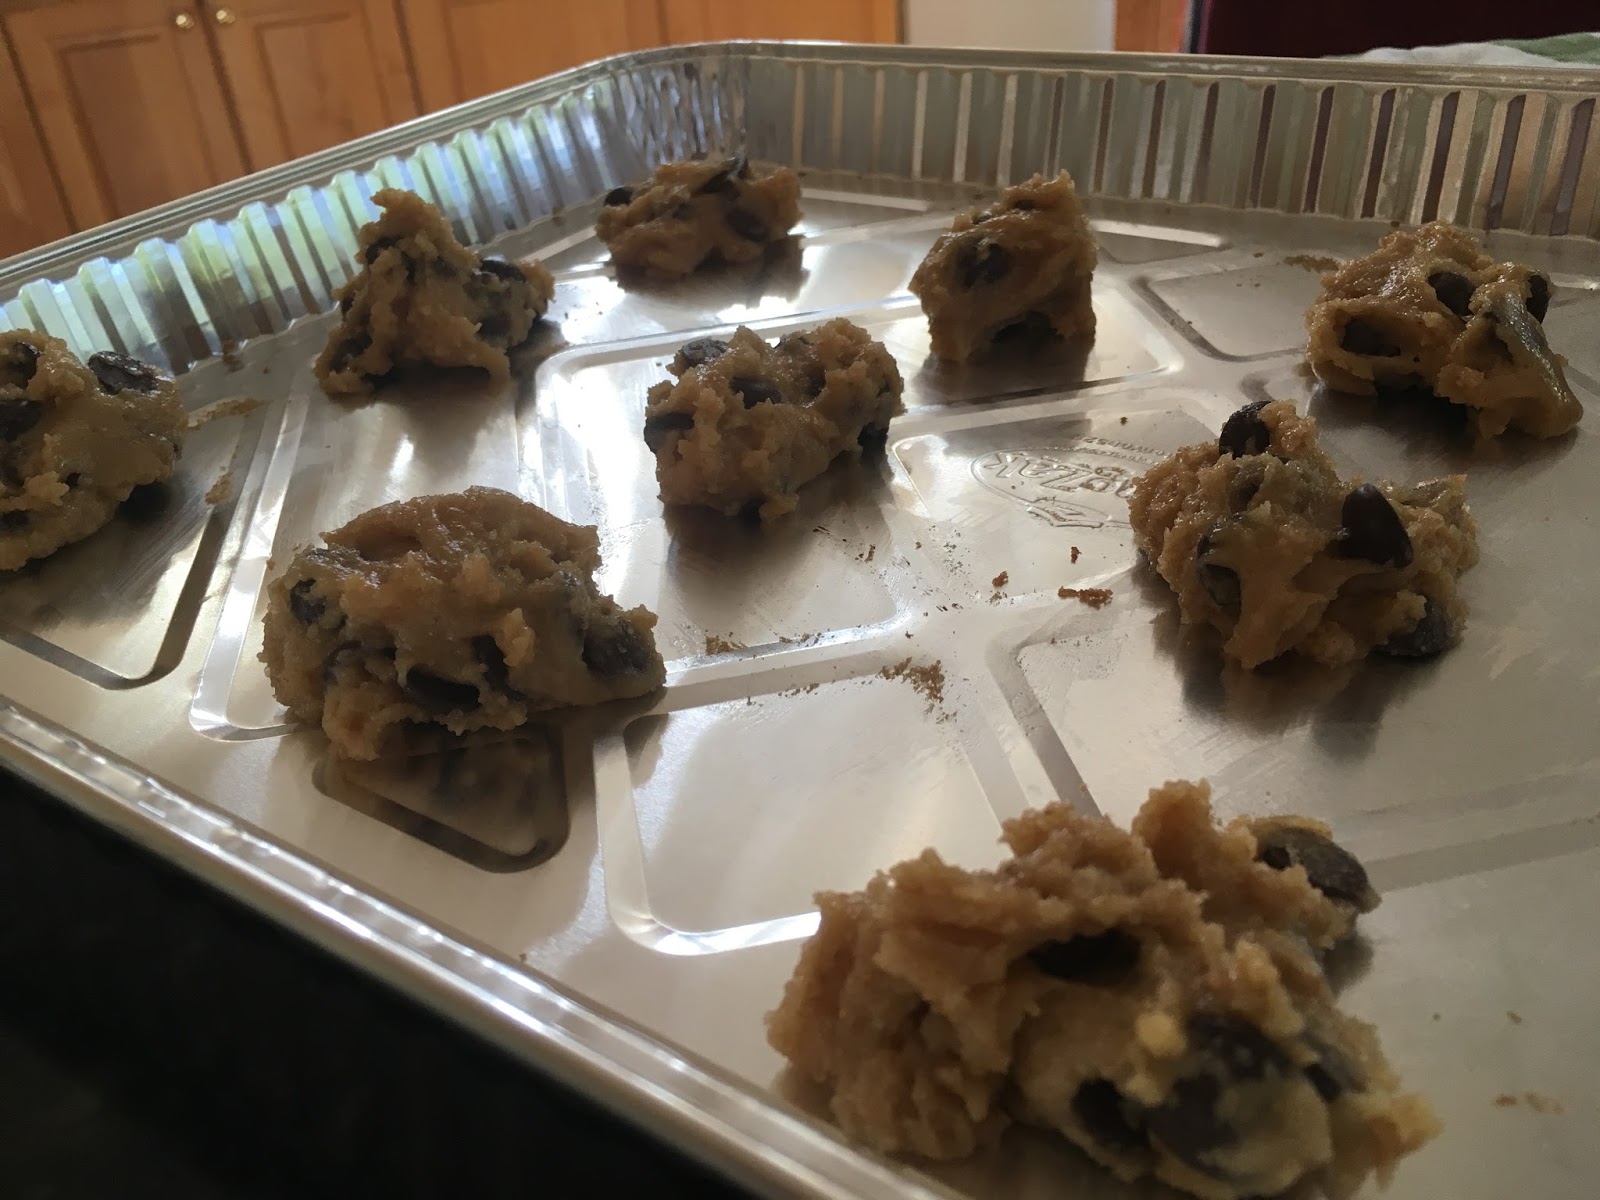
Early in the morning, before they doll themselves up, cookies
are just shapeless motionless blobs. Just like the rest of us.
On multiple occasions here, I've posted recipes that I've adapted from things that I used to eat growing up. And sure, stealing things from your parents is harmless fun for the whole family, but rarely has anything been stolen quite as brazenly as this chocolate chip cookie recipe. There are no clever little changes I made to enhance the recipe, like altering the ingredients, changing the quantities, or slapping my name on it. This is just, straight-up, cookies that my mom makes. I wasn't even planning on making this week's post be cookies. It was gonna be egg salad. But then I went over to my parents' house for a minute, smelled cookies, and realized that egg salad is a garbage food for garbage people. I'll probably make it next week.

Ingredients:

1 Cup Whole Wheat Flour 
1.25 Cups Unbleached Flour
3/4 Cup Light Brown Sugar, packed (Brown sugar is essentially sugar with molasses. So if you squeeze it, it packs together, kind of like wet sand. So make a sand castle out of brown sugar and a measuring cup.)
3/4 Cup White Sugar
3/4 Cup Butter or Oil (If you're using butter, because you have taste buds, 3/4 of a cup is the same as 1.5 sticks. You're welcome.)
2 Eggs
1.25 tsp Vanilla (Technically, my Mom's recipe calls for a "generous teaspoon of vanilla," but since that's totally not a thing that actually exists, I decided to change it slightly)
1 tsp Baking Soda
1 tsp Salt
No fewer than 12 oz. of Chocolate Chips

The first thing you're gonna need to do is find yourself a couple of bowls, or bowl-like objects. Fill once up with your various forms of flour (Personally, I'm guessing that the whole wheat and unbleached stuff got into this recipe because of my sister who, as a rule, doesn't eat white flour, consume any sugar, or enjoy life), along with your salt and baking soda, and whisk them all together until you can't tell them apart, even though some of your best friends are baking soda, and you swear you're not a bake-ist. Next, take a completely separate bowl, and cream your sugars into your oil or butter (butter). I used up my parentheses telling you the obvious truth that you should be using butter, so I couldn't use them to tell you that "creaming" is whisking the crap out of your sugars and butter so that the sugar crystals actually rip little holes in the butter, trapping air inside of it, and making it light and fluffy. So....make a note of it. And then whisk in your eggs, one at a time, along with your vanilla.

So, how's that not shoving burning hot cookies into your face
going? Asking for a friend.
Now it's time for the fun part, and by "fun" I mean "flour will be on your clothes until the day you die in a grease fire." Take your flour mixture, and start incorporating it into your sugar glop. Mix it in slowly, in a couple batches, and your clothes might live to see another day. Then add in your chocolate chips. It has been stressed to me that you cannot have too many chocolate chips, nor can you skimp on the quality of the chocolate. That said, some of these brands in the store are like 3 dollars per chip for some bespoke hipster nonsense. So for my money, I say don't get "uncle joe's chocolate-like chip-substance," and also don't get any chocolate chips that come with moustache wax and kombucha tea. Just get regular chocolate chips. And add them in to your batter. Then take a teaspoon, and scoop some heaping mounds of said batter on to baking sheets, leaving room for them to spread out, lightly experiment with drugs, and do their own thing, and shove them into a 375 degree oven until they're golden-brown and delicious. About 12 minutes. (Pro-tip: After they're done and you take them out of the oven, the baking sheet is still hot. So maybe get your cookies off of it before they burn on the bottom). Then try to wait until they cool before shoving them in your mouth so that you don't end up burning yourself horribly, despite the fact that everybody knows cookies are best fresh out of the oven. Enjoy your moral quandary!


April 14, 2017

Matzah Pizza

Here we have Matzah, in its natural habitat. Notice how the
ridges camouflage it, helping the matzah to better elude flavor.
For the...less semitic of my readers, saddle up because this is gonna, without a doubt, be the most jewish-y post I've ever posted. Because, as you may-or-may-not be aware, we're currently deep within the bowels of the Jewish holiday known as "Passover." And, as you may-or-may-not-but-I'm-betting-on-not be aware, one of the key elements of this holiday is eschewing a vast array of foods, including leavened breads. Another is drinking large amounts of wine, which is pretty much the only way to get through a week without leavened bread. What does this all mean, practically? Well, for starters, it means that you should be nice to your Jewish co-workers this week, because they're cranky. It also means that for the more observant Jewish people out there, there's pretty much nothing to eat, so you have to make due with weird facsimiles of real food. Which brings us to Matzah Pizza.

Ingredients:

2 standard-issue Matzahs (A Matzah is an unleavened wheat cracker. Essentially, it's big cracker that has slightly less flavor and nutritional value than the box it comes in. Any supermarket with a kosher section likely has them.)
4 TBSP Marinara Sauce
4 oz. Cheese (What kind of cheese? That's a whole pit of nonsense and terror we'll get into later. But the short answer is, Mozzarella if you can get it)
1/4 tsp Red Pepper Flakes
1/4 tsp Dried Oregano
1/4 tsp Garlic Powder
1 average-sized human's pinch of Salt

The first thing you're gonna need to do is abandon all hope of this thing you're making looking or tasting like pizza. Unless you live in California, in which case this will probably be the most authentic and delicious pizza you've ever had in your life. Take one of your matzahs and slather it up with half of your marinara. Fun fact: because of all of the dietary restrictions involved in Passover, many people won't eat any processed foods that haven't come from a factory specifically monitored to make sure that it's Passover compliant. Another fun fact is that pretty much all of the companies that make food specifically for Passover have absolutely no idea what they're doing when it comes to the making food part. Which is why you'll see a bottle that says something like "Spicy Tomato and Basil Marinara" and take it home, only to realize that it's essentially plain tomato juice with sugar added in for some reason. Anyway, back to our Matzah, which we just spread "marinara" on top of. Take half of your red pepper, oregano, and garlic, and add them on top of the marinara to help make up for its many flaws.

"Pizza cheese." Because who doesn't put a weird combination
of cheddar and mozzarella cheeses on their pizza?
Now we're up to cheese. Which often suffers from the same Passover-related maladies as things like marinara. If you're lucky, you'll be able to find actual cheese, with standard names like "mozzarella," "cheddar," or "whiz." But, often times you'll have to suffer through weird pseudo-cheese blends like "fancy shreds" or "pizza cheese." I prefer "pizza cheese" over the various shreds, because they're at least confident enough that they won't be sued for putting cheese in the name. Add 1 oz. of it on to your marinara. Next, add your second matzah on top of the cheese, and start repeating this process. Because matzah is horrible stuff, and if you want it to have enough sauce to be flavorful, it'll lose all structural integrity, so we need layers. Or pacts with your friendly neighborhood deity. Or both. Anyhow, slather up your second matzah with the rest of your garlic, oregano, and red pepper, along with your salt for good measure. Add on the rest of your cheese, and toss that sucker in a 350 degree oven for 10 minutes. And that's it! Aren't you glad you got sucked into the terrifying world of Jewish cookery during Passover? Me neither


March 6, 2017

Lokshen Milk

Welcome to the exciting, fast-paced world of eating way too
much dairy. Currently unincorporated
Everyone grew up eating something. For some people that something was unreasonably large amounts of fast food. For others it was cheap ingredients, coerced against their natures into delicious home-cooked meals designed to stretch a struggling family’s income. And for some it was...I don't know…chicken? What do nondescript people eat? I'm sticking with chicken. Chicken and asparagus. Some people ate chicken and asparagus. Today however, we’re focusing on the second category of food, and specifically on a dish that I remember fondly from my youth. It’s easy to make, tastes good, and is a great way to feed a family for about two dollars and some change. And the recipe has been in my family for generations. Two generations, as far as I know, but it still counts.

Ingredients:

½ gallon Milk
½ lb. Pasta (traditionally, growing up, my family was fairly specific about the pasta used. Upon growing up I've come to realize that it doesn't really matter, and my mother won't actually barge into my apartment and stop me from using the “wrong noodles.” Because I won't buzz her up.)
1.5 TBSP Butter
Salt

The first thing you're gonna need to do is channel your inner poor immigrant of vaguely eastern-European descent. Got it? Cool, let’s get started. The name Lokshen Milk, loosely translated, means noodle milk. Which sounds super gross, especially given the propensity these days for weird alternative forms of milk. But what it actually is, essentially, is a soup. Maybe even a stew, depending on the proportions of the ingredients (which I guess is technically true of most things), but I'm gonna play it safe and stick with the soup version. Anyhow, take your pasta and throw it in some boiling water until it's al dente (a curious Italian phrase I may have mocked at one time or another, that means “to the tooth.” Which essentially means that it [the pasta] is cooked, but still offers resistance when bitten. Like a sleeping person on a beach).

It looks exactly like what it is. A bowl full of milk and pasta.
It tastes awesome though.
Once your pasta is cooked to my liking, drain it and then throw it right back into the pot again. Add in your butter and milk, along with salt to taste, and bring that sucker up to...well, not quite a boil. Boiling milk is generally frowned upon. People say it burns super easily and that it kills the nutrients. This may be true. What's definitely true is that it makes a crazy mess. So bring your milk up to just under a boil. Then serve it up to your squalling family by the bowlful. And I know that some of you are undoubtedly sitting with your hands eagerly raised, begging to ask how a giant bowl of milk, butter, pasta, and salt can possibly be healthy for you. Well, I promised it'd be cheap, easy, and delicious. I also may have promised through insinuation that it wouldn't be chicken and asparagus. I never said anything about healthy.


January 11, 2017

Tired Returns

Oh, and waterfalls. There were also waterfalls.
So it's 2017! That apparently happened. And with it came the grim realization that I lied to all of you. I said that I was going to keep updating this blog while I was on vacation. I even implied that I might update it more than usual with random trip nonsense. This was not the case. And sure, I didn't intend to lie to you all. I had no way of knowing that the old unsupported blogger app would finally crap out and keep me from updating from my phone. But that doesn't really matter. What actually counts is that I went to Scotland and played around with frickin' Owls. Seriously...even if all the technology worked all of the time, I would not have been focused on updating whilst on this vacation. I was focused on owls. And castles. And whiskey. And....I dunno...natural splendor? But I'm back! And it turns out that when you get back from a day of about 14 hours of plane travel, you're hungry. And because you've been gone for two weeks, you pretty much only what's in your freezer to work with. Fortunately, my freezer was well stocked....with cheese. And not much else. But cheese, plus tomato/herb crusted mini-pitas that I bought from a supermarket, equals delicious mini pita pizzas! Which will totally soothe your soul after a long day of travel, and distract you for about 45 seconds from the fact that owls and castles are behind you, and you have only your whiskey to remember them by. And the pictures. Mostly the whiskey.

Ingredients:

Mini Tomato/Herb Pitas (Yes, this is kind of weirdly specific. But it's what they had at the grocery store. Get regular mini-pita for all I care and smear some tomato sauce on it. Actually, that sounds better. Do that instead.)
Cheese
Vegetable Oil
Nothing like melted cheese to help you forget the horror
 that is WOW airlines. 

That's right. 2 ingredients. Because one thing you don't want to do when you've been on a plane for 16 hours that day is have to mess around prepping different ingredients, hungry and tired and just wishing you were either back in Scotland or dead, whichever you can get to faster. So simplicity is key here. Take your oil and coat the bottom of a cast iron skillet. Throw down your pitas until you get a solid layer (Yes, you've just come off of 20 hours of plane rides, so you're probably not going to have the energy to literally "throw" anything anywhere. Maybe "listlessly prod.") Cover the top with cheese. How much cheese? If you need to ask that question, you may not be deserving of cheese. It's delicious and you're tired. Go nuts. I had about 5.5 ounces on my batch, but that's just because my weary hands gave out from all of the sprinkling. Toss that sucker in a 450 degree oven for about 10 minutes, and then take it out and enjoy! There's nothing like cheesy deliciousness to welcome you back to your dreary life after crazy travel and adventure.


June 7, 2016

Broccoli Cheese Casserole

Oh, broccoli, cover up your shame. 
Broccoli is delicious. That's a simple fact. The problem is, that broccoli is also healthy. People go out of their way to tell you this. You'll just be out enjoying some broccoli at a meal, on a stroll in the park, or while taking in a spot of opium, and somebody will come at you running their mouths about antioxidants and vitamins and supplements. It's pretty much a nightmare from which the only escape is cutting off your own arm with a rusty knife. Clearly a solution was needed. So by cleverly adding butter, cream, and cheese, I've turned it into something that the roving bands of health nuts won't start an uncomfortable conversation with you about while you're in line at the bank. Sure, we could give up broccoli and just eat other things. But I vaguely remember saying like a minute ago that it's delicious. And besides, everybody knows that impulse control is for foppish dandies, suckers and communists.

Ingredients

20 oz. Broccoli (Usually I like working with fresh ingredients because they ususally taste better and have better texture, but in an application like this you could probably get away with using the frozen stuff and get pretty good results.)
1 cup Sour Cream
1 Standard-Issue Onion
2 cloves Garlic
1/2 cup Seasoned Breadcrumbs
3 TBSP Butter
8 oz. Cheddar Cheese
3 oz. Parmesan Cheese 
3 Eggs
Salt

If you're using fresh broccoli, you're gonna start slightly differently than if you're using the frozen stuff. If you're using fresh broccoli you're gonna need to cut it up and boil/steam it. (Don't worry, you can totally learn how to do that in this old post of mine! Now you can read even more. Hasn't today just been the best?) If you're using the frozen broccoli, forget to let it defrost before making this recipe, and then hastily defrost it in the microwave while you're (SPOILER ALERT) chopping and sautéing your onion. Next, you're gonna slice up your onion, melt your butter over some medium heat, and sauté that sucker for 5 minutes along with an average-sized human pinch of salt. During this time, chop your garlic into tiny little pieces of its former self. Once the onions are soft and have started to pick up a little color, add in your broccoli and garlic, along with another, smaller pinch of salt. Like the pinch that a child, or a dog that mutated a thumb might have. Cook that nonsense for about 2 minutes, until all your flavors start to meld, and it smells like happiness. Turn the heat off, and let that mess cool down to room temperature.

Here lies broccoli, killed by deliciousness. As we eat his tasty
corpse, let us think of the good times. He'd want it that way.
Now it's time for the fun part, and by "fun" I mean "fattening." Which is usually pretty fun. So it all works out. The point is, take your eggs, breadcrumbs, sour cream, and cheddar cheese, and add them in to your broccoli mix, to form a cheesy broccoli goop. Or "ooze", if you want to be scientific. Spread that gunk out into a pan, and form an even layer. Top it of with your parmesan cheese, and then shove that sucker in a 350 degree oven for 25 minutes. Then turn the heat up to 400 degrees and cook it for another 10 minutes to make sure you burn away all of the healthiness, leaving a bubbly layer of deliciousness. Wait for it to cool slightly before shoving your face in the entire pan and gobbling the goodness down. If you're a fancyboy or a communist (This link just leads right back here, because that was a callback to the first paragraph of THIS post. Enjoy). The rest of you, enjoy your pretty serious burns all up in your face and throat. Totally worth it.