December 29, 2015

Chamomile Potato Soup

For best results, use only fresh-chopped Chamomile
I'm finally back from all of my crazy random world travels! And, the first post I'm making now that I'm back is a post for some Chamomile Potato Soup. That's right! It's another soup recipe. Pretty soon after the last one, and you might be getting sick of delicious soups, or just delicious warm things in general (last week was Hot Whiskey). Fortunately, I don't care right now! My heat's out, and it's so much winter right now that it's even winter in LA, so shut it. Shut your face and other bits. You don't like it, go start your own blog. But first make this weirdly awesome soup. Then regret all of the mistrust that you had in me, my soup, and the process we've implicitly agreed to whereby I snarkily teach you how to make awesome food, and you put a sock in it about me posting another soup recipe.

Ingredients:

6 stalks Celery
5 average sized Potatoes
1 Onion
1 bulb o' Fennel
2 quarts Chamomile Tea 
2 cloves Garlic
2 TBSP Butter
1/4 tsp Black Pepper
An unspecified amount of Salt

The first thing you're gonna need to do, is have a whole bunch of leftover chamomile tea sitting around your freezing apartment. Or you can make some chamomile tea. Whichever. The point is to let it steep all up in there for a good bit to get some thick Chamomile flavor up in that tea. Otherwise passing British people will scoff at you, and then we'll have to start a war to save face over your weak weak tea. Once you've averted international incidents by not brewing terribly inferior tea, chop your Celery, Onions, and Fennel. It doesn't have to be tiny. You'll be blending the bejeezus out of it later anyhows. Melt your butter in a pot over medium heat. Add in your chopped vegetation along with an average human's pinch of salt (it was pointed out to me by my brother-in-law, that he didn't know how much an average pinch was. I'll give you the same advice I gave him: have everybody in the house pinch a pinch of salt, and form a salt pile. Then evenly divide it by the number of pinchers. Asked and answered!), and sauté for about 7 minutes. Then choppity chop up your Garlic, and add it in for another minute. Finally, roughly chop your Potatoes, and add them in along with another democratically average pinch of Salt, and your Black Pepper. Stir it around for a minute or so to let everything start to meld together. In flavor, that is.

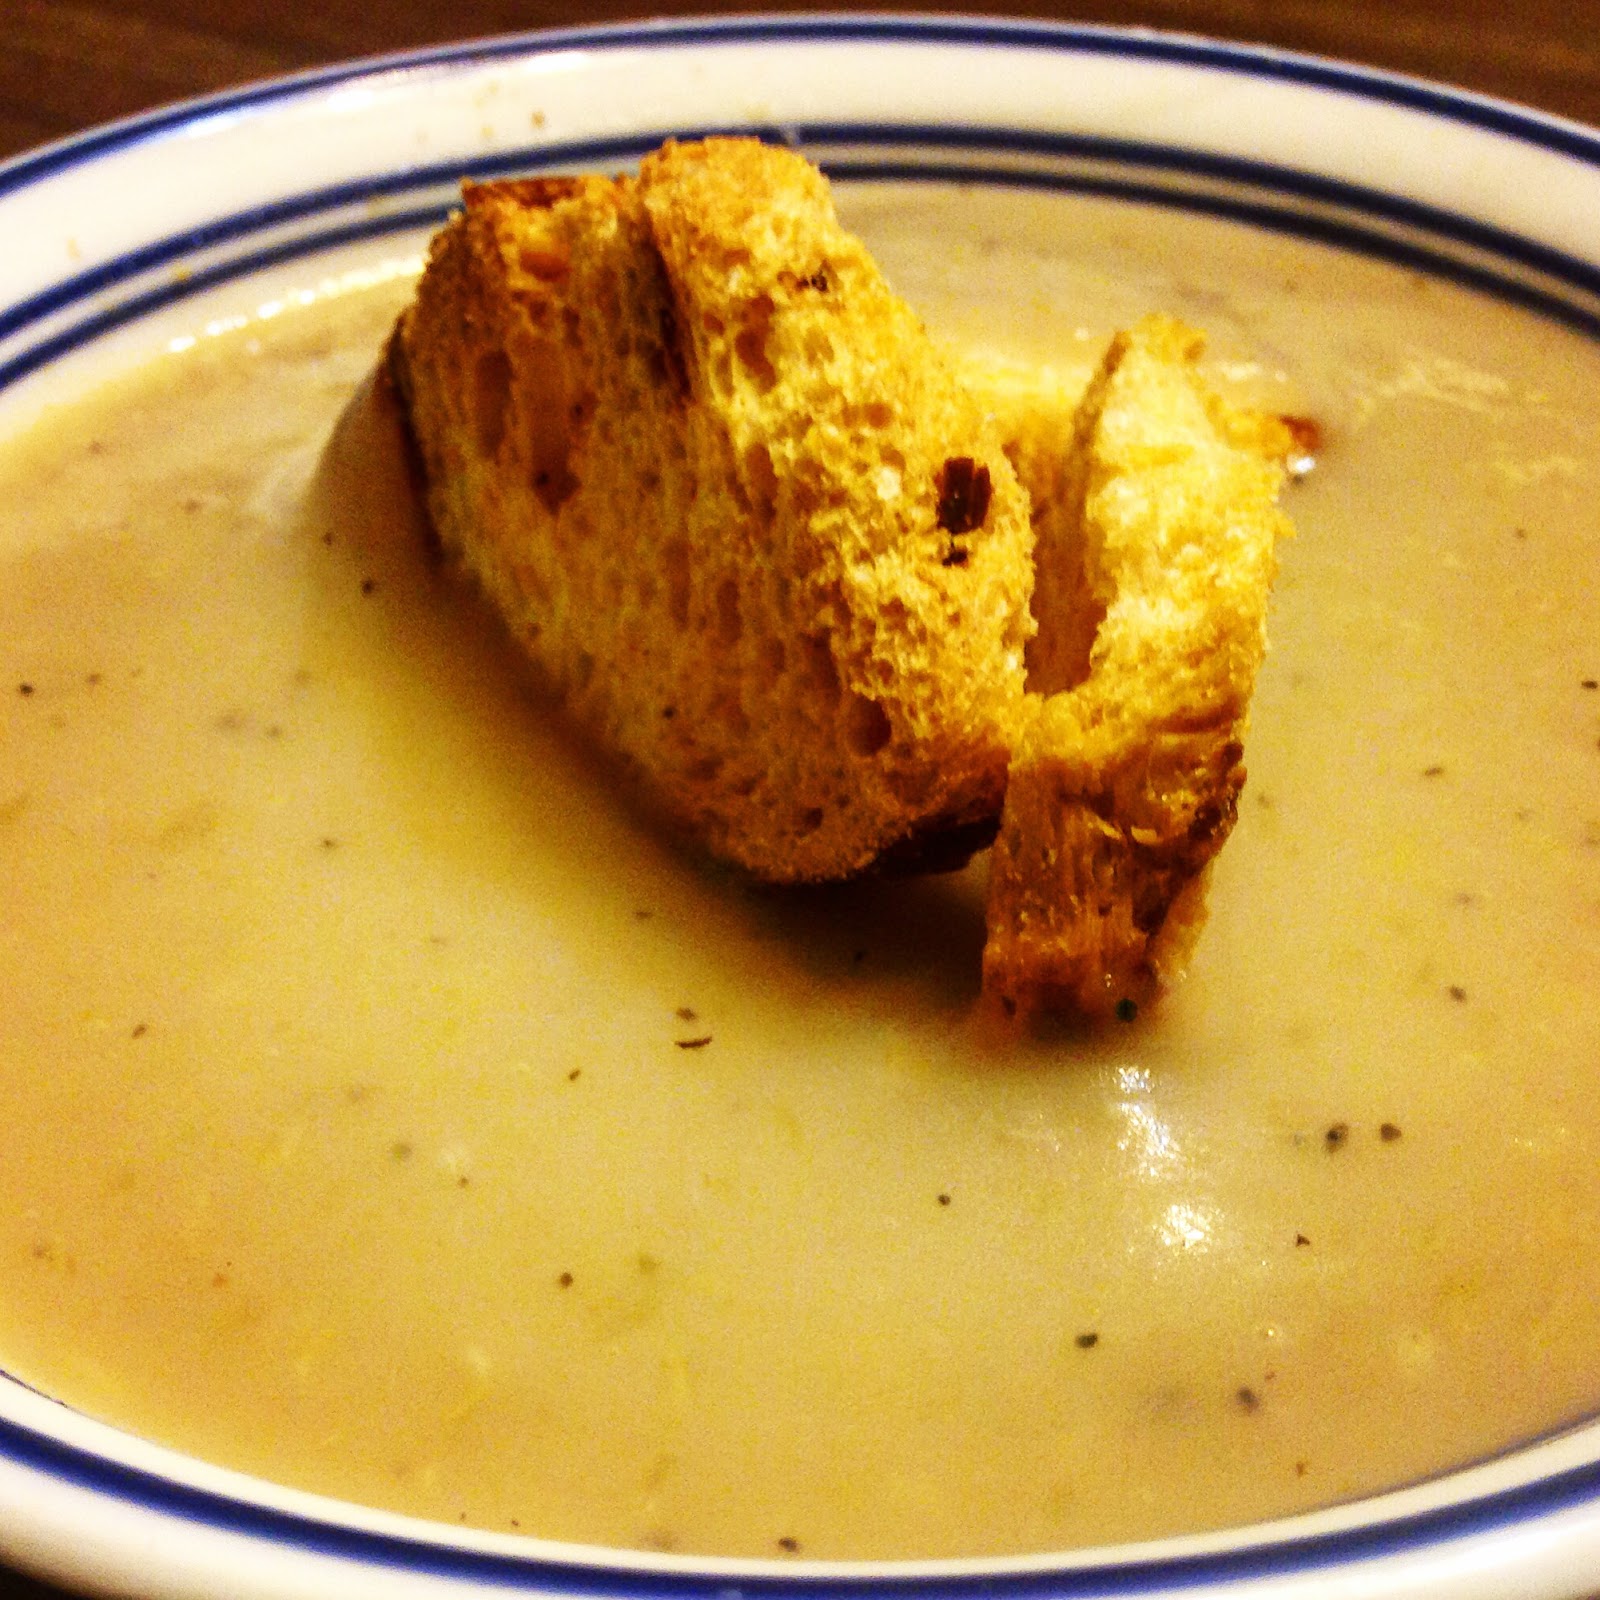
Croutons added for reasons of awesomeness
Now it's time to fight every urge your body is telling you, and dump that tea all up on top of them there vegetables. I know, it feels wrong. It feels like you're going to ruin your vegetables, and ruin your tea, all in one swoop. What will the fictional British passers-by say then? I don't know, but I bet it'll be sardonic. But don't worry. It'll be ok. The Fennel and the Chamomile will form some complex sweetness and deep savoriness that'll make everything awesome. And if it doesn't, you can always drink some more hot whiskey until you think it does. But it totally will. Probably. Almost definitely. It did for me. The point is, pour the tea in the pot, add in another one of the People's Pinches of Salt, bring it all to a boil, and then simmer it for about 20 minutes, until everything inside is cooked, tender, and delicious. Then blend that sucker with a whirry stick of knifiness until it can't see straight anymore. Serve with something crunchy, and a smug sense of satisfaction watching your guests who questioned your soup choice licking their bowls. Welcome back to me blogging on a computer, y'all! I got the ability to post links, and I'm not afraid to use it. Even if I'm sending you somewhere super super weird, but still awesome. See you next week! Not literally! Unless you're stalking me, in which case I'll probably see you sooner than that. Or at least you'll see me. Either way.

December 22, 2015

Hot whiskey

The name pretty much says it all. It's my last night in Ireland, and I'm enjoying my last truly Irish hot whiskey. Oh, you haven't heard of hot whiskey? Because it's insane. One awesome airbnb host introducing me to it, and one awesome Bushmills employee actually putting some in my hand, has legit changed my life. It's the absolute perfect drink if you're feeling a little under the weather, or if it's just cold out. Or if you just like delicious awesomeness. What's that? Alcohol is a depressant and isn't good for your immune system, so you think you can disprove it being good for feeling sick? Cram your word hole. Because this is Ireland, where magic, and rainbows, and pure joy come from. And I've personally experimented, and it works. Why are you still arguing? Didn't I already tell you to shut it (I did)?

Ingredients:

Irish whiskey
Water
Lemon
Cloves
Cinnamon
Honey

The first thing you're gonna need to do is go to Ireland. Because it's awesome. While you're there, stay in Ashford Castle. It's pricy, but insanely worth it. I'm seriously considering selling a limb so I can go back (unrelated question: how much do limbs go for on the black market these days?)
Seriously. I stayed in a castle. It has...battlements. It's legit. It's alsogot forests   and falconry and horses, and clay shooting, and pretty much everything a castle should have. So go there. Romp around the forest. Work up a chill. Then go indoors. And weep because life will never be this good again, and castle-less life isn't worth living. Now it's time to drink some magic!

The recipe I'm giving you is slightly more involved than the typical pub recipe. It's the recipe for the hot whiskey they gave me at Bushmills, which was the best one I had. Take a spice bag (a spice bag, apparently, is a bag you shove spices in to infuse the flavor into cooking liquids without the mess of straining spices. Or you could ignore the spice bag, and just chew your whole spices, like a man. A potentially toothless man.), and cram cinnamon and cloves all up in it. Dump it in some water, and boil it until it's good and dead. Then take a slice of lemon and a smidge of honey and throw them in the bottom of a glass. Add in some whiskey and some steaming-hot-spice-water. Twice as much water as you've got whiskey. Now stir lightly, and drink it down. You won't regret it. I guarantee it (not a guarantee). Then wander back into the Irish wilderness and tackle a new day of absolutely insane awesomeness. 

This isn't exactly the same. This is the hot whiskey from the airport hotel I'm spending my last night at. It's not quite as awesome as the stuff I got at Bushmills, but it's still fairly epic. Now I get to go to sleep so I can make my early morning flight and go back home to LA! (Seriously guys, how much can I get for say...an arm. I can probably sell a couple arms. Don't ask whose.)

December 15, 2015

Crackers

One thing I've learned so far in my crazy multinational adventuring, is that food can be expensive. And sometimes, even if you have the cash to shell out for that sweet sweet food, anything good can be hard to come by. But pretty much everywhere has some tasty weird gunk you can dunk a cracker into (I'm looking at you, hummus). Or some equally tasty nonsense you put on top of a cracker. Or whatever. Shut up. The point is crackers. They're the key to low-key food consumption on the go. Hung-over breakfasts way too early? Crackers. Car food while you're driving to an Irish castle? Crackers. Can't find your cache of local currency, but you'll be damned if you're going to an ATM when you know full well it's around there somewhere? Crackers. 

Ingredients:

1 Cup All Purpose Flour (Don't let the name fool you. It's pretty much only for food purposes. And sometimes paper mâché purposes.)
2 TBSP Olive Oil
1/4 Cup Water
1 tsp Salt
Extra nonsense (optional)

This is one of those blissfully simple recipes that barely even need to be written down. Mix all your ingredients. Got that? I know it was complicated, so I'll repeat it slower. Mix....all....your....ingredients. Take a rolling pin, or any cylindrical object you have lying around (I'm looking at you, wine bottle), roll your dough flat, and slap it on to a baking sheet. The thinner you get it, the crispier your crackers will be, so use your judgement. Then take out your pent up feelings of helplessness and frustration on your dough by repeatedly stabbing it with a fork. The dough didn't do anything to you, but don't let that stop you. 

Once you've stabbed your dough, sobbed in the corner, put the fork down,  and calmed the voices in your head, throw it (the dough) into a 450 degree oven for about 15 minutes. Cooking time can vary based on thinness (of the dough). Let it cool to room temperature, and then break it into little bits and take it on adventures with you! Or keep it whole, and eat a giant cracker on your own because all that dough stabbing apparently didn't fix all your issues. If you opted to make fancier chips, add whatever nonsense you like when mixing the ingredients. Seeds, garlic and fennel, thyme and rosemary, cheese and more cheese. Whatever floats your boat. Also, if you want a fluffier cracker, add 1/2 tsp of baking soda. This is all. Bye for now from Ireland!

December 8, 2015

Kubbeh Soup

So, I'm adventuring around a bunch of countries for the next couple weeks, and right now I'm in Israel. Which, it turns out, is awesome. The people are friendly, the country is beautiful, and they seem blissfully unaware of just how creepy their advertisements for eyeglasses are. 

I'm pretty sure this couple just finished feasting on the souls and flesh of the living before posing for this picture in their lensless glasses. But that's not really the point. The point, which you may have guessed by now, is that my sister made some crazy awesome soup for me over the weekend. And I managed to weasel it out of her (read: politely asked her for it). It's got pretty much everything I look for in a soup. Awesome flavor, variety of texture, and dumplings. Because dumplings are awesome. Seriously you guys. Dumplings. 

Ingredients:

3 Large Onions
1 lb. of lean ground meat (my sister used turkey, which was awesome. I wouldn't say no to ground beef though. Because beef.)
1 28 oz. can of Crushed Tomatoes
7 Carrots 
3 Sweet Potatoes
1 lb. Semolina (traditionally kubbeh is made with bulgur. But that's not how my sister made it. And also, traditionally it's not made into soup. So shut it)
2.5 TBSP Smoked Paprika 
1 TBSP Olive Oil
1 tsp Black Pepper
The juice from 1/2 a Lemon
An unspecified amount of Salt
A huge, but still unspecified, amount of Water

The first things you're gonna need to do is to gather all of your vaguely middle eastern friends. Then ask them, preferably from a distance, how to spell and/or pronounce Kubbeh. Then watch the ensuing chaos with malicious glee. And popcorn. Because it seems like every family calls it's something different. But whether you're making Kubeh, Kubbeh, Kubbah, Kibbe, Kibbeh, Quibe, or any other weird variant, it's all the same. So heat up 1/2 your Olive Oil over medium heat, finely chop 2 of your Onions, add in a normal human pinch of salt, and sauté until they're golden and awesome smelling. Then add in your Ground Meat and half of your Black Pepper, and continue to cook it until the meat's cooked through. This is easy to spot, because the drool in your mouth will get to the point where it actually impedes your speech. Turn off the fire, and set your meat mixture aside. 

Heat up the rest of your oil, again over medium heat, in a large pot. Choppity chop your last remaining onion, crushing his tiny hopes that he wouldn't share the fate of his fallen brothers. Sauté it with another pinch o' salt until it yellows and smells awesome. Chop your Carrots and Sweet Potatoes into bite-sized chunks, and add them in along with your Crushed Tomatoes, Paprika, Lemon Juice, the rest of your Pepper, and about 2 TBSP of Salt. Let it cook together for about a minute before adding in...just a ton of water. Picture all the water in the world. Then picture that you took about 12 cups of water out of it. That much water (the 12 cups, not the rest of the water in the world). Crank the heat to high, and bring that sucker to a boil. 

While you're waiting the approximate 1 lifetime for your pot to boil, make your dough. Combine your Semolina with an average human's pinch of salt, and 1.5 cups of water. Take a small handful of this goopy nonsense, and roll it into a ball. Gently use your finger to daintily from a divet in your dough. Then roughly cram as much of your meat mixture (remember your meat mixture? It was like 12 paragraphs ago.) into your divet, and stretch the dough around it to form a meat filled dough ball. Repeat as needed until you run out of meat, dough, or patience. Drop your fledgling Kubbehs in your boiling pot, and let them cook for a 1/2 hour. And there you have it! Delicious soup filled with awesomeness and grammar-based sectarian violence! 
And that's what I've learned so far in Israel. That, and how to haggle with cab drivers. And with everybody else. 

December 1, 2015

Turkey Stock

If you're anything like me, you've got the dessicated corpse of a turkey clogging up your fridge right about now. And you also once rode a roller coaster called "The Shock Wave" 10 times in a row at Six Flags. This post is more about that first part. Because leftovers are pretty much the motto of the week after Thanksgiving. And while there are tons of awesome things you can do with leftover turkey, stuffing, cranberry sauce, and whatnot, you can also just straight-up eat them and they'll be awesome. The raggedy old turkey bones that are infesting your life? Not so much. 

Ingredients:

1 Turkey (deceased, defiled, and consumed)
2 cloves Garlic
2 Onions
1 lb Carrots
1 bunch 'o Celery
1 Parsnip
1 Turnip
1 Lemon
1.5 TBSP Salt
1 tsp Ground Thyme
1/2 tsp Rubbed Sage
1/2 tsp Black Pepper
An unspecified amount of Water

The first thing you're gonna need to do is get over the fact that, like Ben Franklin before you, you've tortured and eaten some jive turkey. We all over it? Good. Now take the turkey corpse that you and your family have been picking at like incompetent vultures for days, and shove it all up in a pot. Cut up all of your vegetables (that's the Onion, Carrots, Celery, Turnip, Parsnip, Garlic, and Lemon, for those of you too deep in a post-thanksgiving food coma to pay any attention) into large chunks and toss them in on top of the turkey. You want to form a thick and even layer of vegetation over the body of the turkey to keep its delicious delicious soul from escaping and making its way to turkey heaven (or, if your turkey liked jazz and mixed dancing, turkey hell)

Add in your Thyme, Sage, and Pepper, and then add water until everything's covered in about 1.5 inches of water. Once your turkey sarcophagus of vegetables and water is complete (so that your turkey can carry deliciousness with it into the next life), crank up the heat to high. Let it get to a bare simmer, then clamp a lid on it and turn the heat down to low. Let it sit for pretty much as long as you have the patience for it to keep cooking. At least 1 hour. Then strain it, and there you have it! turkey stock! Which is super flavorful and awesome for making sauces and soups. And gravy. You know, in case you've still got some leftover stuffing and mashed potatoes, because you and your family lack the will if the warrior. 

For those of you interested in why this post looks a little different, it was written entirely on my phone, because I'm currently traveling on a crazy multinational adventure, because why not? And also because I was uncomfortable with not having tons of debt on my new credit card. So while I'm gonna still update every week for the duration, some updates might be a cool regional delicacy, or recipes I found that somebody else made, or crazy food adventures I had while nurturing my drinking problem. Or not! I haven't planned it out yet, because planning is for suckers and horticulturists. See you next week!

November 24, 2015

Pumpkin Pie

Alice's Restaurant is one of many traditional
Thanksgiving songs passed down from the
pilgrims to Arlo Guthrie, and then to us.
Well, we finally made it to the week of Thanksgiving. We made it through endless buzzfeed-style lists about things like "the best 450 ways to cook a Thanksgiving turkey," and "700 Thanksgiving Entrees that aren't turkey." And we've made it through the Christmas decorations in the stores which, by law, is blasphemy. I'm pretty sure you can be prosecuted for treason in the US for putting up Christmas decorations before Thanksgiving, but here these corporate jerks are, bold as brass, just flouting it in our faces like some sort of delicious pie. Not in my America. In my America, delicious pie is made out of actual pie, not out of department stores selling you things. It's made out of pumpkin, and spices, and it's so good that it makes all of the "pumpkin spice" everything that you've been guzzling down since the beginning of October taste hollow and meaningless. It's the flavor you finish off Thanksgiving with, and some things you just don't mess with. Don't even get me started about Black Friday.

Ingredients:

1 Can of Pumpkin (You technically can replace this with an actual pumpkin. It's kind of hard to work with, it doesn't taste much better, and it's a huge pain to get the texture right, but if you're the type of insecure person who needs to lord over everybody else how your pumpkin pie is more pumpkinny than theirs, go for it.)
2 Eggs
Approximately 3/4 Cup Soy Milk (Why soy milk? Because my pie is dairy free. Got a problem with that? Then use regular milk. What do I care?)
1/2 Cup of standard issue Sugar
1/3 Cup Dark Brown Sugar
1 tsp Ground Cinnamon
1/2 tsp Salt
1/2 tsp Ground Ginger
1/4 tsp Ground Cloves
An average human sized pinch of Ground Nutmeg
1 Pie Crust (If you want to go traditional, just use regular pie crust. You can buy it in the store, or make your own. If you want to get funky, make a gingersnap crust. How? Take the graham cracker crust from my cheesecake recipe, and replace the graham crackers with crushed gingersnaps. You're welcome.)

The first thing you're gonna need to do is punch Christmas in the throat. It's started stretching all the way through November, and it frankly needs to learn to wait its turn. That's the lesson here. If you're a holiday, and you don't wait your turn, you get punched in the throat (I'm looking at you Valentine's Day). Once your holidays are straightened out, and have stopped acting like jerks, pour your Pumpkin, Eggs, Salt, Sugar, Brown Sugar, Cinnamon, Ginger, Cloves, and Nutmeg into a bowl and stir them together to combine. Did you catch that? That's all of the ingredients, except for the Soy Milk and the Pie Crust. And when I say "stir to combine" I don't mean "gently twirl a spoon into the pumpkin mixture with your dainty fingers." I mean stir. Until you can't point out any specific ingredients in the mix, and the whole thing looks homogenous. Then slowly stir in your Soy Milk, until your mixture is just liquidy enough to start making you nervous about whether it's still gonna turn into pie.

You ate twice your bodyweight in turkey and stuffing, and
you swore you'd never eat anything again. Then pie happened.
Now it's time to be terrified that something will go horribly wrong! Will it? Who knows? Because now it's time to pour your filling into your crust, throw the whole thing into a 350 degree oven, and let it sit for an hour. Without opening the oven and checking on it. Seriously, opening the oven will lower the heat which will change the cooking. So leave the oven shut and try not to think about all of the things that could be happening in there. After an hour, open your oven and check on it. It should be firmed up all around the edges, and just a tiny bit jiggly in the center. If it's not, it could be for a number of reasons, including the fact that you didn't listen and you opened your oven early to check on it. If despite your best efforts, you've got a puddle instead of "slightly jiggly," put it back in for another 15 minutes. Then let the pie cool for 2 hours, and then refrigerate it for another 2 hours. Because as awesome as it smells right now, it'll taste so much better once it's properly cooled. Trust me, your patience will be rewarded. Then slice it, top it with some whipped cream, and serve it. To yourself, and the other loyalists who haven't abandoned you in the name of shopping. Everybody else can put terrible nonsense pie into their mouths. The good stuff is reserved for the real Americans.


November 17, 2015

Stuffing

It's like an Escher of stuffing ingredients
As a child, we never really stuffed the turkey on Thanksgiving. Shoving bread goop up inside that bird's gross butt always seemed like a silly idea compared to concepts like stuffing aromatic herbs and vegetables up that bird's gross butt. You know, to actually produce some flavor. So when I'm talking about stuffing, I'm talking about what some people out there mistakenly refer to as "dressing." It's pretty traditional thanksgiving fare, and is often corrupted and mangled beyond recognition with nuts, berries, cornbread, and other heathen traps for the unwary. But in my mind, real stuffing is relatively simple. It's pretty much an intensely good herb and bread casserole, and since mine doesn't roast inside the grossest part of a turkey, even the vegetarians at your table will love it. Which is a nice change of pace from what they'll be feeling while eating their disgusting soy-turkey-substitute.

Ingredients:

1 lb loaf of Challah Bread 
3 Cups of Vegetable Stock
3 Eggs
1 Standard Issue Onion
5 stalks of Celery
1 TBSP Olive Oil
3 tsp of ground Thyme
1 tsp of rubbed Sage
1/2 tsp Black Pepper
An unspecified amount of Salt

The origins of this recipe are definitely my mother's. Years ago I asked her how she made stuffing, and she told me. Every year since then I've forgotten some parts and filled in the blanks myself instead of asking her again, because I can't be bothered to make multiple phone calls for the same recipe in one short lifetime. What am I, made of phone calls? I don't know exactly how close I am to the original, but I do know that what I've ended up with after all of this time tastes like my childhood memories of thanksgiving (Savory, delicious, kind of wistful, and possibly completely idealized. Who knows what it was really like?and that's good enough for me. And now it's good enough for you. 

The first thing you're gonna need to do is to chop up your Celery and Onion, sauté them in your oil along with an AHSPS (Average human sized pinch of salt), your Black Pepper, and 1 tsp of your Thyme. Cook that hot mess over medium heat, stirring occasionally, for about 6 minutes. You want the onions and celery to be somewhat softened, but not cooked all of the way through. If you aren't sure about this, taste them, either by taking a spoon, removing a little bit, and blowing on a it until it's cool enough for your delicate mouth to handle, or by reaching into your hot pan with your hands and stuffing some onion and celery directly into your mouth and dealing with it. You know, like a man (I say things like this a lot, but in this case I totally did this).

All the delicious awesomeness of stuffing, none of the
turkey rectums
Once your vegetation is done, tear your Bread into roughly 1 inch chunks. If you've forgotten your culinary ruler and protractor, again, use your best judgement. And see me after class. Then take your Eggs, and lightly beat them until they submit to your authority by having their yolks and whites mingle together. In fear. Put your bread chunks into a bowl, and add the rest of your ingredients along with another AHSPS. Mix it all together gently. Sure, you want it mixed and you want your bread to absorb the moisture. But you don't want to squish it down too much or you'll end up with super dense stuffing. You know who eats super dense stuffing? Communists. That's why they don't have thanksgiving. Who would be thankful for that nonsense? Nobody, that's who. Take your bread gunk, shove it up in a baking dish if some kind, and then throw it in a 350 degree oven for an hour. Then take it out and eat it in front of your guests, offering bites only to those who brought suitable tribute (Alcohol). If anybody argues, challenge them to a contest to prove true ownership of the stuffing, using the traditional holiday weapons (Guilt. And alcohol). And if anybody tries to leave your meal early to line up for Black Friday shopping, hit them with the turkey carcass and disown them. Seriously.

November 10, 2015

Cranberry Sauce

Always spring for the fresh-premium cranberries. The
fresh-kinda-ok cranberries just look...wrong.
It's the holiday season, defined by Hallmark and Walmart as "the period between 1 AM on November the first, and 1 AM on January second when holiday music is played non-stop in all stores, festive decorations are placed strategically by sale items, and employees are forced to wear silly hats." The actual holiday season, at least to me and all other Americans who haven't yet submitted out wills to the enemy, starts the week of Thanksgiving. But who am I to say that we shouldn't be posting recipes for stuffing and turkey this early? I love Thanksgiving, so I won't complain too hard. Especially not after consuming all of that festive eggnog I bought on sale. Which reminds me, I need to go shopping. 

Ingredients:

12 oz Whole Cranberries
6 oz Whole Blackberries 
3/4 cup of Brown Sugar
1/4 cup of White Sugar
1/4 cup Orange Juice
1/2 tsp Ground Cinnamon
1/4 tsp Lemon Juice
1 smallish sized human's pinch of Salt
1 smallish sized human's pinch of Cayenne Pepper

Here's the problem with cranberry sauce. Despite being highly awesome, and surprisingly easy to make, it suffers from everybody having grown up with the canned glop (which is pretty much just gelatinous sugar goop), and not knowing that real cranberry sauce tastes exactly like holiday cheer and winning the big cash prize on your local radio station's phone-in contest. It's true. Look it up. For some people this means that they refuse to try legit cranberry sauce under any circumstances. For others it means they make weird fusion dishes like mango curry cranberry chutney. Either way these people should be banned from your holiday table. 

Once you've shunned the nonbelievers, throw all of your ingredients into a pot and crank the heat all the way up to...low. Cook the pot of goodness, stirring occasionally, for about 10 minutes at which point the sugar should be dissolved, the cranberries should just be starting to soften, and you should be wondering how this stupid pot full of very solid berries is ever going to turn into cranberry sauce. Then turn the heat up to medium, and let it cook down, stirring occasionally, for another 15 minutes when the cranberries start to burst. It's less dramatic than it sounds. At this point, it should look and smell like the holidays. And happiness. And cranberry sauce. Pretty much, it will look and smell like everything that 10 year old Harry Potter probably daydreamed of while he was living in a cupboard and eating spiders for extra protein, which I assume he did

Nothing says "holidays" like semi-gelatinous goop that makes
everything it touches taste incredible. Dickens said that.
Once you've got your sauce looking fictional-orphan-tantalizingly good, take the back of your spoon and lightly smash the remaining whole berries until most of them are crushed and your sauce has started to thicken. If it's still kind of thin, don't worry. It thickens up a lot as it cools down. There's very little chance of your sauce staying super thin and ruining your meal for everybody. The next part is gonna be the hardest. Wait. Without eating it. For what seems like forever, until your sauce is room temperature. Then put it in the fridge and wait some more. For no less than half an hour. It's gonna suck, but your patience will be rewarded. Take it out of the fridge, gather or make some friends (or bribe strangers, who will be friends after they taste this, assuming they're not crazy people who end up harvesting your organs), and throw together an awesome holiday meal. Bonus points if you really get in the holiday spirit by rubbing it in the faces of those people you were shunning earlier. Which means you'll have to Un-shun them for a minute or two, rub their faces in it, and then re-shun then before they know what hit them. Nobody said holiday bonus points came easy. 

November 3, 2015

Nachos

Artist's rendition: Me getting terrible restaurant nachos
Nachos are a sore spot for me. Because they're so so very awesome. But nobody ever makes them right, and it pisses me off. I don't know. I grew up with relatively easy access to awesome nachos, and while I know that not everybody shared that experience, they should at least be familiar enough with the concept to not microwave cheese on top of a bag of chips and try to sell it to me for $8.95. This has been more angry ranting and less fun banter with the voices in my head than usual, so let's all watch this to even out again. We all good? Cool. Back to nachos. The point of nachos, at least to me, is to be able to get a little bit of everything in each tiny bite. Not to have a giant disk of chips held together with congealed cheese that you have to rip apart, getting beans everywhere and grossing out everybody at your niece's Bat Mitzva, or Quinceanera, or whatever. The point is, your clothes are stained, your family is ashamed of you, your date left an hour ago, and it's the fault of sub-par nachos.

Ingredients:

2 15 oz cans of Pinto Beans
1 Standard Issue Onion
2 Cloves of Garlic
8 oz Cheddar Cheese
3 Jalapeños 
3 Cups Milk
1/3 Cup Vegetable Stock
3 TBSP Butter
3 TBSP Sour Cream
3 TBSP Flour (You need 3 of a lot of things in this recipe. Try not to let it worry you. It's in no way a hint to some sort of greater conspiracy affecting your life. Almost definitely)
1 TBSP Chili Powder
1 TBSP Olive Oil
2 tsp Ground Cumin
1/4 tsp Cayenne Pepper
An unspecified amount of salt
Tortilla Chips. All the Tortilla Chips (You can use your favorite store bought chips if you like. Or, if you have the will of the warrior, slice up some corn tortillas, fry them in oil, and then toss a little salt on them. Because it's super easy, crazy awesome, and your therapist said you need to try new things)

The first thing you're gonna need to do is make some refried beans. Because Nachos without beans, while technically pretty authentic, are just little edible plates of sadness. So chop up your onion, and throw it in a pan with your Olive Oil and an ASHP (average sized human's pinch) of Salt over medium heat. Saute` the onion for about 5 minutes, until it starts to get soft and golden. Add in your Garlic, Cumin, Chili Powder, and Cayenne, and Saute` another minute. Add in your Pinto Beans along with one more ASHP of Salt, and let it cook for another couple minutes before adding in your Vegetable Stock. Bring the whole mess to a boil, and let it go for another 5 minutes. Now it's time to get an authentic rustic texture, by taking the back of a spoon, and individually crushing your pinto beans for approximately 3 lifetimes (Bonus points if you use this as an opportunity to express some of the anger you've felt over the years at disappointing nachos, which led to a disappointing life). You want a thick and creamy consistency, but you still want whole beans floating around in there, letting people know what it is they're eating, and generally taunting you about the amount of time you've spend smashing beans compared to the amount of unsmashed beans looking up at you with their stupid bean faces.

Next you're gonna make a cheese sauce. Because of course the cheese should be in sauce form. Any other thought you might have had is blasphemy. Do you want to go to Nacho hell? No? Then stop asking questions about the cheese sauce. It's pretty simple. Essentially, you're gonna take the Flour, Butter, and Milk, and another AHSP of salt to make a thick Bechamel sauce. Too lazy to read that link, but somehow not too lazy to read this? Here's a brief overview: melt the butter in a pot, whisk in the flour slowly, and let it cook for a minute. Then add in the Milk slowly, whisking like crazy until your arm wants to fall off, but can't because of your dumb skin. Got it? Good. Chop up 2 of your Jalapeños, and throw them in the sauce. Then melt in your cheese, in a couple batches so that it actually incorporates and doesn't just end up in a cheesy mess on the bottom of your pot. Keep it cooking over low heat until it threatens to boil but isn't actually boiling yet, and then turn off the heat. Jalapeño Cheese Sauce!

Normally I say something like "they taste even better than
they look. Which is clearly impossible here. I'm gonna
go with "as good." They taste as good as they look. 
Now it's time for the assembly. It's important (To me. And now, because I'm forcing you, to you!) to be able to get a little bit of everything with each bite. So lay down a thick layer of Tortilla Chips on whatever you're gonna be eating these things off of/out of. Then drizzle a layer of your Jalapeño Cheese Sauce (!) over it, followed by a loose layer of your beans. Then add on another layer of chips, followed by another layer of beans, and another layer of cheese sauce. Why does the order of the beans and sauce reverse here? Because it's better that way. What's with all the questions? Do you want to go to Nacho purgatory? Then don't question the order of operations. Throw your Sour Cream down in the middle of your pile of awesomeness, chop up your final Jalapeño, and sprinkle it over everything. And that's all there is to some incredible nachos. And the best part is, you can make enough to share with your friends for the price of an individual portion from a restaurant. Just kidding! The best part is that they're awesome. Eat them all yourself until you get sick.


October 27, 2015

Caramel Popcorn Balls

It looks innocent, but those kernels will mess you up man
The Halloween times are upon us again. Which means it's time to misappropriate a harvest festival as an excuse to drink and party! And that also means drunk people will be angrily trying to defend their costume choice. Or the assertion that their costume is a costume at all. And finally, that means it's time for the annual fear-a-palooza that news stations run each year about people putting crap in candy to harm trick or treaters. Which has almost never happened in history. But that doesn't stop us from freaking the hell out and watching the news, which lets them sell more advertising! But don't worry about fictional poisoned candy this year, because this year you're going to be that super creepy guy in the neighborhood giving out creepy homemade treats. Why? Because they're awesome.

Ingredients:

9 Cups of popped Popcorn
1.5 Cups Brown Sugar
1 Cup Water
1/2 Cup Standard-Issue Sugar
1 Cup Light Corn Syrup (No, this isn't the same as high-fructose corn syrup, and yes, you should actually use it. Unless you like grainy caramel and sadness.)
2 and 1/4 tsp of White Vinegar
3/4 tsp Salt
1/2 Cup of Butter
More butter
All of the butter

The first thing you're gonna need to do is take your popcorn, and dump it into a large pot or bowl. Wasn't that easy? Don't get used to it. Now combine your Brown Sugar, Regular Sugar, Corn Syrup, Water, Vinegar, and Salt in a sauce pan and get ready to not leave the kitchen for a while. Crank the heat up to around a medium-high, and, without stirring, move the pan around to combine the ingredients. And bring it to a boil. Oh, it's boiling? Good, now you get to freak out. Because it really really looks like you should be stirring it. But too much, or in some cases any stirring, will lead to crystallization, which leads to crappy foodstuffs, which leads to a life of depression and alcohol abuse, which leads to mixed dancing. So freak out, and maybe stir or maybe don't, but always feel guilty about it. For how long? Until your fledgling caramel reaches the "Hard Ball" stage. What the crap does that mean? It means that your mixture is between 250 and 265 degrees. Which is super useful if you have a candy/frying thermometer like me, and actually remember to use it....unlike me. For those of us without the financial or mental capacity to make our lives easier, we're gonna rely on the more archaic method. Drop a little bit of your mixture into some cold water. If it's at the "Hard Ball" stage, it'll form thick threads of sugary goodness, which you can pick up and form into a ball that maintains its shape when you set it down. Also, Keanu Reeves will be there for some reason.

Orr'Vill the Terrible, accepting tribute from his subjects
Once your caramel is playing hardball, turn the heat down to low, and add in your Butter. Stir it until it's fully incorporated, and then stir it a couple more times to make up for all of the pent up stirring you didn't get to express earlier on. Turn off the heat, and pour the goop on to the popcorn. Try not to spill any on yourself. Seriously. What's worse than burning yourself? Burning yourself with something sticky, that stays stuck to you and keeps burning you because it loves the way you taste, but wants you a little more well done. Once you've finished treating your burns and weeping softly in the corner, stir the caramel and the popcorn together and then let it cool for 5-10 minutes. Take some Butter, and lube up a cookie sheet, plate, or some other containment vessel. Also butter up your hands. Because this stuff is sticky. Form the popcorn goop into balls, and place it on your plate/cookie sheet/whatever. Re-butter your hands as necessary. And there you have it! Homemade treats that will creep out your neighbors, until they taste it, at which point they'll beg you for more. Assuming it hasn't pulled out all of their teeth. Maybe even then.

October 20, 2015

Hot Toddy

A rare look at the hot-tubbing habits of common ingredients
It has come to my attention that not everybody knows what a Hot Toddy is, and apparently these belligerent dissidents aren't willing to do their own googling. So here's what a Hot Toddy is: Awesome. It's a warm drink, traditionally made with some combination of Whiskey, Hot Water, Honey, and Spices. It's typically consumed on a cold day or rainy day, at night before bed, or whenever you feel like it because this is America, dammit. Even if you're reading this from some other country, the inherent America-ness of my willingness to drink an awesome drink whenever is, even now, permeating your computer and infecting you. That's the awesome power of the awesome power of the internet

Ingredients:

1 Cup Standard Issue Water
2 tsp Honey
1 Slice of Lemon
1 Slice of Lemon Peel
3 Whole Cloves
2 Cinnamon Sticks
1 Shot of Whiskey (That's 1.5 ounces for those of you sad sad people who don't drink regularly enough to know the standard conversions for alcoholic measurements)
1 average-sized human's pinch of Nutmeg

Let's get one thing straight. The Hot Toddy has a couple different stories concerning its spelling and origin. I don't pretend to know which one is correct, but this one has a certain "truthiness" to me: There was an Irish doctor named Robert Bentley Todd who became famous for prescribing his patients a hot drink of Brandy, Cinnamon, Sugar-syrup, and Water. That's not in dispute. It really did happen. Whether that's the 100% indisputable origin of this drink and it's name, we may never know (it totally is). Now then, this recipe, like all of my favorite recipes, combines 2 important elements:

1)An awesome result that's not too hard to achieve
2)Giving drunk people the chance to accidentally hurt themselves with knives and fire. And if they're super drunk, with cinnamon sticks and cloves.

I'm pretty sure that just looking at this picture cured my
cold and got me over my last 3 breakups. 
The first thing you're gonna need to do is fill a small pot with your Water, Honey, Slice of Lemon (The actual lemon, not the extra slice of peel), Cloves, Nutmeg, and 1 Stick of Cinnamon. Bring it to a boil over medium heat, and let it cook together for about a minute. Turn the heat off, and let it sit uncovered for another 30 seconds or so to cool slightly. While your water is cooling, add the rest of your ingredients to a mug, or a teacup, or whatever it is you want to drink out of. Typically it's something with a handle because it's a hot drink, but if you've got the heart of a lion (gross), use whatever cup or bowl you'd like. Strain your water mixture by thrusting your hand into it, grasping the cinnamon, lemon, and cloves in your samurai fist, and removing them all within the blink of an eye. Or use a slotted spoon, like a communist. Either way, add the liquid in to your Whiskey-cup, and stir it with your second Cinnamon Stick. And enjoy! People say that these are a really awesome way to treat a cold. I don't know if there's medical science to back that up, but if you drink enough of them, you probably won't care about your cold anymore. You're welcome.


October 13, 2015

Scallion Pancakes

Note: Actual recipe may included no blueberries or cardboard
If you're anything like me, you hate paying too much for restaurant food that you can make better yourself. Also, you once carved "I messed with Texas" into a table at a rest stop...in Texas. The point is, sometimes, restaurant disappointment can be kind of like inspiration. You may have been served cardboard with a ketchup and sadness emulsion, but you ordered that crap because it was supposed to be awesome. Which brings me back to scallion pancakes, because they can be great. But more often than not, when I have them in restaurants, I end up more disappointed than 1990s Nicolas Cage having a vision of his future. So I'm taking what I wanted them to be, figuring it out, and making them myself. And that my friend, is the true meaning of Christmas.

Ingredients:

1 Cup All Purpose Flour
1/2 Cup of Hot Water
8 Green Onions/Scallions/Spring Onions/etc. (Apparently, green onions have a stupid number of regional names, and no region wants to give theirs up so we can all call them the same damn thing. Probably because of Onion Politics,  with it's lobbying efforts, corruption, and stubborn stupidity. You know, like regular politics, just more delicious)
1 TBSP Vegetable Oil
1 tsp Toasted Sesame Oil
1 tsp Salt
More flour
More Salt

More Ingredients! For a dipping Sauce, which is kind of superfluous, and therefore optional!

2 TBSP Rice Wine Vinegar
2 TBSP Soy Sauce
1 TBSP Sriracha (The concept of a dipping sauce with these is really an American development, so using an American hot sauce that's designed to taste eastern-ish felt...appropriate)
1 TBSP Sugar
2 Green Onions
2 tsp Crushed Ginger
1 tsp Toasted Sesame Oil
1 Clove of Garlic, crushed

Woo! Sooooo many ingredients. But most of them are for the sauce, which takes like 25 seconds to make, so we'll ignore them for now. Take your flour and sift it in a bowl along with your Salt, using a sifter, a fork, knives, a whisk, or fear itself. You just want to break up the clumps, and aerate it a little bit. Then slowly add in your water, stirring as you go. You may not end up using all of your flour. You want the dough to just barely come together, but there shouldn't be any leftover flour sitting around, looking for a dance partner, striking out, and bringing the whole party down. Cover the whole thing with a moist towel, and let it sit for about 45 minutes. You can use this time to chop your Green Onions into itty bits! You're on your own for the other 44 minutes. Once the time has passed, cover a cutting board, counter, or other flat surface with flour, knowing deep in your heart that you'll never truly be able to get it clean again. Plop half of your dough onto your floured surface, sprinkle the top of it with flour, and knead the crap out of it for 5-10 minutes. If it still feels sticky, knead in more flour. Once you've done all the kneading that your dough needed (Puns!), roll it out as thinly as you can. Take half of your Toasted Sesame Oil, and smear it on the dough, and then evenly throw on half of your chopped Scallions.

Now comes the complicated bit. Take an edge of your flattened onion dough, and start rolling it up on top of itself, until your have a tube of dough. It should look kind of like everything you ever made out of Play-Doh as a kid. Then take that dough tube, and wrap it in a spiral around itself. Then roll it out again, this time about 1/4 of an inch thick. Got that? Because I'm not sure I do. Seriously though, roll up your dough into a dough snake, then make a dough spiral our of your snake, and then roll it flat again. It's not as bad as it sounds. If you can't figure it out, just fold your dough in half a couple times and then roll it out again. It's won't be as layered and flaky, but at least you won't be standing terrified in your kitchen, afraid to move for fear that I'll jump out of your computer and mock you (Which has only happened once, that I know of). Throw your Vegetable Oil into a pan on medium heat, lay in your fledgling pancake, and fry it for about 3 minutes on each side, until it's brown, crispy, and awesome. Put it on a plate lined with paper towels to drain, and immediately sprinkle it with an average human sized pinch of Salt. Then repeat this entire stupid process again with the rest of your flour, Oil, Scallions, and whatnot, while trying not to weep.

Like all fried foods, it's best eaten as soon as possible,
in one sitting, while stubbornly refusing to share
Once you're done weeping, it's time to think about the sauce. This type of food is served as a street food in places like China, and doesn't have a sauce. And it tastes awesome on its own. But in American restaurants, a dipping sauce usually comes with. So, for thoroughness and awesomeness, we're making one too. And it's pretty complicated too. Are you ready? Chop your Green Onions. Crush your Ginger and Garlic. Add them into a bowl with the rest of the ingredients. Stir. Feel free to read this paragraph as many times as you need to to get that down. And there you have it! Delicious, flaky, crispy, delicious bits of reverse-engineered awesomeness that you can take back to that original restaurant that wronged you and rub their dumb faces in it. Not literally. Probably.


October 4, 2015

Baked Burgers

Sadly, no delicious-looking pictures this week, because of
 travel,  and nonsense, and forgetting to take them. 
So it's getting colder outside. The days are getting shorter, and more filled with cold, rain, and maybe even snow. Boo-hoo. Are you gonna let that stand between you and delicious burgers? Is that what our ancestors hunted the buffalo to near-extinction for? Not in my America. But for those of you who lack the will of the warrior, and can't contend with the cold, I've got some delicious burgers that you can make in the oven to hide your shame from friends and family!

Ingredients:

1 lb. Ground Beef
1 Egg
1/2 cup Seasoned Breadcrumbs
1/4 cup Ketchup
1 tsp Garlic Powder
1 tsp Onion Powder
1 tsp Whiskey 
1 average human sized pinch of Salt
An unspecified amount of Oil

The most important thing about burgers is to drink beer while you cook them. That's how George Washington did it, and it's a tradition I'm proud to keep alive today (be glad we don't follow Ben Franklin's burger traditions). Once you've got this going, it's time to meticulously build our meat mixture for our burgers but by bit, carefully considering each level of flavor. Or just throw all the ingredients in a bowl and squoosh them together with your hands. That works too. Don't overwork the meat, for the obvious reasons (Because I said so. Also, to keep the texture awesome. Also...labor laws), just gently bring it all together. Which is hard, I know, because it's fun to squoosh ground meat, but just contain yourself. 

Artist's rendition of me demanding more burgers
Once your ingredients are mixed, it's time to form your burger patties. Separate your meat mixture into segments that are, roughly, 1/3 of a pound, and flatten them down into disks. Or, be super neurotic about it and use a scale to measure each bit out. Either way. A lot of recipes will tell you to heat up your pan in the oven so that the burgers will sear and lock in the juices. Which is gypsy nonsense. But searing does make some awesome flavors, so if you feel like it, grease up your pan with a thin coating of oil and stick it into your 350 degree oven for a couple minutes before throwing your burgers in. Cook them for about 10 minutes, flip them, and cook them for another 10 minutes. And that's it! Delicious burgers in any weather. Just shove them on a bun with your favorite burger toppings and enjoy. Unless you're one of those people who puts mayo on burgers. In which case you can't enjoy this, or probably anything else in your sad, over-mayoed life. 

September 27, 2015

Deviled Eggs

Look at them. Sitting there. Plotting.
I try not to get too judgy and religious, except about the truly important things like which way you hang your toilet paper. But it's high time that we, as a community of people on planet Earth, got together and stopped calling Deviled Eggs...Deviled. Because it's stupid. It's a term that was invented to describe any food prepared with hot seasonings because "omg spicy hot equals hellfire equals DEVILED!" Back when this became a thing, people were used to eating boiled mush, if they were lucky (Don't ask what they ate if they were unlucky.) The point is, to them, an incredibly small amount of pepper or mustard was mind blowing, and clearly the work of the delicious delicious devil. We don't have that same indoctrination in to the world of bland. So shut it already.

Ingredients:

3 standard issue Eggs (Chicken is preferable)
1/2 TBSP Mayo
1/2 TBSP Sweet Relish 
1 tsp Dijon Mustard 
1 average human sized pinch of Salt
1 smallish human sized pinch of Cayenne Pepper
An unspecified amount of Smoked Paprika

The first thing you're gonna need to do is boil up your eggs. Sure, that sounds easy, but over cooked eggs get weird discolored yolks, and the yolks are heavily featured in this recipe, and if they don't look just right you'll RUIN your niece's quinceanera. Fortunately, I'm here to help keep you from getting disowned. At least for food related reasons. I can't do anything about that van with the mural of a tiger riding a centaur. Good luck with that. But for the eggs, you're gonna just barely cover them with water in a pot and throw it on to medium heat. Wait approximately forever until it boils, then cover the pot and turn the heat off. Let the eggs sit in the hot water for 14 minutes, and then put them in cool water to keep them from over cooking. 

Now comes the fun part, and by "fun," I mean "give up now. Seriously. Pack it up. Go get a burger or something. It's not even worth it anymore." Because now it's time to peel your eggs. Technically, there is a thin membrane between the egg and the shell, and if you work your finger into it just right you can peel off the shell without much hassle. This works about 60% of the time. The rest of the time, your life becomes a ghastly hellscape of peeling tiny bits of your egg at a time and trying, with increasing desperation, to convince yourself that the large bits of egg you're inadvertently tearing off are extra bits. As if you got your eggs from an Ikea Chicken who decided to throw in some extras just in case you need them. 

You can always tell when I'm posting from out of town by
the different dishes. Also...because I just told you. Forget that.
Once your eggs are peeled and you've stopped weeping, cut those suckers in half to get at their sweet innards. Scoop out the yolks, and mash them up with your Mayo, Relish Mustard, Salt, and Cayenne. This is the part where you exact sweet vengeance on your eggs by mashing their innards and stuffing them back inside of them, like some sort of gruesome egg-inquisition. Stuff each egg with as much filling as you can muster, and then sprinkle your Smoked Paprika on top of them. How much? Figure it out. Its delicious, but the paprika here is about 50% ingredient and 50% garnish, with a 10% margin of error. And that's it! You've got delicious eggs which credulous medieval serfs might think is the work of the devil because it's got spices! And the devil's eggs leads to the devil's toast, which leads to loose morals, which leads to ritual human sacrifice. Which leads to mixed dancing.

September 22, 2015

Grenadine

My clothes got stained just looking at this
It's the Jewish high-holiday season, and that means one thing. Kosher markets desperately trying to unload a crapload of surplus pomegranates. And also some nonsense about self-examination and changing for the year to come. But you can't put that in booze, so who cares?

Ingredients:

4 Cups Pomegranate Juice (That's gonna be about 16 Pomegranates. If you want, you can use the store-bought pre-juiced stuff, but just be cognizant of the fact that I will be judging you)
1 Cup Sugar
1 TBSP Lemon Juice

The first thing you're gonna need to do is get comfortable with staining your shirt, counter, walls, and loved ones. Because, pretty uniquely as far as fruits go, pomegranates are aware of the indignity you're about to put them through. And they're angry. Fortunately, drowning is their one weakness. Like pretty much every non-aquatic organism! So lightly slice through the thick outer skin of your pomegranate, just to kind of piss it off. Then submerge it in water, and tear it up. The seeds, which are technically called arils (pretentious people will only call them arils. Because they're the worst), will sink while the waxy white bits will float. Take your pretentious drowned arils, and put them in a blender, food processor, or other implement of destruction, and then strain it through cheesecloth. And there you have it! Pomegranate juice! Or you can buy it in juice form from pretty much any grocery store for the low low price of your dignity.

Make sure to wait so long to take your picture that the
Grenadine all settles at the bottom and you don't get pretty
patterns in your tequila sunrise. Bonus points for storing your
Grenadine in a leftover tequila bottle.
Once you have your juice all taken care of, throw it in a pot along with your Sugar and Lemon Juice. Throw it on some medium heat, and stir it occasionally until the sugar melts completely. Then turn the heat down to medium-low, and let it reduce. Which essentially means just let it sit over the heat and try not to get super nervous about whether it's burning or not. Also stir occasionally, partially to actually keep it from burning, but mostly just to ease the sad voices in your head. When it's reduced by half, meaning there's about 2 cups left in the pot, turn off the heat. It'll still be kinda liquidy. Calm down. It'll get thicker as it cools down. And that's all there is to homemade Grenadine, which incidentally tastes about 1000 times better than the corn syrup stuff they sell in stores. This stuff has a ton of uses. You can make mixed drinks like a Tequila Sunrise, or a Kamikaze. It probably has other uses too!


September 13, 2015

Fresh Ricotta

Ricotta: For when you're torturing lemons, and you get hungry
It's the Jewish High Holiday season! Which is why I'm posting this today as opposed my normal Tuesday. In classic Jewish tradition, on Tuesday I'll either be lamenting all of my sins from this past year, or I'll be in an epic food coma. It's pretty much impossible to tell which. And since it's a traditional Jewish Holiday season full of traditional Jewish this and that, we're making something awesome that has absolutely nothing to do with any of that! I've been meaning to get more into the cheese making, and Ricotta is a great place to start. Because it's simple, awesome, only mildly disgusting, and let's us severely question the mental capacity of nursery rhyme characters. You'll see.

Ingredients:

1/2 Gallon of Whole Milk
1.5 Cups Heavy Cream
3 Lemons
1/2 tsp Salt
Cheesecloth. Or, if all of the stores open when you decide to make cheese at 2 AM on a Sunday morning don't sell cheesecloth because fate is capricious and unfair, good quality Coffee Filters.

Some of you might be thinking, "That's a small list of ingredients. This is gonna be easy!" Some of you may be thinking "That's a suspiciously small list of ingredients. This is gonna suuuuuuck." Good news! You're both kind of right! The first thing you're gonna need to do is heat up your Milk and Cream, over medium-low heat. You don't want the Cream and Milk to boil, burn, or scald, so ideally use a heavy-bottomed pan, and stir it relatively regularly. Lots of nonsense recipes will tell you to use frying/candy thermometers to make sure your mixture hits a certain temperature range, and you're welcome to do that if you like wasting your time and effort. Or, you could just make sure that it's warm, but not HOT. Can you handle that? Really? Alright, fine, use your damn thermometer.

Add in the juice from your lemons a little bit at a time while stirring. I add it in by the half-lemon, but if you're one of those "squeeze all of your lemons ahead of time" kinds of people, who probably has a shelf in your cupboard for shelf-liners, add in your lemon juice a Tablespoon at a time. And know that we probably can't be friends. The acid from the Lemons is going to start to curdle the Milk and Cream, separating it into thick, white, floaty curds, and murky, thin, whey (Nobody in their right mind...nobody, would consider this to be a reasonable snack food. Little Miss Muffet was probably on lots and lots of drugs. Which is a different recipe) . It will be very obvious when this separation happens. It looks gross. It's like if milk sneezed and didn't have a tissue. Turn the heat off, and let it sit for about 20 minutes to more fully separate.

Not pictured: 20 minutes spent deciding between
Pita Chips and tortilla chips.
Now comes the fun part, and by "fun" I mean.....squishy, I guess. Take a fine  strainer, or a slotted spoon, and remove your floaty gross curds from your somehow-grosser whey. Throw the curds in a bowl and stir in the Salt. Then stuff them into Cheesecloth, and figure out some way to dangle it over something. The two most preferred methods are just sticking the cheesecloth back in the strainer and putting it in the sink, or using the complicated tie-it-to-a-spoon-and-dangle-it-in-a-pot method. Which isn't actually that hard, but doesn't really have any added value over the infinitely simpler strainer method. Of course, this all assumes you have basic things like cheesecloth and strainers. If life likes to mess with you as much as it does with me, it's time to punch causality in the throat and stuff your Curds in your coffee filters, then stab your coffee filters with chopsticks and dangle them inside of drinking glasses. Let it sit and drain for about 2 hours, and you've got creamy, delicious, Ricotta! Which you can use in about 1000 different recipes. Or you can just dunk pita chips you bought from Walgreens into it and eat  it straight. Which I'm pretty sure is an Italian tradition dating back to the bronze age, when all they had were primitive proto-Walgreens. Enjoy!

September 8, 2015

Irish Apple Crisp

The apple racial divide is strong at the supermarket
So you're having friends over. Congratulations on having friends! Now comes the existential dread from knowing that they're quietly judging everything about you, including (but not limited to) your apartment decor, the food you serve them, and the gigantic collection of antique clown statues in your damn foyer. The key is in the dessert. Give them something awesome to remember, and to associate with your entire awkward night of Apples to Apples and dramatic readings of the Berenstain Bears. Alcohol might also help.

Ingredients:

3 Granny Smith Apples
2 Gala Apples
2 Cups Brown Sugar
1 Cup Oatmeal
1/2 Cup chopped Walnuts
2 TBSP Coconut Oil
2 TBSP Irish Whiskey (I prefer Tullamore Dew, because it tastes better and costs less than most other Irish Whiskeys. But feel free to waste your money on an inferior product. It'll almost be like you're a congressman!)
1 TBSP Lemon Juice
2 tsp Cinnamon
2 tsp Corn Starch
1/2 tsp Ground Nutmeg
1/2 tsp Ground Ginger
1/4 tsp Ground Cloves 
2 typical human sized pinches of Salt

The first thing you're gonna need to do is dice your apples. This used to take me a long time, cutting little wedges out and buying apple corers and whatnot, until I discovered an ancient secret: it doesn't actually matter if you get every damn inch of usable apple. Yes, excessive food waste isn't good, but wasting an hour to save half an ounce of apple is counterproductive. You heard me stereotypes of soviet Russia in the 80s. So hold it on a cutting board, and just slice off an entire side of it. Repeat 3 times and you're in business. Once they're good and choppity chopped, toss them in your Lemon Juice to keep them from turning into gross brown nonsense.

Throw your lemony apples in a pot along with half of your Brown Sugar, Cinnamon, and Salt, and all of your Corn Starch, Nutmeg, and Cloves. Got That? Good. Because if you messed it up nobody will ever forgive you, and only your creepy clown statues will love you. Just like last week. Saute` that whole mess over medium heat, stirring occasionally to show you care, for about 4 minutes. Add in your Whiskey, and keep it on the fire for another minute or so, and then dump it all in a baking dish. 

Goodbye hunger, hello diabetic coma! Totally worth it.
Now it's time to make some crumbly goodness. Take a bowl, and dump in...the rest of your ingredients. That's your Oatmeal, Ginger, Walnuts, Coconut Oil, and the rest of your Cinnamon, Brown Sugar, and Salt for you kids in the back who weren't paying attention. Mush it all together with your hands, and then splorp it on top of your apple mixture. Try to spread it out relatively evenly. Or don't, and call it "rustic." But we'll all know what it really means (it means lazy). Bake it at 350 for about 30 minutes, when it starts to smell up your whole house with it's intrusive awesomeness, and the topping is crispy. And that's it! Irish Apple Crumble! Except it's still burning hot, so probably don't have it until it cools down a little, or you find some way to fireproof yourself. Or just go at it and have a cool story to tell in the burn ward.