Showing posts with label Basics. Show all posts

May 30, 2018

Peanut Butter Frozen Yogurt Bites

dramatization
It's that time of year again. The time of year when the ice has thawed, the flowers have bloomed, and the sun does its absolute best to kill us and burn our corpses in to crispy bits. I enjoy the fun added benefit of having what early settlers to this country referred to as "no stupid air conditioning in my stupid apartment," so I get the full brunt of this. The point is, at times like this it's important to find small bits of comfort and relief from the oppressive heat to try and distract us from the grim reality of our impending doom. Being weirdly kind of healthy is just a fringe benefit.

Ingredients:

1 cup Greek Yogurt
2 TBSP Peanut Butter (I used a natural, no sugar added kind of peanut butter because it just tastes like peanuts, which lets me control the final flavor better. But use what you like)
1.5 tsp Honey
1 tsp Vanilla Extract

So, as those of you who haven't been blinded by the sun may have noticed, there's not a whole lot going on in terms of ingredients here. This is for a couple of reasons. Firstly, this is a recipe designed to give relief from the heat. Spending hours dealing with a vast array of ingredients in a hot sticky kitchen isn't conducive to that. Secondly, this is a basic version. Delicious, but you can totally add optional extras, like some chocolate syrup, hazelnut spread, candied almonds, dulce de leche, or nutmeg. Definitely not all of them together. Probably. The point is, make these. Enjoy them. But don't be afraid to add in a little something extra once you've got the hang of it. That said, the first thing you're going to need to do is take all of your ingredients, splorp them in to a bowl, and mix them together. Seriously, that's like 95% of the work. Again. Heat. The less time I spend not lying on my bed underneath a ceiling fan, the better.
Don't let the cool shape distract you from the deliciousness

Now it's time to contemplate containment vessels. The idea is to get bite-sized bits of frozen refreshing goodness. I happen to have just come back from a trip with some cool silicone molds. If you didn't, you can make weird shapeless blobs by throwing some wax paper on a baking sheet and spooning your yogurt mixture on to it. Or, you could just use an ice-cube tray and make life easy on yourself. In any case, throw those suckers in to your freezer for at least 45 minutes, though an hour and a half would be better. Whenever the heat gets to you (so, you know, all the time), grab one, pop it in your face hole, and forget about life for a while. Enjoy, and if you survive I'll see y'all next week!

May 15, 2018

Kalamata salad

Life can be hard. It can just sort of wear you down until you feel trapped in an endless routine, demoralized and dissatisfied. I'm speaking about other people's lives, obviously, because I'm somehow on like my 4th vacation so far this year. And it's only May. It's been kind of a whirlwind of a year, and I'm still not entirely sure how/if I managed to afford it all. But here I am, sitting on a Mediterranean beach, playing guitar, and actively waiting for the other shoe to drop. Eventually this will all come to an end, reality will butt its stupid face into my business, and I'll end up cleaning chimneys or something to retroactively finance my life of raging excess and occasional Airbnb use. All I'll have left will be the memories, the recipes inspired by my travels, and probably cirrhosis of the liver. Good times.

Ingredients:

1 lb. Baby Spinach (the adult spinach leaf has a darker color and a rougher texture, making the infant Spinach the easier prey)
2 Tomatoes
1 smallish Red Onion
1.5 cups pitted Kalamata Olives
2 cloves Garlic
1/3 cup Lemon Juice
1/3 cup Extra Virgin Olive Oil
1.5 tsp Dijon Mustard
1/2 tsp Salt
1/4 tsp Black Pepper

The first thing you're going to have to do is come to terms with the fact that you're going to eat a salad. Sure, salad is essentially a pile of leaves and other detritus that was probably first eaten as some sort of prank, but it's also allegedly healthy. Eating it, instead of real food, can help you live a longer, healthier life. A long life...full of salad. Yay? Once you've come to terms with this grim reality, we can work on making our salad not suck. Peel your onion and then cut it into quarters. Then thinly sliced those quarters and disdainfully toss them into a bowl. Remove the white core from your tomatoes, then chop them (the tomatoes) in to chunks and add them in to your bowl of disdain. Make sure your Spinach is dry, then throw it in there too, along with your olives. You're pretty much done at this point. Say what you will about salad, but it's super easy to make.

Actual salad for humans

It's time to talk about dressing. Many people who want to eat more salad despite the fact that it's salad will try and disguise it with a ton of sugar and fat. While this is tasty, it kind of ruins the entire point of eating salad in the first place (health concerns and/or masochism), at which point you may as well just eat a burger or some ice cream, because it's got the same nutritional value and will taste much better. So we're going to get our deliciousness from less contradictory sources. Torture lemons until you've got your 1/3 cup of juice. Then combine it with your oil, mustard, salt, pepper, and a tsp of the juice your olives were sitting in. Then choppity chop your garlic into tiny bits and add it in to the party. If you let this dressing sit in the fridge for a day or two it'll get even better, but you can totally use it right away. Just mix the whole thing together, toss it on your salad as needed, and consume. Congratulations! You successfully outwitted nature, and ate something both healthy and tasty. Stupid nature.

February 6, 2018

Whiskey Fudge!

If life and the Simpsons have taught me anything, it's that
Yale's motto really should be Semper Fudge
So I'm going to be straight with you all. I've been known to enjoy some whiskey on occasion. And yes, that may have been a contributing factor to my decision that it would be an excellent addition to fudge, but that doesn't change the fact that I was totally right. It gives it a subtle complexity that tastes awesome, and helps keep the fudge from being too sweet. Too sweet sounds like a good thing for fudge, but if you make it a little less sweet then, aside from tasting better, you can totally justify eating significantly more of it at one time, which means you'll feel slightly less bad about yourself when you snork down half of this recipe before lunch. And sure, if you have a super low alcohol tolerance it's entirely possible that this recipe will allow you to literally get drunk on fudge (Drunk On Fudge is definitely going to be the title of my memoir), but that's a risk that I'm willing to take.

Ingredients:

14 oz. can of Sweetened Condensed Milk
12 oz. Semi-Sweet Chocolate Chips
5 oz. Bittersweet Chocolate Chips
1.5 tsp Whiskey (I used Irish Whiskey, which worked really well. Technically, you can use whatever whiskey you want, but if you use garbage whiskey you may end up with garbage fudge.)
1/2 tsp Vanilla Extract

You may have noticed that there's not a whole lot going on in terms of ingredients. You're welcome. The entire point of fudge is to be easy and delicious. And sure, you can add fancy things like caramel sauces or toasted nuts on top if you like, but they're like ketchup on a really good hot dog, or like your appendix. If you like it then sure, go and have fun with it, but it's ultimately not really necessary. And before all of you ketchup lovers and appendix lovers start sending me your angrily worded handwritten emails, let me just remind you that - and I mean this sincerely - I don't care. Anyhow, open up your can of sweetened condensed milk, and let it gloop out of the can into a pot. After about 3 minutes of waiting for it to stop taking its sweet time, try futilely to speed up the process using spoons, spatulas, and other various implements of destruction. Once your can is more or less emptied into your pot dislodge any dust and spiders that may have settled colonies on your person, and crank the heat up to medium-low. Stir occasionally for a couple minutes to let your milk heat up before adding in both your semi-sweet and bittersweet chocolate chips. Add them in in about 3 batches. Keep stirring and let the whole thing melt and smooth out before adding more in. Normally you'd melt chocolate in a double boiler, and be hesitant about stirring it because crystals could form and it could seize up, and you could be the butt of many jokes made by me at your expense. This is all technically true, but in my experience the sweetened condensed milk helps to prevent this, kind of in the same way corn syrup would, by acting as a buffer between potential subversive crystal clumps. Follow your heart.

If possible, it's advisable to eat fudge in mountain form
Once your chocolate is melted in turn the heat off and stir in your whiskey and vanilla. Once they're incorporated and everything is smooth, pour the whole mess into a baking pan that you've thoughtfully lined with aluminum foil, and let it cool down to room temperature for about an hour. How big of a pan to use is up to you, but in my mind it's not really fudge unless it's thick. Otherwise it's just a chocolate bar. Toss your fledgling fudge in the fridge (I want to stop writing things like that, but I don't know how) and wait for it to set up completely, which ostensibly takes a couple of hours, but feels like an eternity. Allow extra time for several misguided attempts at eating your fudge early, wherein you get goop on your hands, refrigerator door, and possibly walls. When it's finally ready, turn the foil upside-down over a plate, and then remove it to reveal your fudgy treasure. Slice it into whatever servings you think are appropriate (e.g. in half, or completely unsliced) and consume it as fast as possible to keep intruders from claiming it as your own. You waited hours for this fudge. Your friends and family can pry it from your cold dead hands. Enjoy!

January 18, 2018

Crockpot Baked Potatoes

Look at them, all snug and cozy. They don't even know they're
about to get cooked to death for 9 hours.
Since the dawn of time, mankind has struggled with one thing above all else. But there's nothing I can do to help you with your taxes, so we're gonna talk about potatoes instead. Baked potatoes are absolutely delicious, a truth which few people ever get to know because they (the potatoes) take approximately a lifetime to cook, and by that time you've got better things to worry about than potatoes. Thing like trying to get the neighborhood kids to have less fun, and eating dinner at 4 PM. Fortunately, with the advent of crockpot technology, you can just leave your potatoes cooking in a corner somewhere, forget about them, accidentally trip over your crockpot, and just when you get super angry at a cruel universe that you never asked to be a part of in the first place, get rewarded with a trove of delicious potatoes spilling out like buried pirate treasure.

Ingredients

5-8 Russet Potatoes (I don't care what the mainstream media tells you, russet potatoes are the ideal potatoes for baked potatoes. Depending on their size and the size of your crockpot, you'll be using more or less of them)
Oil
Salt
Garlic Butter (You can make this by sautéing garlic in some butter, then letting it cool. If that's too much effort for you, you can totally just use regular butter. Just know that we're all judging you.)
Sour Cream
Chives
Aluminum Foil

The first thing you're gonna need to do, according to several experts who are my mother, is carefully wash and scrub your potatoes forever. She has a thing about dirt. You can often find her saying things like "Potatoes grow in the ground...the ground is full of dirt" to no one in particular. She's technically right, but I still feel that rinsing off your potatoes and removing any obvious dirt clumps is more than enough effort to put in. In any case, once your potatoes are sufficiently clean, it's time to rub them down with some oil. Any cooking oil will do, though I prefer Olive Oil for several culinary reasons including the fact that I had some lying around. Take your oily potatoes and rub them down with salt. This is an important step because potatoes and salt are like a desert and water. No matter how much salt you add, there never seems to be any around. But if you add even a drop too much, you've got a flood plain on your hand. Take your salty oily potatoes and individually wrap them in aluminum foil. Toss them in your crockpot and wait.

No matter what Pinterest and Food Network tell you, baked
potatoes are supposed to be rustic and hearty, not dainty and
fancy. Also, I wasn't lying about having work in 5 minutes
I should have clarified. Turn your crockpot on, to low specifically, and then wait. Or sleep, or whatever, because even with our advanced foil and crockpot technology, this is still gonna take about 9 hours to cook. So maybe do this overnight, or before you marathon an epic movie trilogy. In any case, once your time is up open up your crockpot, unwrap your potatoes, then split them open and add toppings. I went with garlic butter, sour cream, and chives. You're welcome to go with something completely different and probably inferior, because these are your potatoes and you can bend them to your will probably. If you want to put more effort in, you can top them with sautéed vegetables and cheese, and then throw them in the oven until the cheese is browned. That'll totally be delicious, but also kind of takes away from the point of making these things in a crockpot to begin with. But maybe you enjoy contradiction. Maybe you're a riddle, wrapped in an enigma, wrapped in a vest. Maybe I'm going to go eat some potatoes in the 5 minutes I have before work. See you next week!

November 14, 2017

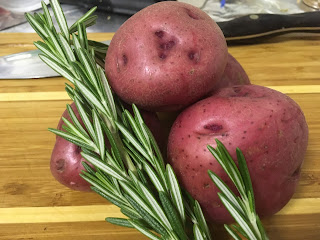
Rosemary Roasted Potatoes

Rosemary, taking a selfie with some potatoes
So it's official. It's getting dark early, the air is getting colder, and people have begun to talk about "the holiday season." It's truly the end of times. All that we can do now is wait it out until the sun stops ignoring us and starts being cool again. You know, for about a week until the unbearable heat and humidity of summer. But that's a problem for future us, and those jerks probably have it coming, so let's focus on what's important: making a good all-purpose side dish that's tasty and hearty enough to satisfy us while we're huddling for protection from the cold and darkness outside. Which means delicious potatoes, at least to me. A lot of historians believe that if this technology had fallen into the hands of Ivan The Terrible, we'd all be speaking Russian right now. Or whatever proto-Russian they spoke back in the 16th century. So use with caution.

Ingredients:

2 lb. Potatoes (I don't know if you've noticed, but there are a lot of different kinds of potatoes, with more mutant varieties popping up in stores every week. Potato farmers need to just stop and get a life. Anyhow, any potato with a thin skin like red or white potatoes should be fine)
4 Cloves Garlic
3 TBSP Olive Oil
1.5 TBSP Chopped Rosemary (Don't buy chopped Rosemary. That's not even a thing. Buy Rosemary, chop it, and once it's chopped measure out one and a half tablespoons)
1/4 tsp Black Pepper
Salt

So full disclosure: this recipe is going to take almost an hour and a half to make from start to finish. If you don't have that kind of time, just get a store-bought can of potatoes and eat them cold while thinking about how incredibly important the things you've chosen to spend your time on are. Everybody else is gonna start by choppity-chop-chopping their garlic and rosemary down to size, which seriously represents like 50% of the work involved in this recipe. Throw your tiny bits of garlic and rosemary into a ziploc bag (Sorry, I forgot to act like Chopped and pretend that brand-names don't exist. Put them into a resealable zip-top storage bag) along with your oil, pepper, and salt. How much salt? Well, potatoes tend to need a lot of salt to taste like anything at all, so don't be stingy. I'd say throw in two large person's pinches of salt. For the frantic measurers out there, about 1.5 teaspoons. Chop your potatoes into wedges (Pro-tip: if they're all about the same size, they'll all cook in the same amount of time. If they're not, your life will be full of regret and sadness), and throw them in there as well.

If you're snowed in, just make these potatoes. Neighbors will
smell them, and dig through the snow to get to deliciousness.
Tradition says that you mix all these things together in a bowl, not a bag. But one of the oldest traditions is to not eat if your food can outrun you, so maybe let's use our brains instead of blindly following what people tell us to do. Seal up your bag and shake around the contents until everything's mixed together and the potatoes are thoroughly coated. Then spread them out onto a sheet pan in as close to a single layer as you can manage, and throw that sucker in a 400 degree oven for about an hour. Check on your potatoes every 20 minutes or so to stir, mix, and otherwise wangjangle them, which will help them brown evenly. Once they start looking crisp and golden and just kind of awesome, take them out. Serve them immediately, by which I mean eat them in your home while taunting the wild bears that are now roaming through your snow-encrusted neighborhood. Good luck out there, and remember that in no way by suggesting that you taunt bears am I trying to ensure that there are more scarce resources left for me. See you next week, possibly!

Artist's Rendition: January

October 31, 2017

Sugar Cookies

Anything can happen on Halloween. From London to Idaho.
It's Halloween time again, full of festivity, cheer, and little kids dressed up in costumes that cost more than the price of all of the candy they'll get from trick or treating. Also angsty teenagers who vandalize people's houses because they're angry that society has deemed them too old to trick or treat. It's a fun time! So make sure to start partaking in the traditional Halloween activities, such as extortion, alcoholism, and protesting Halloween because it was originally a pagan holiday (So was pretty much every other holiday, but let's pretend we don't know about that to help fuel our outrage). And nothing's quite as in the spirit of the holiday as parents freaking out over the contents of the homemade treats that some creepy neighbor gave out, despite the fact that pretty much nobody has ever tampered with Halloween candy. Who are you to deny them this holiday tradition?

Ingredients:

2.75 Cups Flour
1 Chicken Egg (Raw, by preference)
1 Cup Sugar
1 Cup Butter (For some reason, there seems to be some sort of holy war concerning butter among people who write recipes. Some people measure it in sticks. Others in cups. Neither of them are willing to admit that the other side exists, never mind how much of one equals the other. Our nation needs some unity and healing. One cup equals two sticks of butter.)
1.5 tsp Baking Powder
1 tsp Vanilla Extract
1 small human's pinch of Salt

Optional Frosting!

The first thing you're gonna need to do is get in the holiday spirit. If you're a strict originalist, you can accomplish this by harvesting your crops, dancing around a bonfire, and carving a turnip. If you're not that odd mix weirdly fascinating and incredibly boring, just drink too much at a party and confess romantic feelings to someone who doesn't reciprocate them. Now you're ready to make some cookies. Start by creaming your sugar and butter (mixing the crap out of them so that the sugar crystals tear into the butter and make little air pockets, for those of you who haven't made my chocolate chip cookies before) in a bowl. Then mix in your egg and vanilla and set it aside. In another bowl, whisk together your flour, baking powder, and salt. Then take your dry ingredients and slowly mix them into your wet ingredients. It's best to work in batches so that you can incorporate all of the dry stuff into the wet, and so that flour doesn't fly out of the bowl dousing everything in your kitchen in a fine white powder. This is a pretty thick cookie batter, so for those of you mixing this manually, by the last batch you might need to abandon your whisks and just mix it with your hands despite the very real risk that you may need to lick batter off of your fingers.

Pumpkin sprinkles added to remind you that pumpkins exist.
Once your dough is formed, roll it into balls and put them on a greased up cookie sheet. You should get about 24 out of this recipe. If you're off on that number by one or two it's no big deal. If you're off by 5 or more then re-roll your cookies. If you're off by 10 or more, re-think some major things about how you live your life. Now, personally, I like a big fluffy cookie, so I leave mine as balls. If you prefer a thinner, crispier cookie, flatten them down with a weird gadget you can buy for about 30 bucks. Or, you know, with your thumb which is usually free. In any case, throw those suckers in a 375 degree oven for 10-18 minutes, depending on the thickness of your cookies. Pretty much, about 5 minutes after your house starts to smell delicious, take them out. Make sure to neurotically check on them every couple of minutes to really give them that homemade touch. When they're done, they should just be starting to brown around the edges. Now you've got some delicious homemade cookies to freak out the neighbors! They (the cookies) have got a mild sweetness going that's super awesome for other days, but this is a holiday predicated on threatening your neighbors into giving you sugary treats. So, once your cookies are cool, feel free to douse them in chocolate frosting. And since we've talked a lot about giving these cookies to kids, I'm not going to tell you to add a little bit of bourbon into the frosting. So don't even think about adding in specifically two tablespoons of bourbon into one standard sized can of frosting. See you next week, assuming you haven't been egged into oblivion!


June 28, 2017

Chocolate Chip Cookies

Early in the morning, before they doll themselves up, cookies
are just shapeless motionless blobs. Just like the rest of us.
On multiple occasions here, I've posted recipes that I've adapted from things that I used to eat growing up. And sure, stealing things from your parents is harmless fun for the whole family, but rarely has anything been stolen quite as brazenly as this chocolate chip cookie recipe. There are no clever little changes I made to enhance the recipe, like altering the ingredients, changing the quantities, or slapping my name on it. This is just, straight-up, cookies that my mom makes. I wasn't even planning on making this week's post be cookies. It was gonna be egg salad. But then I went over to my parents' house for a minute, smelled cookies, and realized that egg salad is a garbage food for garbage people. I'll probably make it next week.

Ingredients:

1 Cup Whole Wheat Flour 
1.25 Cups Unbleached Flour
3/4 Cup Light Brown Sugar, packed (Brown sugar is essentially sugar with molasses. So if you squeeze it, it packs together, kind of like wet sand. So make a sand castle out of brown sugar and a measuring cup.)
3/4 Cup White Sugar
3/4 Cup Butter or Oil (If you're using butter, because you have taste buds, 3/4 of a cup is the same as 1.5 sticks. You're welcome.)
2 Eggs
1.25 tsp Vanilla (Technically, my Mom's recipe calls for a "generous teaspoon of vanilla," but since that's totally not a thing that actually exists, I decided to change it slightly)
1 tsp Baking Soda
1 tsp Salt
No fewer than 12 oz. of Chocolate Chips

The first thing you're gonna need to do is find yourself a couple of bowls, or bowl-like objects. Fill once up with your various forms of flour (Personally, I'm guessing that the whole wheat and unbleached stuff got into this recipe because of my sister who, as a rule, doesn't eat white flour, consume any sugar, or enjoy life), along with your salt and baking soda, and whisk them all together until you can't tell them apart, even though some of your best friends are baking soda, and you swear you're not a bake-ist. Next, take a completely separate bowl, and cream your sugars into your oil or butter (butter). I used up my parentheses telling you the obvious truth that you should be using butter, so I couldn't use them to tell you that "creaming" is whisking the crap out of your sugars and butter so that the sugar crystals actually rip little holes in the butter, trapping air inside of it, and making it light and fluffy. So....make a note of it. And then whisk in your eggs, one at a time, along with your vanilla.

So, how's that not shoving burning hot cookies into your face
going? Asking for a friend.
Now it's time for the fun part, and by "fun" I mean "flour will be on your clothes until the day you die in a grease fire." Take your flour mixture, and start incorporating it into your sugar glop. Mix it in slowly, in a couple batches, and your clothes might live to see another day. Then add in your chocolate chips. It has been stressed to me that you cannot have too many chocolate chips, nor can you skimp on the quality of the chocolate. That said, some of these brands in the store are like 3 dollars per chip for some bespoke hipster nonsense. So for my money, I say don't get "uncle joe's chocolate-like chip-substance," and also don't get any chocolate chips that come with moustache wax and kombucha tea. Just get regular chocolate chips. And add them in to your batter. Then take a teaspoon, and scoop some heaping mounds of said batter on to baking sheets, leaving room for them to spread out, lightly experiment with drugs, and do their own thing, and shove them into a 375 degree oven until they're golden-brown and delicious. About 12 minutes. (Pro-tip: After they're done and you take them out of the oven, the baking sheet is still hot. So maybe get your cookies off of it before they burn on the bottom). Then try to wait until they cool before shoving them in your mouth so that you don't end up burning yourself horribly, despite the fact that everybody knows cookies are best fresh out of the oven. Enjoy your moral quandary!


March 6, 2017

Lokshen Milk

Welcome to the exciting, fast-paced world of eating way too
much dairy. Currently unincorporated
Everyone grew up eating something. For some people that something was unreasonably large amounts of fast food. For others it was cheap ingredients, coerced against their natures into delicious home-cooked meals designed to stretch a struggling family’s income. And for some it was...I don't know…chicken? What do nondescript people eat? I'm sticking with chicken. Chicken and asparagus. Some people ate chicken and asparagus. Today however, we’re focusing on the second category of food, and specifically on a dish that I remember fondly from my youth. It’s easy to make, tastes good, and is a great way to feed a family for about two dollars and some change. And the recipe has been in my family for generations. Two generations, as far as I know, but it still counts.

Ingredients:

½ gallon Milk
½ lb. Pasta (traditionally, growing up, my family was fairly specific about the pasta used. Upon growing up I've come to realize that it doesn't really matter, and my mother won't actually barge into my apartment and stop me from using the “wrong noodles.” Because I won't buzz her up.)
1.5 TBSP Butter
Salt

The first thing you're gonna need to do is channel your inner poor immigrant of vaguely eastern-European descent. Got it? Cool, let’s get started. The name Lokshen Milk, loosely translated, means noodle milk. Which sounds super gross, especially given the propensity these days for weird alternative forms of milk. But what it actually is, essentially, is a soup. Maybe even a stew, depending on the proportions of the ingredients (which I guess is technically true of most things), but I'm gonna play it safe and stick with the soup version. Anyhow, take your pasta and throw it in some boiling water until it's al dente (a curious Italian phrase I may have mocked at one time or another, that means “to the tooth.” Which essentially means that it [the pasta] is cooked, but still offers resistance when bitten. Like a sleeping person on a beach).

It looks exactly like what it is. A bowl full of milk and pasta.
It tastes awesome though.
Once your pasta is cooked to my liking, drain it and then throw it right back into the pot again. Add in your butter and milk, along with salt to taste, and bring that sucker up to...well, not quite a boil. Boiling milk is generally frowned upon. People say it burns super easily and that it kills the nutrients. This may be true. What's definitely true is that it makes a crazy mess. So bring your milk up to just under a boil. Then serve it up to your squalling family by the bowlful. And I know that some of you are undoubtedly sitting with your hands eagerly raised, begging to ask how a giant bowl of milk, butter, pasta, and salt can possibly be healthy for you. Well, I promised it'd be cheap, easy, and delicious. I also may have promised through insinuation that it wouldn't be chicken and asparagus. I never said anything about healthy.


October 5, 2016

Roasted Vegetables

Brightly lit kitchen courtesy of my parents' kitchen, which
isn't located in an apartment that was built in the 1940s
Well, it's official. Autumn is here. You can tell from the crispness in the air, the dead leaves on the ground, and the pumpkin-spiced everything in the store. It's the time of year when our hardy forebears would start looking toward their root cellars to provide their meals. I'm the same way. Except I live on a 2nd floor apartment, so when I dug my root cellar, my downstairs neighbors got super pissed. Thankfully, unlike my root-grubbing ancestors, I live by a whole bunch of large supermarkets with produce sections. So even with the pending lawsuit over my root cellar, I can still get some vegetables, roast them up, and taunt my neighbors with their deliciousness. 

Ingredients:

2 standard-issue Onions
2 bulbs Fennel 
2 lb. Mushrooms (any mushroom you've got will work pretty well here, but I like crimini mushrooms, because they've got an awesome flavor, they cook down well, and they look exactly like the depiction of a mushroom from every cartoon I've ever seen)
2 Bell Peppers
1 TBSP Olive Oil
1/4 tsp Black Pepper
Salt

The first thing you're gonna need to do is chop your vegetables. For this recipe, there really isn't a wrong way to cut them. You just want everything to be roughly bite-sized. And yes, different people take different sized bites. That's why I recommend you line up any potential guests you have along a handy wall and, using a protractor and compass, measure each of their bites before cutting your vegetables. Or you could use your best guess. Once your friends and family have been probed and measured, and your vegetables are cut, toss them (the vegetables) into a bowl. Mix them together with your oil, pepper, and a large-human's pinch of salt, and then lay them flat on a baking sheet. You want the vegetables to be in a single layer, not stacked on top of each other. So if you need to, break out some backup baking sheets (Backup Baking Sheets sounds like it should be the name of the absolutely worst band from the 60s. Like, so bad that they'd have opened for The Turtles).

Warning: highly delicious. Only throw at neighbors if you're
out of rotten tomatoes and cabbages.
Take your carefully distributed vegetables, and throw them in a 450 degree oven. Leave them there for about 20 minutes, or until your house starts to smell super awesome. If your house starts to smell like burning, you may have left them in for a bit too long. If you notice flames coming out of the oven, wait and see if the situation gets any better. If the eggs on your counter start to cook despite not actually being in the oven, consult the appropriate authorities. Once your vegetables are ready, take them out of the oven and eat them. Or throw them at your neighbor through a perfectly innocent hole in the floor. I've heard it both ways.

September 27, 2016

Pasta Salad

Pre-made dried pasta. Imported from Italy, for Reasons.
The first US presidential debate just happened. It was a stark reminder that we, as a nation, are rapidly approaching that important time when Baseball, Football, and Hockey are all happening at the same time. We're gonna need snacks. And since I've already posted some recipes for a whole bunch of different dips, as well as an awesome potato salad recipe, it's time to delve into the world of pasta salad. And let's be clear: there are a lot of different kinds of pasta salad, but when it comes to randomly eating while watching sports, I go with a basic pasta salad. Some people differentiate this kind of salad by calling it "macaroni salad," but I'm not about to limit myself to one kind of pasta to use. I'm not ready for that kind of a long-term commitment.

Ingredients:

1 lb. Pasta (I prefer a rotini or fusilli, but any smallish pasta shape will do. Follow your heart! By which I mean "use whatever you have lying around.")
8 oz. shredded Cheddar Cheese
1/2 cup Mayonnaise
1 Bell Pepper
1 Red Onion
1 TBSP Sour Cream
1 tsp Apple Cider Vinegar
Salt

One of the things I like about this recipe is how simple it is. You could pretty much make it while you're watching the game. So I guess the first thing you'll need to do is make some friends who like watching sports. After you accomplish that, and then somehow convinced these people to come over to your gross home, it's time to make some pasta. Pretty much every pre-made pasta ever has directions on it, and following those is a good way to go. But if you can't be bothered to because you're busy, lazy, or already threw out the container, boil up some water. Add in a large pinch of salt, and then your pasta. Stir it, and then boil it for about 10 minutes or so. The party line is that you want your pasta to be "al dente," which translates to "to the tooth" and means the pasta is cooked but still firm, offering resistance when chewed. Why this is supposed to be implied by "to the tooth" is one of the great mysteries of culinary history, along with the correct pronunciation of worcestershire, and who really killed Chef Boyardee. Once your pasta is sufficiently toothy, drain it and toss it in a bowl.

could have used a green pepper so it wouldn't be the same
dumb color as the cheese. But orange peppers were on sale. 
If you planned ahead, you used the 10 minutes your pasta was cooking to dice your vegetables and to mix together your dressing. But you were watching 30 seconds of football, interspersed between ads for beer and Cialis, so let's do it not. Dice up your pepper and onion, and throw them in with your pasta. Then mix together your mayo, sour cream, and vinegar, and add it in the bowl as well. Toss the whole thing together until it's well coated. And...that's pretty much it. Like I said, simple. Throw it in the fridge so that all the flavors have a chance to get to know each other, hit it off, get married, have little flavor babies, get divorced, and die alone in Utah. At least an hour. Or, as it's known in the NFL, 10 minutes of gameplay. Enjoy!


August 23, 2016

Chocolate Truffles

I was gonna write about me being a terrible Willy Wonka, but
got distracted by that oompah loompah who looks exactly like
Neil Patrick Harris.
Well, that's it. The olympics have ended. Which means that you've spent 17 days wishing you were in better shape than you were, all while sitting on your couch and eating chips directly out of the bag. It also means that the Paralympics are about to start! Which means you'll get excited for a second thinking that you must be a better athlete than some of them! That'll last 5 seconds, when you'll realize that overcoming crazy physical adversity to still attain a crazy high level of achievement in a sport is something you could never in a million years do. The bad news is, you're totally right. A couch dwelling chip-eater like yourself isn't destined for athletic greatness. The good news is, that means you can pretty much stay on that couch forever, and eat whatever you want. Even balls of chocolatey goodness topped with deliciousness, and rolled into a bite-size ball of awesomeness! Or take-out. Whichever's faster, because the opening ceremony is about to start.

Ingerdients:

1 lb. Dark Chocolate
1 cup Heavy Cream
2 TBSP Butter
1/2 tsp Vanilla
1 largish-sized human's pinch of Salt
Toppings!

The first thing you're gonna need to do is chop your chocolate into oblivion. You don't want any large chunks. This will get a never ending supply of chocolate smudges conveniently stuck to your knife, cutting board, body, clothing, and walls. You may have to move. But you'll end up with little chocolate bits, which you're gonna plop in a glass bowl. Now take your cream, butter, and salt, and bring all that nonsense just barely to a boil. Take it off the heat and immediately dump it on top of your meticulously melted chocolate. Whisk the crap out of your rapidly melting chocolate until the whole thing is smooth and uniform. Add in the vanilla, and stir lightly to combine. And that's it! Except totally not! Now we play the waiting game. Shove your bowl of chocolate goo (Ganache, to you people who either are culinarily inclined or have watched way too much food network) in to your friendly neighbor refrigerator, and let it cool for about an hour.

You may gain 3-5 delicious pounds by looking at this picture.
Line a flat surface with parchment paper/ Take your somewhat cooled goo and spoon a shapeless blob, roughly a tablespoon large, onto your parchment paper. Repeat until you run out of goop. Take your flat surface full of shapeless chocolate blobs, and shove the whole thing back in the fridge for another hour. (You may have noticed that this recipe has a whole bunch of waiting around time. I haven't noticed, because I'm an experienced cook-type person, and as such may-or-may-not have consumed a large quantity of culinary-grade liquor). Take your tray of solid goo balls out of the fridge, and roll them into vaguely spherical spheres. Any part of you and your home that wasn't previously covered in chocolate will be now, but that's cool because you're moving anyway. Now it's time to contemplate toppings. Because you have pretty much unlimited options. Just fill up a bowl with a topping, and roll a truffle in it until you, surprise, get chocolate all over everything! Stick the truffles back in the fridge for a couple minutes, and try again. I went with four toppings, sprinkles, cinnamon and sugar, cocoa powder, and crushed peppermint candies. But the sky's the limit! Are my flavorings better than yours? Sure, but don't let the fact that you haven't outclassed a professional (Gross exaggeration) at their own game get you down. You've got the Paralympics for that. 

August 16, 2016

Mayonnaise

In lieu of a priest, Egg and Lemon had their close friend Oil
officiate their weird, gross wedding ceremony. 
Mayonnaise gets a bad rap these days. We've spent decades just thinking of it as this weird, kind of flavorless sludge that we buy from the supermarket. I blame the corrupt media, fueled by the ever-more powerful Miracle Whip Lobby (Motto: when life gives you lemons, spend millions of dollars on advertising to try and get people to willfully shove lemons down their throats until either the lemon, or humanity, dies out). The fact of the matter is, back in pre-historic times they didn't have fancy store-bought jars full of over-processed, under-flavored, hyphenate-inducing goop. They just had their wits, and maybe a sharp stick if they were lucky. And now they're all dead. I still say that the store-bought mayo is a bad idea.


Ingredients:

1 Egg Yolk (There are a lot of store bought devices, of varying levels of grossness, that will seperate egg yolks and whites for you. Or you can be a man, and use your hands. Your call.)
1 Cup Oil (I like to go with a relatively neutrally flavored oil, like Corn, or Light Olive. But follow your heart. Your gross, weirdly flavored heart.)
1 TBSP Apple Cider Vinegar
1 tsp Dijon Mustard
1/2 tsp Salt
1/2 a Lemon

This is another one of those recipes that seems like an awesome idea at first. Until you've been whisking a bunch of junk around a bowl for what feels like, at the minimum, 2 presidential terms, and your arm is having serious doubts about whether it wants to move forward with you as its running mate. But it tastes good, so let's get cracking. Take your egg yolk, salt, and mustard, and whisk them together in a bowl until they get a little bit lighter and frothier than they started. Take a second bowl and juice your lemon into it, being careful to keep the seeds from falling in with the juice. Add in your apple cider vinegar, and pick out all of the lemon seeds that brought dishonor upon your family just now. Take half of this mixture, and add it in to the egg mix, whisking like a frenchman. Which is a phrase I invented just now that doesn't really mean anything, but sounds like it should be offensive for some reason. Why are we only adding half of this mixture in? Because we need some liquid to suspend all of the oil we're about to add in, forming an emulsion, along with several emotional scars. But if we add in all of the vinegar and lemon juice, we'd have a super wet mix to start off with. Which would make forming the emulsion with our oil a lot harder. We're already whisking for the duration of one of Kanye West's interviews where he talks about how much of a genius he is for wearing ugly clothes. Don't make this harder on us. Don't be that guy.

Now it's time for the fun part, and by "fun," I mean, "oh god, oh god, why?" Take your egg mix, and start whisking the bejeezus out of it. While you're doing this, start adding your oil in. At first, you want to add it in painfully slowly. Just a couple drops at a time. Add it in too fast and instead of mayonnaise, you'll just end up with oily eggs. Once your emulsion starts to take form a little bit, and the pain in your arm has started damaging your spirit in addition to your body, you can start adding in the oil a little bit quicker, in a thin but constant stream. (Protip: Apparently a measuring cup is absolutely terrible for this job. Especially if you have to hold it while you're beating your mixture, causing large waves of oil to constantly threaten to splorp out into your fledgling mayo, each time giving you new and exciting heart attacks. I've heard squeeze bottles might help with this.) Once your oil is about half done, add in the rest of your vinegar and lemon mix, and then get back to whisking. The hardest part will be the end, but not because your arm hates you, and just wants to die. Well, not just because of that. You'll see your oil coming to an end, and your arm will be aching, and you'll just have the strongest urge to just pour everything that's left in and be done with it. This is the voice of failure talking. Ignore it. 

Fries sold separately. Go find your own
Once your oil is finished, you're pretty much done! Except that you've got raw egg in there. And sure, chances are it didn't have any salmonella in it, but do you really want tiny fish swimming around in your blood? Upstream? The fridge will help keep the bacteria from spreading, but to really kill it off you need some room temperature acid. Fortunately, you've got lemon juice and vinegar in your mayo! So, the conventional wisdom says to leave your mayo at room temperature for a minimum of an hour, but some people recommend closer to a day. They move it to the fridge where it'll last for about a week. And it won't last a week, because this stuff is good. Slather it on a taco, make some tuna, potato, or pasta salad, or even just straight-up use it as a condiment on fries and whatnot. Bonus points if you mix in a little sriracha. 

July 19, 2016

Brownies

Artist's rendition: Me at every party
Brownies hold a special place in my heart, and several other major organs. They're the perfect combination between a cookie, a cake, and licking delicious raw batter off of a mixing spoon, FDA-be-damned. You can eat them plain, or add various toppings like fruit, whipped cream, or caramel sauce. And yes, your mouth just watered when you read that, yet again confirming Pavlov's famous experiment where he annoyed the crap out of his neighbors. But let's be honest. Your mouth started watering back when you first read the word "brownies." Because brownies are special. They're exciting, and awesome, and if you're lucky enough to have some in your life don't let them go. If you have to stab other partygoers with a fork, so be it.

Ingredients:

1.75 Cups Sugar
1 Cup standard-issue Flour
2/3 Cup Vegetable or Canola Oil
2/3 Cup Cocoa Powder (It's important to note that Cocoa Powder straddles the fine line between "powder" and "gas." It will get everywhere if you're not carfeful with it. It probably will regardless, but at least this way you have the sweet illusion of control.)
4 Eggs
1 tsp Baking Powder
1 tsp Vanilla Extract
1 tsp Peppermint Extract
1/2 tsp Salt

Before we get started, it's important to note that this is part of a number of recipes I got from my mom and then gussied up (from the latin GUH, to blatantly steal, and SEED, to alter very slightly to assuage guilt). Why is it important to note this? Mostly so that I don't get sardonic phone calls all this week. The point is...well, I don't remember what the point is, which makes this a good time to start the actual cooking part of the recipe. Whisk or sift together your flour, baking powder, and cocoa powder. Allow 3-5 minutes to adequately curse at your cocoa powder, and at the stylish cocoa powder stains covering everything you're wearing. In another bowl, because we're high class snobs like that, whisk together your eggs, and beat them until they're light and a little fluffy, so you know they're no longer a threat. Then add in your sugar and beat it for about a minute, just to show it who's boss and keep it from getting ideas.

Words fail me. All I can say is: you're welcome.
Add the rest of your ingredients, including your cocoa mixture, into your egg/sugar ooze. It's gonna get pretty hard to stir. It's gonna be a thick gloppy mess. That's how you know it's good. Take a pan and oil it up, or cooking-spray it up, or whatever. How large of a pan should you get? That's really up to you. The larger the pan, the more spread out the brownies will be, which means they'll be crispier, and cook faster. Which is great if you hate joy and liberty, and love things like kicking puppies and siphoning gas out of the school-buses at the orphanage. The rest of us know that brownies are supposed to be gooey and thick and delicious. So we're all gonna take a 9x13 pan, lube it up, load it up with our brownie sludge, and bake that sucker at 350 degrees for 40 minutes. We might even say that this time we're not gonna eat the leftover batter off the spoon and/or bowl. But we are lying.

May 24, 2016

Sloppy Joe

So, according to the internet, another name for a Sloppy Joe
is a "Wimpie." So this happened. Because I'm a child.
Legend has it that back in Sioux City, Iowa (The "Tallahassee" of Iowa) a chef named Joe invented what he called "The loose meat sandwich." And it was awesome. But the only thing known to man that sounds less appealing than "Loose Meat Sandwich" is "Fishguts Ice Cream," so it's no surprise that the name didn't stick. The awesomeness did though. As little as 10 years later, cookbooks were printing recipes for "Sloppy Joe" sandwiches, which sounds like a super backhanded compliment to me. They're down for naming the sandwich after him, but they still have to get a dig in at Joe's expense. Because cookbook writers are jerks. Then again, apparently the term "Sloppy Joe" used to refer to any cheap diner food, or even to cheap clothing. So maybe they weren't insulting Joe himself, just his job, cooking, clientele, and clothes.

Ingredients:

1 lb. Ground Beef
1 standard-issue Onion
1 Bell Pepper
1 clove Garlic
8 oz. Tomato Sauce
2 TBSP Chili Powder
1 TBSP Tomato Paste
1 tsp Ground Cumin
1/2 tsp Black Pepper
1/2 tsp Ground Mustard 
1/2 tsp Worcestershire Sauce (Nobody can ever agree on how to pronounce this name, but it's named after an actual place, so that should make it simple. It's pronounced "Glasgow.")
1/2 tsp Balsamic Vinegar
1/4 tsp Hot Sauce
Oil
Salt 

The first thing you're gonna need to do is brown your meat so you can set it aside like a neglectful parent who has better things to do than pick you up from soccer practice, thank you very much. So coat a pan with oil, heat it over medium heat, throw your beef in there, and let it sizzle for a bit (Oxford comma added for reasons of logic and awesome). Flip it and repeat, and then break up your ground beef into little beeflets using a wooden spoon. Drain any excess liquid, and set your beef aside so it can learn the hard way how to use the bus system. 

Buns sold separately. Sense of deep emotional fulfillment
may not apply in your region.
Choppity chop your onions, bell pepper, and garlic into tiny bits. Sauté your onion in a pan coated with oil along with an average-sized human's pinch 'o salt. Coom for about 3 minutes before adding in your belle pepper, garlic, and another AHSP of salt. Cook for another 2 minutes, then add in your chili powder, black pepper, mustard, tomato paste, and hot sauce. If your beef has managed to find its way back home, this is a good time to add it back in to the party as well. Let that whole nonsense cook down for a minute or so and then add in your tomato sauce, worcestershire, and balsamic. Cook for another 2 minutes, or until it smells so good that you literally can't stop yourself from reaching your hand in and shoving that goodness in your food hole, forks, propriety, and severe burns be-damned. And there you have it! Sloppy Joes! Throw that sucker down on a bun and enjoy. Or get creative and put it in an egg roll, or on mashed potatoes, or just eat it straight. Or don't. More for me


May 3, 2016

Red Cabbage Slaw

It's like the world's least interesting or dangerous stampede
There comes a time in every man's life where he's forced to contend with coleslaw. As you may or may not know, coleslaw is what happens when some idiot decides it's a good idea to take a bunch of mayonnaise and sugar and throw it on top of cabbage. For reference, it's that thing that comes on the side of your sandwich in deli-restaurants that you don't eat because it tastes like an even blander version of soggy cardboard. I can't say that I recommend it. But, like a lot of bad food, most local politicians, and--according to my old little league coach-- my hitting game, it's got some real unrecognized potential. Except that I just recognized it. Try not to think about it.

Ingredients:

1/2 a head of Red Cabbage 
5 Carrots
3/4 Cup of Orange Juice
1/2 Cup Apple Cider Vinegar
2 TBSP Honey
2 TBSP Olive Oil
1/2 tsp Salt

The first thing you're gonna need to do it find some vegetarian and/or vegan friends. Because otherwise, what's even the point of making delicious vegan food. Just go make some meatballs and call it a day. Once you've mastered the art of human interaction to the point where vegans don't flee from you, it's time to peel the outer layer of your cabbage off. Because it probably tastes as gross as it looks, and because those things grow in the dirt. Have you seen the dirt lately? Exactly. So peel off that outer layer of bluh, and then choppity chop up the cabbage into bits. Peel your carrots and grate the crap out of them. Take all the bits of carrots, bits of your hands, and bits of nearby furniture and pets that the box grater decided to attack, and throw them in with your cabbage.

Friends to share this with sold seperately
Now it's time to take all the rest of the ingredients, dump them in a bowl, and whisk the crap out of them. This is pretty much the hardest part of this recipe, and it's super easy. This thing is practically impossible to screw up, despite your best efforts. Toss everything together in a bowl, cover it, and shove that sucker in the fridge for a minimum of 3 hours, going back in occasionally to stir the whole thing up (oh, is it too hard for you to occasionally stir your food so it'll be delicious? Suck it up.) and that's it! You've got some delicious slaw, with no mayo in it, with flavors that actually complement each other. It's food good enough for kings. Vegan kings! Or...you know, the good kind of kings. Those too.

March 29, 2016

Tomato Sauce

Look at those poor suckers. They have no idea what's about
to happen to them.
There comes a time in every true American's life when you get a great idea from watching TV. This has been the origin story of some astonishing technological advances in computers and medicine, I assume, and it's also how I decided to make some legit tomato sauce. Come to think of it, TV may have also influenced my idea for a new olympic sport. The good news is that this recipe is super easy to make, and delicious. The bad news is that it's vegan-friendly, gluten-free, and doesn't actually require any cooking, so whenever you make it you'll probably get a bad case of the hipsters. If the infestation is allowed to grow unchecked, they'll start following you around asking about your bespoke, gluten-free, vegan, rawfood, sauce, and going on about how you should really try adding kombucha, chia seeds, and ennui to it. Just call Orkin to spray a repellent around and you should be fine. 

Ingredients:

3 Average-Sized tomatoes (If you're unfamiliar with what an average tomato size is, get your time machine out and watch some vaudeville acts around the turn of the 20th century. Or go to a produce store)
28 oz. can Crushed Tomatoes
1/2 an Onion
3 cloves Garlic
1/4 cup fresh chopped Basil
2 TBSP fresh chopped Oregano
1 TBSP Olive Oil
1/2 tsp Salt
1/4 tsp Black Pepper

The first thing you're gonna need to do is prepare your fingers to be mangled. Because this is another time we're bringing out our homicidal friend, the box grater. Offer it a fatted calf to try and appease its fury. Then wash your tomatoes, and grate them into a bowl. Tomatoes are squishy nonsense things, so you're making the grater's job even easier than normal (It's job is to cause you pain). If, like me, through a string of heathen prayers, quick-wittedness, and sheer dumb luck, you managed to not cause yourself serious bodily harm, celebrate in whatever tradition suits you. Then open your can of crushed tomatoes, and splorp them down on top of your fresh tomatoes. Then finely chop your onions and garlic, and throw them in there. 

Best when served to an Italian or Sicilian friend who's
face you can rub it in.
Now it's time to talk about chopping basil. If you want even bits of basil, and don't want to take forever chopping it, your best bet is a chiffonade. Yes, that sounds like a French prank perpetrated on unsuspecting Americans during the second world war, like mimes and escargot, but don't worry. Just stack your smaller basil leaves inside of the larger ones, tightly roll them up into an adoreable tiny basil cigar. Slice your basil stogie into bits and add it, along with the rest of your ingredients, in with your tomato goop. Stir that nonsense together, cover it, and stick it in the fridge for at least an hour to let all of the flavors come together. And that's all there is to it. Just throw that stuff down on some fresh cooked pasta, use it to make lasagna, or use it to make some insane pizza. Because this sauce would make an awesome chicago-style pizza. (pro-tip: that's what we in the using-the-english-language-business call foreshadowing. It may have something to do with a recipe coming up soon). And that's all there is to it! Enjoy making some awesome food with that sauce. Maybe even some pizza.


March 22, 2016

Frittata

I didn't have a "before picture," so here. Enjoy this awesome
surplus castle picture from my trip to Ireland. You're welcome
Legend has it that the Frittata was invented in the days of yore by esteemed chef and and disgraced mime William H. Frittata. The story tells that he desperately wanted a delicious food he could carry with him and eat on the go, so he ordered a pizza. But he was cheap, and refused to tip the delivery guy, who got pissed, took the pizza for himself, and stole all of Frittata's flour so he couldn't make some himself. He told anybody who'd listen it was the "salting the earth of Carthage" of pizza delivery. Not many people listened, and those who did regretted it. The moral of the story is, don't stiff the delivery guy, or your pizza might be made out of eggs.

Ingredients:

4 standard issue Eggs
8 oz. Italian Sausage
5 oz. Crimini Mushrooms
1 Bell Pepper
1/2 an Onion (It's often hard to find half an onion. But if you track one down you're in luck, because they usually travel in pairs)
1 TBSP Olive Oil
An unspecified amount of Salt
An unspecified amount of Black Pepper
A skillet you can stick in the oven. (Yes, technically you can stick any skillet in the oven, but you want one you can stick in the oven, while the oven is on, without any damage to your health or security deposit
Optional extras! Maybe! If you feel like it!

If, like me, you have access to fancy and wonderful kitchen equipment as a fringe benefit of your menial existence of perpetual unemployment, you're in luck! Or, at least, you're in luck in this one specific regard! Just slap a ring mold on a flat-top, fill it up with oil, sausage, and veggies, season it, add in the beaten eggs, wait for it to set, remove the mold, flip that sucker, and you're done! For the "rest of the people out there," with their "gainful, and often even fulfilling employment," we're gonna have to make do with the pots, pans, and stovetops that god gave us. So the first thing you're gonna need to do is chop your onions, peppers, mushrooms, and sausage into bits. Don't go all crazy with it. Large recognizable chunks are fine. Think "pizza toppings," not "hide the evidence." Heat up your oil in a smallish skillet and toss all that nonsense in there along with an average-sized human's pinch of salt and pepper. Saute` it over medium heat for about 5 minutes. During that 5 minutes, beat your eggs mercilessly, like the cruel egg-overlord you lie about being on your resume. Add a very small human's pinch of salt in with your eggs right before your drop them in the pan. By the way, spoiler alert, you're gonna drop the eggs in the pan.

Just think: none of this would be possible without some guy
randomly trying to eat that thing that popped out of a chicken 
Drop the eggs in the pan. They should kind of fill in the crevasses between all of your bits of veggie and sausage. Now comes the tricky part, because eggs have this fun tendency to overcook. And thanks to the stupid laws of stupid thermodynamics, they're technically still cooking once you take them off the fire. Because they're jerks. So when your eggs are starting to set up around the sides, but are still runny in the middle, throw the pan under your oven's broiler. Let it go for about a minute, just to crisp up on top. Take it out of the oven, and say a prayer to any god or sports team that you didn't keep it in there too long. Dump that sucker out on to a plate, and enjoy your awesome weird cross between a pizza and an omelet. Optional extras/substitutions include milk added into the eggs, all sorts of cheeses added on top, and pretty much any vegetable you can chop up into bits. Which is all of them. Because vegetables suck at avoiding knives.