Showing posts with label Side Dish. Show all posts

November 21, 2018

Spicy Honeyed Sweet Potatoes

How does Thanksgiving sneak up on us? With clever disguises
It's Thanksgiving time again. And that means it's time to shove some delicious food into our mouths. As much as we can as fast as we can in the hopes that it appeases the angry ghosts of our ancestors who probably lived and died in some beet-heavy country like Serbia and never dreamed of being able to come to a land of limitless opportunity and eating a giant stupid chicken that drowns in the rain. But not everything is turkey and gravy. For every flower there are weeds, there only to sow dissent and destruction. On Thanksgiving, this is the sweet potatoes which, for reasons nobody can adequately explain and is probably some sort of ancient curse inflicted upon colonizing Europeans, tradition demands get covered with marshmallows and baked. Kids love this idea, because kids are stupid. They hear marshmallows, and they stop listening. You could offer kids marshmallows covered in chalk and they'd ask for more. But sweet potatoes have potential. They've got a good flavor that pairs well with a lot of things, and they can make a great addition to your meal. Assuming you don't cover them with marshmallows.

Ingredients:

3 largish Sweet Potatoes
1/2 cup Walnuts
3 TBSP Honey
1.5 TBSP Olive Oil
1 tsp Cinnamon
1/4 tsp Cayenne Pepper
1/4 tsp Black Pepper
1/4 tsp Cumin
1 largish human's pinch of Salt

The first thing you're going to need to do is stop freaking out. People treat Thanksgiving like it's some crazy marathon of cooking that they need a full month to prepare for. It's one day with family and a large meal. This is a weekly occurrence for tons of Americans who descend from Italians, Greeks, Jews, and tons of others. Any culture with a food and family tradition. We all laugh at the rest of you every year, because it's really not that big of a deal. Just take a breath, make your food, set your table, and don't be afraid to remind any drunk or abrasive relatives that they're completely expendable. Once your tears have dried, start pre-heating your oven to 375 degrees. Spread your walnuts evenly on a baking sheet and put them in the oven for 5 minutes while it's heating. Keep an eye on them, because nut are jerks and they like going from "not cooked at all" to "charcoal" in about 3 seconds while your back is turned. Don't give them the satisfaction. Once your nuts are toasted it's time to peel your sweet potatoes. Technically you could leave the skin on them. They're not harmful to eat and they have fiber. Then again, the same thing could be said of cardboard, so use your own judgement.

I'm not saying these are delicious enough to make up for
centuries of oppression, but they definitely don't hurt.
Cut your sweet potatoes in half lengthwise, and then cut them in to "half moon" shaped chunks, each about 1/4 inch wide. The goal is to get them all the same size so that they cook at the same rate. Some pieces probably won't conform, but that's okay. It's not like your guests are going to be judging you silently while they eat and talking about all of your failures in the car on the ride home. Once you're done cutting, throw your sweet potatoes in a bowl along with your salt, black pepper, cayenne, cinnamon, cumin, oil, and 2 TBSP of your honey. Mix that nonsense together and then spread it flat on a baking sheet in one layer. If it doesn't find, use two baking sheets. If it still doesn't fit, you may need to re-evaluate what you've been calling a "baking sheet." In any case, throw toss your sheets of sweet potatoes into your oven and let them cook for about 20-25 minutes. Once they're soft enough to easily stick a fork through, take them out of the oven and throw them in a bowl along with your walnuts and your last TBSP of honey. Stir that together, and then serve it to your ungrateful friends and family. It's a little spicy, a little sweet, and a whole lot of delicious, and will totally distract from the fact that a bottle of wine disappeared and the kids' table is starting to look a little too festive. Happy Thanksgiving!

October 25, 2018

Roasted Pumpkin Seeds

Who doesn't love a nice gourd lobotomy?
It's the end of October, which means that it's that time of year again. That time of year when we have feasts and celebrations, sprinkle the blood of an animal sacrifice on our doorway, and light some bonfires to ensure good luck and keep our cattle alive through the winter. Or at least that's how we did it back in the middle ages in various Celtic countries. Nowadays we celebrate Samhain mostly by freaking out about somebody slipping a razor blade surreptitiously into our kids' M&Ms, and by dressing up as a sexy meerkat. Oh, and pumpkins. We carve human-ish faces into pumpkins, kind of like some sort of grotesque gourd serial killer, and then leave the mutilated pumpkins outside of our houses as a warning to the other vegetables. Which means we're left with the classic serial killer dilemma: what to do with the goopy insides that we methodically removed from our victims.

Ingredients:

1 Pie Pumpkin (A pie pumpkin is a pumpkin typically used for pie making. We've genetically bred them to have characteristics that make them ideal. If sentient gourds from outer space ever visit the Earth, this is what will spark intergalactic war)
1/4 tsp Chili Powder
1/4 tsp Garlic Powder
1/4 tsp Onion Powder
A largish human's pinch of Salt

 The first thing you're going to need to do is dismember an innocent pumpkin. But I've been pretty open about that up to this point and you've made it this far, so I'm going to assume that you're OK with that. So let your pumpkin say goodbye to its loved ones, eat a final meal, and then chop its head off like your name is Robespierre. Or the guy who killed Robespierre. Either way. The point is, pull out all of those gross pumpkin innards. This is where we encounter our first problem. Namely, the fact that pumpkin innards like being innards, and have little-to-no interest in making the leap towards being outards. So, using some unholy combination of kitchen implements, your hands, and more gumption than you can shake a stick at, just do your best. Remember, they say that nobody's perfect. Which just goes to show that there really isn't any excuse for coming in second place. Take your pumpkin guts (Or maybe pumpkin brains? I never really thought about it before) and separate the seeds from the other nonsense. Rinse your seeds off and then get ready for the trouble you're going to have with the rest of the ingredients.

Perfect for snacking while you watch TV, read
a book, or lie to friends about reading books
Haphazardly throw the rest of the ingredients on top of your seeds and mix them together. Not everything has to be a challenge. Spread your seasoned seeds down on a baking sheet. It's important to keep them as close to a single layer as possible. If your pumpkin is abnormally fertile or you're just doubling the recipe, use multiple baking sheets rather than clumping your seeds all together. Bake them in a 300 degree oven for about 30 minutes, making sure to wangjangle them around every ten minutes or so to get even crispiness and no burning. And there you have it! Delicious spiced pumpkin seeds! You also have an entire hollow pumpkin which you can mutilate to your heart's content and leave around neighborhood. Or you can cook it. But more on that next week. Happy cultural appropriation holiday!

August 9, 2018

Roasted Elotes

We use corn for so many crazy things in America that it's
even starting to weird out the other vegetables
Corn is everywhere, especially in the midwest. Some of you sticklers for language might be thinking "there's no such thing as gradient levels of 'everywhere,'"and you'd think that would be the case. But you're wrong. Go to any grocery store. Look at ingredients. Corn is everywhere. Then go to the midwest and drive for 30 miles in literally any direction. I rest my case. Fortunately, corn is also absurdly delicious, and is kind of synonymous with Summer, which it technically is in case the absurd heat and gaggles of unruly children roaming the streets wasn't enough of a clue for you. The point is, we're being invaded by delicious corn, and it's our duty as patriotic Americans to eat the heck out of it to thin out its numbers so that we don't get completely overrun and end up slaves to our corn overlords, working in a butter mine in Montana.

Ingredients:

4 Ears Corn
4 oz. Cotija Cheese (If you can't find Cotija, you can replace it with Feta, but it won't be quite the same)
1/4 cup Mayo
1/4 cup Sour Cream
2 Limes
2 cloves Garlic
1 tsp Chile Powder
1/2 tsp Smoked Paprika
1/4 tsp Cayenne Pepper
1/4 tsp Kosher Salt

I've managed to make some pretty easy food here once or twice. Once I just mashed up a couple of fruits and froze their goop. This isn't the easiest recipe I've ever made, but it may be the easiest recipe I've ever made that actually requires any cooking. So first thing's first, heat your oven to 400 degrees and toss your corn in, husks and all. You don't even need any bourgeoise luxuries like a pan. Just throw them straight on your oven racks and leave them there for 45 minutes. Which is awesome because, firstly, there's no dishes to clean up, and secondly you now have 45 minutes to prep everything else. 40 minutes later, after you suddenly realize that you completely forgot about your corn because you got sucked in to whatever reality TV show you're addicted to this week, run to your kitchen with a nervous energy that really has no place near sharp knives. Take a sharp knife and chop the bejeezus out of your garlic. You really want to get it fine. Otherwise you're going to end up biting into a giant chunk of uncooked garlic later, which will end up being bad for you and everyone who has to talk to you for the rest of the day.

I wouldn't recommend letting these sit around for too long if
you're not eating 'em right away. This has yet to be a problem.
Combine your mayo, garlic, sour cream, cheese, and the juice from your limes together (oh yeah, you've got to juice your limes. So go retroactively have done that). In a separate container combine your chile powder, paprika cayenne, and salt. You're pretty much good to go. Like I said, easy. Once your corn is cooked all the way through take it out of the oven and pull the husks off of it. If you have delicate, sensitive, effeminate hands that can't handle second degree burns, use a towel for this. Either way, leave the husk at the bottom of the corn so that you can use it as a handle, and take your delicious snack on the go. This allows you the fun of eating your hot food outside in the Summer heat. You know, where the sun is blazing down on you in its endless struggle to murder you. Anyhow, immediately slather your cream mixture on to the hot corn, and then sprinkle it with your spice mixture. I'm a fan of citrus, so I squirt on a little extra lime juice at the end, but that part's optional. And that's it! You've got a snack that's delicious, filling, and a service to your country. You're technically a veteran now.


July 4, 2018

Savory Sweet Potatoes

Cayenne is shy, but was socially obligated to be in the picture
Happy 4th of July! It's a special time of year when we Americans prepare burnt offerings for Uncle Sam in hopes that he wakes from his enchanted slumber and smites our enemies. And like any good holiday, it's got a pretty heavy food component to it. The traditional fare is usually grilled meats, like burgers, hot dogs, chicken, which are awesome, but it's side dishes that really make it in to a festive event. Think about it this way: if you were on the run from zombies, or ninjas, or gluten or whatever, and you had to stop briefly to make food, you'd totally char some meat over a trash can fire. But you probably wouldn't make cole slaw, potato salad, and succotash. Or sweet potatoes, which brings us to today (roll credits).

Ingredients:

4 Sweet Potatoes

1.5 TBSP Olive Oil
1/2 tsp Chili Powder
1/2 tsp Cumin
1/2 tsp Garlic Powder
1/4 tsp Onion Powder
1/4 tsp Smoked Paprika
1/4 tsp Oregano
1/4 tsp Cayenne Pepper
Salt
Black Pepper

The first thing you're going to need to do is get over your hangups. There's often a stereotype of men doing the grilling of meat, and of being weirdly territorial over their grills. Other men are forced to sit in huddled groups talking about classically manly things (killing spiders, Babe Ruth, and Monty Python), while women are relegated to the kitchen to prepare vegetables and talk about traditionally female things (eating salads, dealing with Time Warner Cable, and multi-tasking). Personally, I doubt that this is an actual phenomenon that ever happens outside of television ads and sitcoms. Don't get me wrong, I know plenty of people stupid enough to insist based on some weird gender-based pride that they have to do a specific job. I just don't know anybody willing to play along, especially when that means eating subpar food on a rare day off in the summer, just to satisfy some idiot's need to feel important and special. Anyway, the point is peel your sweet potatoes, and cut them in to long thin wedges, roughly shaped like french fries. Congratulations, you've done like 90% of the work for this recipe.
Delicious, healthy-ish, and orange. Living the dream.

Take all of your spices and mix them together into a giant spice concoction. Or blend. Or whatever. Dump that nonsense into a bowl along with your sweet potato wedges and your oil. Mix until everything's coated, and then spread your sweet potatoes out on to a couple of baking sheets, keeping them in one layer as much as is possible. Throw that into a 400 degree oven for 35 minutes, and you're pretty much done. All that's left is to eat your delicious sweet potatoes along with your traditional meal of beer, charred meats, pickles, and beer. And to watch a fireworks display, in which we fire explosive devices into the sky, symbolizing the American dream to eventually wage war on the clouds and bring their sky-treasure back as tribute. Happy 4th of July!

June 26, 2018

Honey Mustard Parsnips and Carrots

A rare image of wild parsnips running amok
Parsnips are interesting things. If you're not aware, they're the albino-carrot looking things that you walk past without buying at the grocery store. Which seems crazy, because parsnips have a kind of nutty, peppery flavor that's completely delicious. The thing is though, it makes sense that you'd overlook them. They're kind of like the root vegetable equivalent of chameleons. Or maybe ninjas. They just seem to blend in perfectly with whatever you cook them with. Also, they may have played a role in assassinating several feudal lords of ancient Japan. And sure, that last thing I said probably isn't true, but we don't know for sure. Uncertainty is a powerful tool, for man and root vegetable alike. Anyhow, the point is that parsnips aren't carrots. Despite this, they do taste good with carrots. Which just goes to prove the old adage: if two things look similar, you should probably put them together and eat them.

Ingredients:

1 lb. Carrots
1 lb. Parsnips
1 TBSP Honey
2 TBSP Dijon Mustard
3 TBSP Olive Oil
Salt 
Black Pepper

The first thing you're going to need to do is get over the fact that we're cooking root vegetables in late June. Sometimes life throws you curveballs. Sometimes those lifeballs come in the form of a semi-regular box of misshapen produce that you're paying to have delivered to your apartment, and in the weird produce choices that said box has been stocked with this week. You can sit and cry about it, like the family of an assassinated Japanese feudal lord, or you can make something great out of your random box of assorted nonsense. So grab your vegetables, peel them, and get to chopping. Now carrots and parsnips tend to be skinny at one end and fat at the other. Skinny chunks of food cook faster than large chunks of food, and since we want all of our food to finish cooking at the same time we're going to have to deal with that. I like to cut them in half to make them easier to work with, a principle which I apply to many of my culinary and business dealings. Then I halve the skinny ends, and I quarter the fat ends. Once you've finished your root vegetable trigonometry, toss them into a bowl along with a smallish pinch of pepper, a large pinch of salt, and 2 TBSP of your olive oil. Throw that mess on to a baking tray, doing your best to keep it in a single layer, and then toss it in to a 400 degree oven for 1/2 an hour. 

This here is why the rice kingdoms fell
Halfway through this process, make sure to take everything back out of the oven, stir it all around, and ineffectually poke at the vegetables with a fork while contemplating whether they'll finish cooking in time. After contemplatively staring at your parsnips for about 2 and a half minutes, throw it all back in the oven for the rest of the cook time. Stir together your honey, mustard, and the rest of your oil until they form a homogenous goop. After your half hour of cooking is up, pour that goop all over your vegetables, stir that nonsense together, and throw it back in the oven for another 15 minutes. You'll know it's done when you start to get some color on the vegetables, everything around your oven begins to smell fantastic, and when 15 minutes have passed. And that's it! Or, well mostly it. Take your vegetables out of the oven. And that's it! Serve them as a snack, a side dish, or a warning to the shinobi tribes operating in the shadows of your local produce store.


April 17, 2018

Jalapeño Cheddar Bicuits

I've found that the freshest dairy products are bought in alleys
The first thing that you think about when you buy cheese out of the back of a van is safety. How recently was this van serviced? Was the air conditioning on when it drove down from Wisconsin? Is there a Cheese Mafia, and if so does this make me their customer, business partner, or rival? But let me start at the beginning. A guy called the restaurant where I'm working looking to sell some cheese, and gave shockingly few details about where it had come from, who he was, or why he was peddling mystery cheese in the first place. Eventually it was learned that he worked at a new dairy up in Wisconsin that had overproduced for an order, and so he was looking for people to buy some of his discounted sketchy cheese out of the back of his van. Naturally, I jumped at the opportunity. The restaurant bought a fair amount of cheese, and I got some for myself. Then, as suddenly as it had appeared in my life, the cheese van drove off in to the night, leaving me with nothing but a weird story, fond memories, and 9 pounds of discounted cheddar cheese. Which brings us to biscuits.

Ingredients:

2 cups Whole Wheat Flour (I'm doing a whole wheat thing right now, so I used whole wheat flour. If you want to switch it out for regular flour, go ahead)
3/4 cup Grated Cheddar Cheese
1 cup Buttermilk
3/4 stick of Butter (This is 6 TBSP, for you math/unit conversion nerds out there)
2 Pickled Jalapeños 
3 tsp Baking Powder
1/2 tsp Baking Soda
An average adult human's pinch of Salt

So the first thing you're going to want to do, after having bought the rest of your ingredients out of the backs of whatever vans are available in your neighborhood, is to have a long family history of biscuit-making to rely on. If, like me, the closest your family ever came to biscuits was to have had a conversation with someone from Alabama or Georgia (The longest conversation on record in Georgia and Alabama without somebody mentioning biscuits in some way was 5 minutes and 47 seconds, at a funeral in 1937), you may have to fake it a little bit. In any event, take your flour and whisk in your baking powder, baking soda, and salt. Then take your jalapeños and chop them down to size. You're looking for a pretty fine cut on these. You want them to flavor the biscuits throughout, but you're not looking for people to be biting in to giant chunks of jalapeño. That's how friendships are ruined. Take your butter, grate it in to your flour, and work it in until it forms in to little pea-sized globules. It's important that your butter doesn't melt if you want light flaky biscuits instead of dense lumps of sadness. If, like me, you've been cursed with absurdly warm hands, don't be afraid to take a break and stick your flour and butter in the freezer to cool off.

Yes, I made these today. And no, there aren't any left
Once you've got your buttery flour globules all set, add in your cheese, jalapeños, and buttermilk, and very gently stir to combine. You don't want to overwork your dough, or else you'll form a bunch of gluten, melt your butter, and end up sad and alone at the company picnic like last year (for the sake of this example I'm assuming you don't live in the midwest, where picnicking would be a challenge since its still snowing despite technically being mid-April). If you have things like a traditional biscuit cutter and a biscuit pan that your family has passed down since they were originally forged on the Mayflower, good for you. I don't have any of those things, except for the unwarranted sense of puritanical entitlement, so I'm making drop biscuits, so named because you just splorp a spoon in to your dough and drop it on to your pan. Do your best to get your biscuits close together and equally sized. If you're smarter than I was you'll push down lightly with your thumb in the middle of each biscuit so that they rise evenly and you don't end up with a dome on top of each one. Either way, shove those suckers in to a 450 degree oven for about 15 minutes, then take them out and try not to burn your hands and mouth when you refuse to wait for them to cool down and shove them in to your face. You can totally add some butter on top if you can find any before your friends and family (or you. Just you) devours them all. Enjoy!

January 30, 2018

Quinoa salad

Yes, this is typically how we experience healthy food. This
time will be different
Last week I decided to actually splurge and buy meat as a reward to myself for not dying or punching somebody during a period of insane overwork. Fortunately that overwork has been done with for almost a week, which I've spent celebrating my freedom. A week or so of celebration will take it out of you though, and you get to thinking that it might be a good idea to take it easy, release any hostages you may-or-may-not have taken, and put something healthy-ish in your body. Sure, quinoa may sound scary, and it may take an inordinate amount of effort to make it not taste like rain gutters, but if you put in that effort you can totally lord how healthy you're being over your friends and neighbors.

Ingredients:
1 Cup of Water
1 Cup of Quinoa
1 Yellow Pepper
1 Carrot
1/2 a Red Onion
1/4 Cup Dried Cranberries
4 tsp Olive Oil
1 TBSP Balsamic Vinegar
1 TBSP Raspberry Preserves
1/8 tsp Black Pepper
Salt

The first thing you're going to need to do is wash off your quinoa. Leading food-science experts agree that this will appease the tiny demons living in your food and ensure that your quinoa is flavorful and fluffy. Then toss it in your water along with 1 tsp of olive oil, one average-sized human's pinch of salt, and your black pepper. Bring that whole mess up to a boil, then cover it and reduce the heat down to low for about 12 minutes, or until the liquid is all absorbed. And yes, this is exactly the same way I'd make white rice because, at the risk of asserting my moral superiority over you, I don't see quinoa's differences. I just treat it like everybody else. Anyhow, while your quinoa is cooking, it's time for you to get a-chopping. Chop up your pepper and red onion into reasonably bite-sized chunks, and go ahead and peel your carrot before you shred it to smithereens. Which of course means that it's time to re-introduce our favorite kitchen gadget that hasn't yet succeeded in killing us (Only maimings so far!), the box grater! Fortunately for those of us in favor of keeping our blood on our insides, I've managed to outsmart the grater this time. If you've got the financial capital, buy yourself two carrots instead of one. Then just shred half of each one, keeping your hands and delicious blood out of reach of the grater. And sure, this may cause an unfortunate amount of food waste, but that's the price of holding on to your blood. Also, you could just eat the extra carrot hunks.

I can feel my mouth watering and my liver healing itself
just by looking at that.
Take a bowl and mix together the rest of your oil, your vinegar, and your raspberry preserves, along with another average pinch of salt. Then get ready for some mildly unsettling noises, because it's time to splorp everything together into one large bowl. So combine your veg, dried cranberries, dressing, and quinoa, and stir until the whole deal looks homogenous. You can technically consume this immediately (Well, I mean technically you could have eaten it without cooking the quinoa. It wouldn't have been a good idea, but you still could have done it), but it will taste even better if you let it sit covered in the fridge for an hour. In any event, it'll taste delicious, be slightly healthier than the diet of pizza and whiskey you may have been living on lately, and will maybe keep you alive for a week or so longer so you can enjoy more pizza and whiskey. Hypothetically. Happy quinoa!


January 18, 2018

Crockpot Baked Potatoes

Look at them, all snug and cozy. They don't even know they're
about to get cooked to death for 9 hours.
Since the dawn of time, mankind has struggled with one thing above all else. But there's nothing I can do to help you with your taxes, so we're gonna talk about potatoes instead. Baked potatoes are absolutely delicious, a truth which few people ever get to know because they (the potatoes) take approximately a lifetime to cook, and by that time you've got better things to worry about than potatoes. Thing like trying to get the neighborhood kids to have less fun, and eating dinner at 4 PM. Fortunately, with the advent of crockpot technology, you can just leave your potatoes cooking in a corner somewhere, forget about them, accidentally trip over your crockpot, and just when you get super angry at a cruel universe that you never asked to be a part of in the first place, get rewarded with a trove of delicious potatoes spilling out like buried pirate treasure.

Ingredients

5-8 Russet Potatoes (I don't care what the mainstream media tells you, russet potatoes are the ideal potatoes for baked potatoes. Depending on their size and the size of your crockpot, you'll be using more or less of them)
Oil
Salt
Garlic Butter (You can make this by sautéing garlic in some butter, then letting it cool. If that's too much effort for you, you can totally just use regular butter. Just know that we're all judging you.)
Sour Cream
Chives
Aluminum Foil

The first thing you're gonna need to do, according to several experts who are my mother, is carefully wash and scrub your potatoes forever. She has a thing about dirt. You can often find her saying things like "Potatoes grow in the ground...the ground is full of dirt" to no one in particular. She's technically right, but I still feel that rinsing off your potatoes and removing any obvious dirt clumps is more than enough effort to put in. In any case, once your potatoes are sufficiently clean, it's time to rub them down with some oil. Any cooking oil will do, though I prefer Olive Oil for several culinary reasons including the fact that I had some lying around. Take your oily potatoes and rub them down with salt. This is an important step because potatoes and salt are like a desert and water. No matter how much salt you add, there never seems to be any around. But if you add even a drop too much, you've got a flood plain on your hand. Take your salty oily potatoes and individually wrap them in aluminum foil. Toss them in your crockpot and wait.

No matter what Pinterest and Food Network tell you, baked
potatoes are supposed to be rustic and hearty, not dainty and
fancy. Also, I wasn't lying about having work in 5 minutes
I should have clarified. Turn your crockpot on, to low specifically, and then wait. Or sleep, or whatever, because even with our advanced foil and crockpot technology, this is still gonna take about 9 hours to cook. So maybe do this overnight, or before you marathon an epic movie trilogy. In any case, once your time is up open up your crockpot, unwrap your potatoes, then split them open and add toppings. I went with garlic butter, sour cream, and chives. You're welcome to go with something completely different and probably inferior, because these are your potatoes and you can bend them to your will probably. If you want to put more effort in, you can top them with sautéed vegetables and cheese, and then throw them in the oven until the cheese is browned. That'll totally be delicious, but also kind of takes away from the point of making these things in a crockpot to begin with. But maybe you enjoy contradiction. Maybe you're a riddle, wrapped in an enigma, wrapped in a vest. Maybe I'm going to go eat some potatoes in the 5 minutes I have before work. See you next week!

January 2, 2018

Smoked Fish Salad

Just like a narcissistic hoarder mermaid, we're gonna betray
this little guy. Fortunately, he'll taste delicious.
Well, it's a new year out there. From what I've seen so far it's mostly like the old year, but you can never be too sure. I'm only like halfway through testing out laws of physics, so there could be some fun new surprises in 2018. But I digress. Like I said, it's a new year, so I figured that it's a good time to make some old-world food that somehow stood the test of time. Specifically, I'm making a smoked whitefish salad, which is an absurdly tasty thing to eat with bread, crackers, or vegetables, plus is full of protein so it'll help you survive the harsh winter you'd experience in a frozen wasteland like Siberia or Chicago. You can technically still buy this stuff nowadays in delis and whatnot, but it's usually full of sugar. Which normally I don't have a problem with, but we're talking fish and (apparently) that's where I draw the line.

Ingredients:

1 lb. Whole Smoked Fish (I bought smoked chubs, because that's the flavor I grew up with. You've got some leeway here, but stick in that general vicinity. Pretty much any fish you could reasonably expect to catch on a midwestern fishing trip.)
2 Ribs of Celery
3 TBSP Mayonnaise
2 TBSP Sour Cream
1.5 TBSP Fresh Dill
1 TBSP Prepared Horseradish (It's important to help your horseradish prepare for what's coming next)
1 tsp Worcestershire Sauce
Juice from 1/2 a Lemon
Salt 
Black Pepper
Chives

The first thing you're gonna need to do is remove the meat from your fish. Ideally you should have started this some time back in 2017, because it'll take a while. It's not that it's particularly hard to get at the meat. It's that there are, at a conservative estimate, 37,000 tiny little bones that are going to try and come along for the ride. There aren't any good ways to help with this, but there are a couple of methods to try and help minimize the horror. One option is to kind of flake the fish off of the bones with a couple of forks. Prayer and shouting angrily are other, equally effective methods. Long story short, even after you carefully remove the fish from the bones, you're probably going to want to go over them between one and seven times, just to double (septuple) check that you're completely bone free. The bad news is that if you were to look at a clock you'd note that this entire process has taken forever. The good news is that it's pretty much antarctica outside, so where else did you have to be exactly?

This fish smoked 3 packs a day for the sake of flavor.
Let's not let that sacrifice be in vain. 
Once your fish is boneless, lightly mash it into chunks with a fork or other implement of culinary destruction. Then choppity chop up your celery in to tiny bits and toss it in there along with your chopped dill, your mayo, sour cream, horseradish, worcestershire sauce, and lemon juice. Mix the whole thing into a homogenous fish glop, and salt and pepper it to taste. Cover it up and toss it in your fridge for at least a couple hours so that all of the flavors get to know each other. This is important. Flavors that don't know each other, who awkwardly stand at either end of the dance floor staring at the ground can ruin an otherwise awesome dish. When you're serving this (by which I mean eating it on the couch while watching Netflix), take it out of the fridge, top it off with some fresh chopped chives, and slather it up on anything you've got lying around. Crackers, cucumbers, the flesh of those too weak to make it through the winter. This will make anything taste smoky, and salty, and awesome. So enjoy the winter! There's only like 3 and a half months left.


November 21, 2017

Stuffing Muffins

It doesn't matter if you know the muffin man. It matters
that he knows himself.
Thanksgiving times are upon us, which means that it's time to break out the most treasured of all holiday traditions: lying to each other about how good the food is. Because let's be honest here. A lot of classic Thanksgiving food is somewhere between unimpressive and super gross. You've got marshmallows melted on to overcooked yams, green bean casserole that pretty much comes out of a can, and usually some stuffing that amounts to dried out crusty bits of bread loosely held together by a mass of onions and disappointment. Which is a shame, because it really isn't that hard to make some delicious stuffing. And I should know, because I made some this morning. The whole process took about 45 minutes from start to finish, and at no point did I feel like my mouth had turned into a desert fortress from which escape is impossible, which isn't always the case with stuffing. Making it into individual muffins is a fun twist that makes everything self-contained and helps ensure that everybody actually gets some. Also it'll help you deceive your friends and family into thinking that you're creative and whimsical.

Ingredients:

Approx. 8 Cups of Bread (You've got some decent leeway here. Use something hearty, but really whatever bread makes you happy. Tear it into chunks, throw 8 cups of them in there, and be merry)
2 Eggs 
4 Crimini Mushrooms
3 ribs Celery
1 standard-issue Onion
1.5 TBSP chopped Parsley
2 tsp rubbed Sage
1 tsp dried Thyme
1/4 tsp Black Pepper
Salt 
Oil
Water

The first thing you're gonna need to do is learn to ignore people. Because undoubtedly there are already people constructing angrily worded letters about how stuffing is only "real" if it's stuffed into a turkey, and that otherwise you should call it "dressing." It's easy to get angry or annoyed with these people, but remember that they serve an important role in the evolution of our species. Without having obviously terrible people to be a focus for our communal rage and disgust, those feelings would fester and eventually turn into something negative, like dysentery or a world war. Once you've blocked out the voices, it's time to grab your bread. A lot of stuffing recipes start off by having you toast the bread to dry it out. We're not doing that. We're doing the opposite of that. Moisten your bread with a little bit of water until it starts sticking together just a little bit, and set it aside. You don't want it to be soaked and gloppy, so be careful with it.

Just look at those things. I can practically hear a drunk uncle
ruining a pleasant family moment already.
Now dice your onion and sauté it over medium heat along with an average sized human's pinch of salt. Let it cook down for about a minute. You can use that minute to chop up your celery, because now it's time to add it in with the onions and cook them for another 2-3 minutes. Then choppity chop up your mushrooms and add them in along with your thyme, black pepper, and another pinch of salt. It should take about 2 minutes for some of the moisture to cook out of the mushrooms and for the whole thing to start smelling crazy good. Take your vegetable mixture and stir it into your bread along with your parsley, eggs, and one final pinch of salt. Buy or steal a standard muffin pan and grease up the cups before filling them with your bread and vegetable mixture. Pack it in there and try to overstuff them a little bit if you can (you can). Throw those suckers into a 375 degree oven and let them cook for 15-20 minutes, until they start to get a little crispy on top and your entire home smells like condensed holiday awesomeness. Then take them out of the oven, take them out of the pan, and serve them. Or make them ahead of time in which case wait until your actual meal, heat them up, and then serve them. Bonus points if you don't make up an obnoxious cutesy name for them like "stuffins." Happy holidays!

November 14, 2017

Rosemary Roasted Potatoes

Rosemary, taking a selfie with some potatoes
So it's official. It's getting dark early, the air is getting colder, and people have begun to talk about "the holiday season." It's truly the end of times. All that we can do now is wait it out until the sun stops ignoring us and starts being cool again. You know, for about a week until the unbearable heat and humidity of summer. But that's a problem for future us, and those jerks probably have it coming, so let's focus on what's important: making a good all-purpose side dish that's tasty and hearty enough to satisfy us while we're huddling for protection from the cold and darkness outside. Which means delicious potatoes, at least to me. A lot of historians believe that if this technology had fallen into the hands of Ivan The Terrible, we'd all be speaking Russian right now. Or whatever proto-Russian they spoke back in the 16th century. So use with caution.

Ingredients:

2 lb. Potatoes (I don't know if you've noticed, but there are a lot of different kinds of potatoes, with more mutant varieties popping up in stores every week. Potato farmers need to just stop and get a life. Anyhow, any potato with a thin skin like red or white potatoes should be fine)
4 Cloves Garlic
3 TBSP Olive Oil
1.5 TBSP Chopped Rosemary (Don't buy chopped Rosemary. That's not even a thing. Buy Rosemary, chop it, and once it's chopped measure out one and a half tablespoons)
1/4 tsp Black Pepper
Salt

So full disclosure: this recipe is going to take almost an hour and a half to make from start to finish. If you don't have that kind of time, just get a store-bought can of potatoes and eat them cold while thinking about how incredibly important the things you've chosen to spend your time on are. Everybody else is gonna start by choppity-chop-chopping their garlic and rosemary down to size, which seriously represents like 50% of the work involved in this recipe. Throw your tiny bits of garlic and rosemary into a ziploc bag (Sorry, I forgot to act like Chopped and pretend that brand-names don't exist. Put them into a resealable zip-top storage bag) along with your oil, pepper, and salt. How much salt? Well, potatoes tend to need a lot of salt to taste like anything at all, so don't be stingy. I'd say throw in two large person's pinches of salt. For the frantic measurers out there, about 1.5 teaspoons. Chop your potatoes into wedges (Pro-tip: if they're all about the same size, they'll all cook in the same amount of time. If they're not, your life will be full of regret and sadness), and throw them in there as well.

If you're snowed in, just make these potatoes. Neighbors will
smell them, and dig through the snow to get to deliciousness.
Tradition says that you mix all these things together in a bowl, not a bag. But one of the oldest traditions is to not eat if your food can outrun you, so maybe let's use our brains instead of blindly following what people tell us to do. Seal up your bag and shake around the contents until everything's mixed together and the potatoes are thoroughly coated. Then spread them out onto a sheet pan in as close to a single layer as you can manage, and throw that sucker in a 400 degree oven for about an hour. Check on your potatoes every 20 minutes or so to stir, mix, and otherwise wangjangle them, which will help them brown evenly. Once they start looking crisp and golden and just kind of awesome, take them out. Serve them immediately, by which I mean eat them in your home while taunting the wild bears that are now roaming through your snow-encrusted neighborhood. Good luck out there, and remember that in no way by suggesting that you taunt bears am I trying to ensure that there are more scarce resources left for me. See you next week, possibly!

Artist's Rendition: January

September 13, 2017

Egg Salad

All of my bowls are garbage, so you can thank my parents for
the blue part around the egg salad.
I've seen a lot of people posting articles and recipes lately about how the summer isn't over yet. The main point of these seems to be that it's not too late to capture the spirit of the summer and have a great time, and you should totally make watermelon slushies while you still can, and also while you're at it click on some links and buy stuff. I don't know what these people are talking about, because nothing is more summery than going to a picnic or outdoor even of some kind, looking at the egg salad and doing some very frantic math about things like how hot it is outside and how long the food has probably been sitting out of the fridge. There's a reason for this. It's because egg salad is awesome. Or at least it can be. Think about it: if there was a pile of old gummy bears slathered in grape jelly and mayonnaise sitting out there you wouldn't think twice about just moving on to the pesto pasta salad and calling it a day. But egg salad we linger over, because it has the potential for greatness. The fact that it costs like 5 dollars to make a tub of it doesn't hurt either.

Ingredients:

1 dozen Eggs (Preferably chicken eggs. Definitely not fish eggs)
1/2 a Red Onion
1/3 cup Mayonnaise
1 TBSP Dijon Mustard
Salt 
Black Pepper

So straight off we're going to need to boil our eggs. Overcooked eggs end up with hard and discolored yolks which bring shame upon your dojo, and it can be a fine balance cooking them just enough. If only there was someone who had posted egg-based recipes before that you could read and learn from (For those of you too proud or lazy to follow the link, bring them to a boil then turn off the heat and leave them in the water for about 14 minutes. You want more details, hilarity, and also a recipe for deviled eggs? Then follow the stupid link). Once your eggs are cooked and cooled down to a reasonable temperature, it's time to get peeling. Peeling eggs is an art-form inasmuch as it's confusing, frustrating, and everybody who claims to truly understand it is clearly using cocaine. Allegedly, if your eggs are older then the membrane between the shell and the egg becomes more detached, making peeling easier. But, if like me you don't have the time to be lovingly aging your eggs before use, you're just going to have to power through it, and probably yell and cry a lot in the process. Once you've recovered from this process (Physically, that is. The emotional scars will last a good long while) it's time to slice your eggs. And sure, you can get all hipstery and have your eggs "artisanally sliced according to ancient methods," which we all know just means badly cutting your eggs with a knife. Or you can use egg slicers. You know, those cheap and useful things that have been around for decades that make this process take like 2 minutes instead of 20. Slice your eggs, then turn them 90 degrees and slice them again. 
The sandwich jauntily displays itself on a diagonal
cross-section to try and attract a mate.

Now that your eggs are finally finished, all that's left is to choppity chop your onion into tiny bits, then splorp in your mayo and mustard along with an average sized human's pinch worth of salt and pepper, and stir that sucker. Gently. Because the idea is to have a light and fluffy finished product where you can distinguish between egg whites and yolks, not dense and homogenous egg goop. So gently stir until everything is combined, and you're technically done. For a little added color and flavor you can dust the top with some smoked paprika, but that part's totally optional (as opposed to all the other parts of this recipe which are mandatory, and I can totally verify whether you've done or not). Now go ahead and serve that delicious nonsense up plain, or slather it on to a sandwich, or do whatever other weird things you normally do with egg salad. Although personally I think that it tastes better after having a couple hours in the fridge to relax. But what do I know? I don't even artisanally slice my eggs according to ancient methods.


August 30, 2017

Empanadas

My level of preparedness here is shockingly out of character
Mankind has, throughout its storied history of expelling gasses with varied effects on the immediate environment, struggled with one all-important goal. Delicious food that you can carry with you and eat on the go without getting your hands full of crap. Many different solutions to this eternal search have been tried. Burgers are too messy. Burritos had promise, but towards the end they can be even worse than burgers. Moms across the world put in a bid for fresh fruit, but most fruit leaves you carrying some form of garbage with you afterwards until you can find the nearest trash can (a problem made even more severe by the fact that throughout most of human history the trash can hadn't been invented yet). Fortunately, the great minds of a generation got together and decided it was a good idea to just stuff delicious meats and vegetables and whatnot inside some flaky pie dough and call it a day. It's in their crumb-littered footsteps that we follow.

Ingredients:

3 Cups All-Purpose Flour
6 oz. Vegetable Shortening
1 Egg
Roughly 1/3 a Cup of Water
1 lb. Ground Beef
1 Green Pepper
1 Red Pepper
1 standard-issue Onion
4 oz. Crimini Mushrooms
4 Cloves Garlic
1 Cup Vegetable Stock (Sure, you could use store-bought stock that tastes like nothing. Or you can make an entire pot of vegetable stock even though you only need a cup of it, and freeze the rest. You know, like a winner)
1 TBSP Balsamic Vinegar
1 TBSP Ground Cumin
2 tsp Dried Oregano
1.5 tsp Smoked Paprika
1/4 tsp Cayenne Pepper
Vegetable Oil
Salt

Yes, that's a lot of ingredients. I know that I usually try and make recipes without long and daunting lists of things you need to buy and/or prepare, and that the sight of this may be a bit of a shock to some of you. I can offer you this solemn advice, given to me by my grade school administrator in the aftermath of the debacle that ensued when a teacher tried to physically restrain me from getting an inhaler when I was having an asthma attack in class:

Get over it

And sure, from the mouth of that administrator it may have been criminally negligent, but here it's pretty appropriate. You're making two things, a dough and a filling. It's not like I'm asking you to make a dipping sauce, a side salad, and a vegetable puree to go with it. Now that I've sufficiently asserted my dominance, let's get started. Use a whisk or a fork to mix your flour and a large human's pinch of salt. Add in your vegetable shortening and mix it together with your hands, kind of squishing it as you go, until all the flour is incorporated, and everything is crumbly bits. Kind of like food sand. Mix in your egg and then stir in water slowly until a loose dough forms. Cover your dough with plastic wrap, and throw it in the fridge for 1/2 an hour. After 15 minutes it's traditional to suddenly remember that you forgot to add in an egg and then frantically grab the dough out of the fridge and add it in, hoping that it won't make too much of a difference. But that part is optional.

Told you. Whole damn pot of vegetable stock.
While your dough is relaxing in its chilled isolation chamber, start working on your filling. Start by chopping your onion, peppers, mushrooms, and garlic into tiny little bits. Remember, this is all going inside a handheld pastry, so you don't exactly want giant bits of anything making it hard to eat. Get a pan good and hot, then coat it in oil and throw in your ground beef (Being more Jewish than most people in the world, I use kosher meat, which already has a fair amount of salt in it. If you don't, because you're...you know...normal, add in a pinch of salt).  Brown it as best as you can, and remove it from the pan, preferably with a spoon or other hand-tool, but if need be with your bare hands. You know, like a man. Then add in your onions along with a pinch of salt. Cook the onions until they just start to get some color and then add in your mushrooms, peppers, and garlic, along with another pinch of salt. Cook everything down until the peppers start to soften and the mushrooms shrink down to the point that you wonder if you forgot to add them in the first place, but you check your fridge and there are definitely no mushrooms there so you start to wonder if the entire memory of buying mushrooms was a false memory your brain provided to cover up some trauma. Then add in your vegetable stock, vinegar, cumin, oregano, paprika and cayenne, stir that mess together, making sure to scrape up any brown crusty bits from the bottom of the pan to join the party, and keep cooking it until your meat mixture is nice and saucy, but when you take out a spoonful no liquid runs in to fill the gap. Turn off your fire, and let that whole mixture cool down to room temperature.

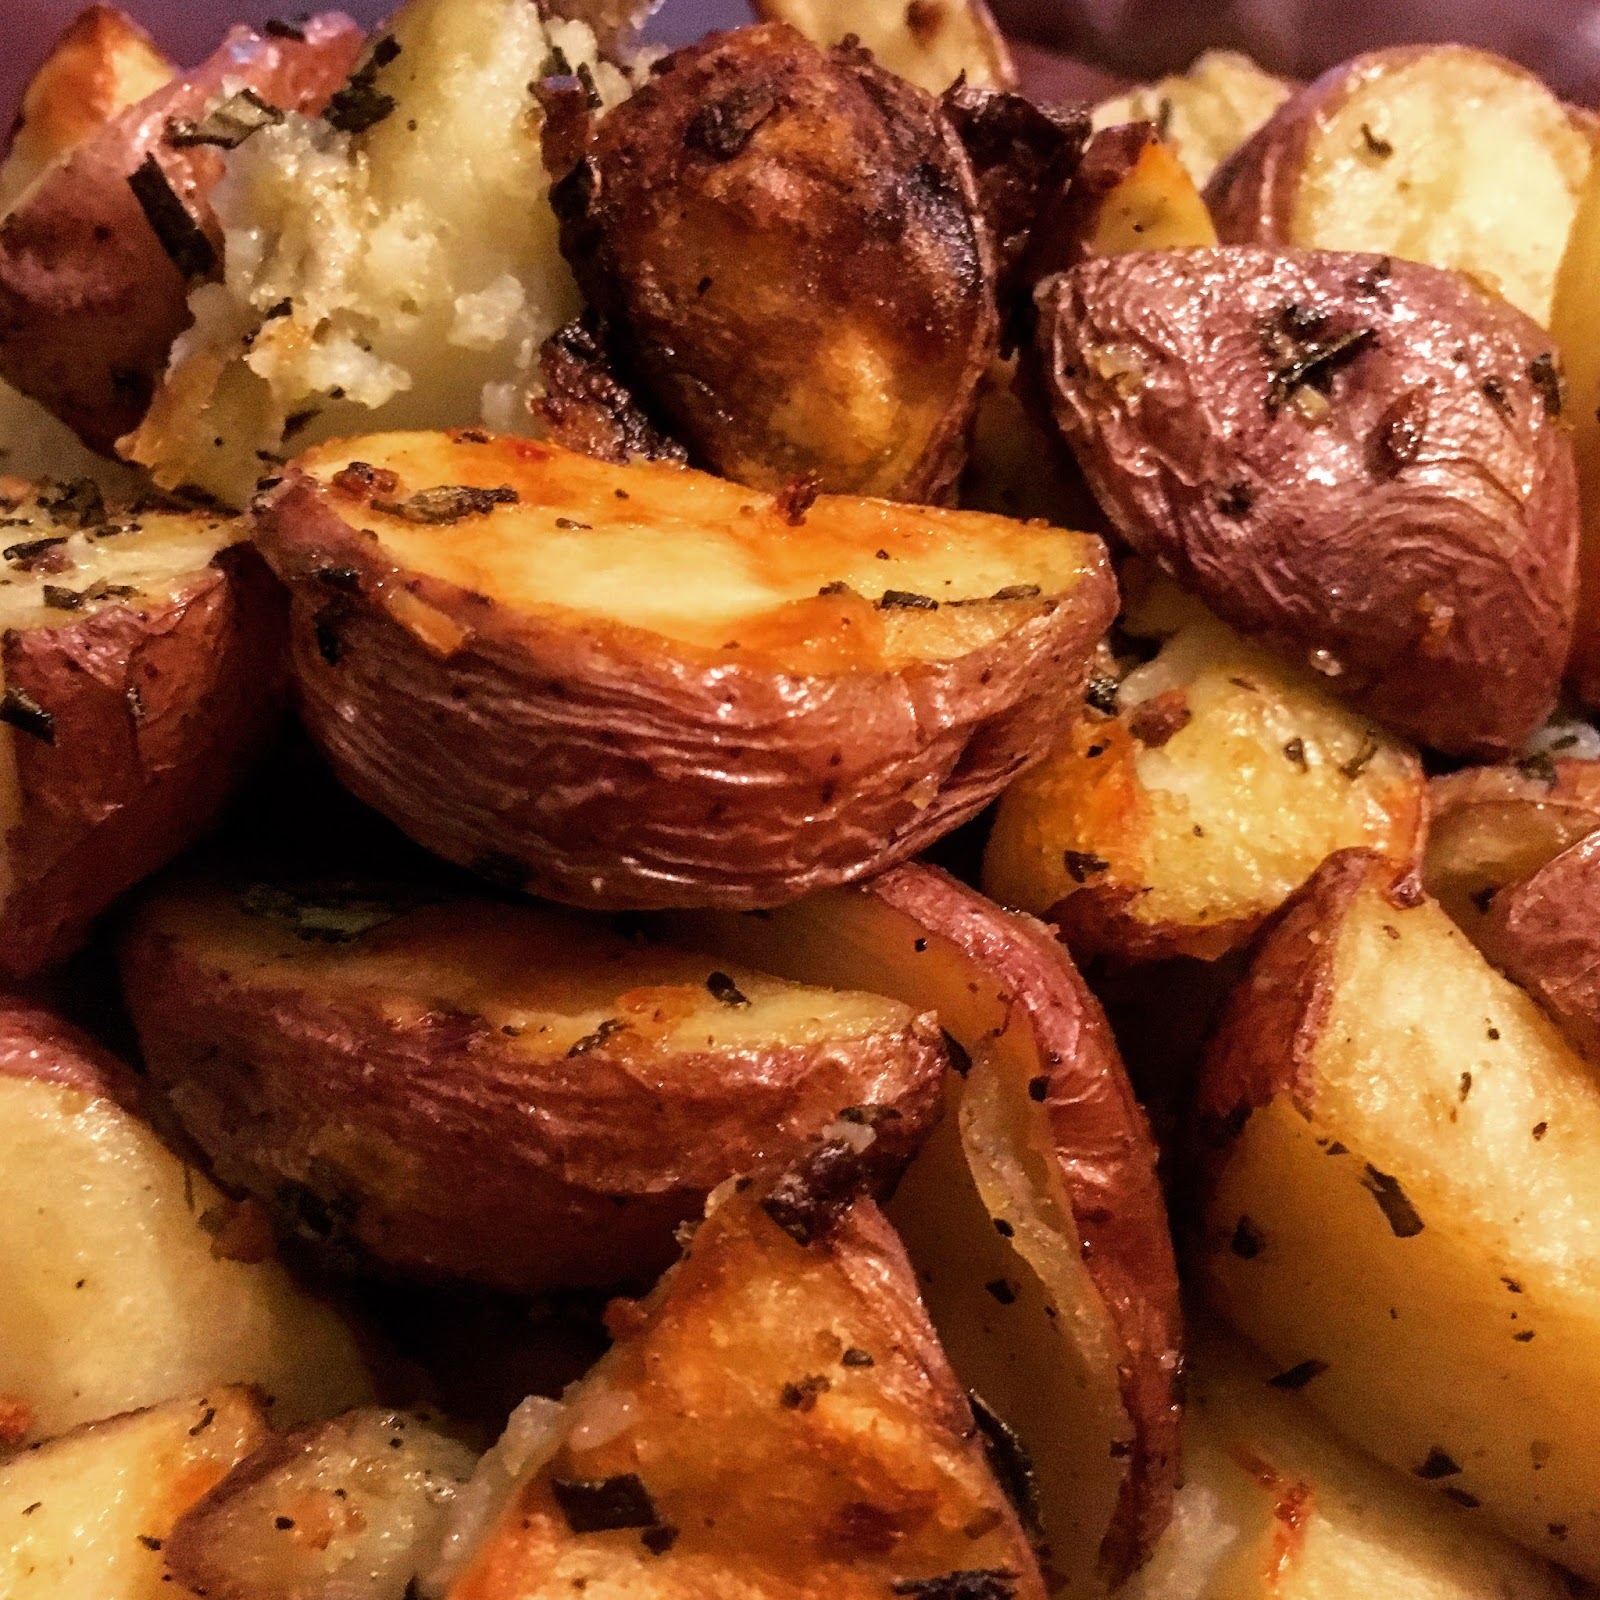
The hardest part of this recipe was not eating these long
enough to get a decent picture. 
 Now it's time for the fun part, and by "fun" I mean "mind-shatteringly frustrating." Roll out your dough until it's about 1/8 of an inch thick. It should be thin and easy to work with, but still sturdy. Cut out rounds using a cookie cutter, a drinking glass, or the perfectly round hole in your soul, and start stuffing them with your meat mixture. Add in too little and you'll end up just eating dough, but add into much and they'll break and explode everywhere, and all of your friends will laugh at you. Have fun! Basically, you want to dollop some of your mix into your dough disc, and then bend one end over to form a kind of dumpling with a meat pocket inside. Press down along the edge with a fork to seal it (Fun fact: pressing on it with a fork is also how the US government seals many things, most notably foreign trade agreement), and repeat until you run out of dough, run out of innards, or give up in a cloud of rage and inadequacy. In any case, grease a baking pan and throw your empanadas into a 350 degree oven for about 30 minutes, or until they start getting golden brown and look incredible. Then just wait for them to cool, give up, eat them, and burn your mouth. Totally worth it.


June 21, 2017

Jalapeño Cornbread

We're gathered here today to mourn our dear friend Eggs...
In the hallowed halls of "foods that disappoint me," cornbread has got to rank pretty high up there. And don't get me wrong, that doesn't mean that I don't like cornbread. It's just that I (and, I assume, everybody) have memories of tasting delicious cornbread, that's light but somehow crumbly at the same time, but doesn't fall apart. This is the cornbread of my idealized youth. And I constantly try to find it. I will pretty much always get cornbread if I see it on a menu, or at a barbecue, or lying unattended in a parking lot, or whatever. And it always disappoints. I pretty much have the same relationship with cornbread that some people have with heroin. So in the spirit of not being perpetually disappointed, and of not ending up an empty[er] shell of a man, I decided to make my own. And in the spirit of lifting heavy things, I decided to make it in my cast-iron skillet. Which (spoiler alert!) turned out to be a pretty good call.

Ingredients:

1.25 cups Cornmeal
3/4 cup All-Purpose Flour (Pro-tip: Don't put the "all-purpose" label to the test. It's pretty much just for cooking and for making paper mache dinosaurs)
2 Eggs
1.5 cups Coconut Milk
1/3 Cup Honey
1 TBSP Lemon Juice
1 TBSP Pickled Jalapenos (Available in pretty much every supermarket. If you can't find em, any canned chiles will do)
1 tsp Baking Powder
1 tsp Baking Soda
1.25 tsp Salt

So, let's address the elephant in the room first. Yes, this recipe has no meat or dairy of any kind in it. Some might even call it vegetarian and/or dairy-free. In my defense, I know a decently large number of vegetarians, and they've gotta eat too. Also, I may have not wanted to go shopping. The point is, this is delicious and you need to stop being so judgmental if you every want to find love. Step one is taking your dry-goods, also known as your cornmeal, flour, salt, baking powder, and baking soda, and whisking them together so that they can get to know each other, share some good times, and try to forget that they're going to get baked in an oven until they're golden and delicious. About a minute seems like long enough. What does flour really have to add to a conversation anyway? Now it's time to deal with your jalapenos. If you have a reasonable can from a reasonable brand, they should already be chopped into little bits. If, like me, you have nonsense jalapenos, you may have to chop them down to size on your own. So...get on that.

Slice it like a pie, cut it into squares, or just eat it like a
giant pancake. There's no wrong way to devour this sucker.
Once your (my) jalapenos are chopped, It's time to get cracking with your eggs (puns!). Whisk them into a homogenous egg-goop, and then add in your honey. The coconut milk and lemon juice together do a fair job of simulating buttermilk. Do you technically need to mix them together before you add them in? Probably not. But baking is a lot like witchcraft (Weird big hats, precise measurements of odd ingredients, used to trick people into loving you, the list goes on), so I didn't take the risk. In any event, add them into your egg-goop along with your jalapenos, and mix it together. Next, pour your wet ingredients on top of your dry ingredients, and mix them together briefly. You don't want to overmix. This is technically known as the "muffin method." Personally, I'm not sure that "add the wet stuff on to the dry stuff and don't mix it too much" actually needs a special name, but who am I to argue with nonsense? Anyhow, throw a little oil in your cast-iron skillet, and heat it up in a 400 degree oven for a minute or two. Then take it out, preferably without burning the crap out of your hand, add your definitely-not-muffin-mix into the hot pan. Then toss that sucker back in the oven for about 20 minutes. When it's done, it'll be crispy and golden on the top, and set in the middle. Then take that sucker out and do your best not to eat the entire thing yourself without sharing any with the vegetarian friends you mentioned earlier in your blog post. You know, hypothetically.


June 7, 2017

Sweet And Spicy Baked Beans

Yadda yadda moved cross-country, globe-trotted, got a new
job, had it catch up to me. The point is, I'm back now. You
can tell from how you're actively reading my words right now.
So Summer came early. You can tell from the sweltering heat, rampant humidity, and annoying people with giant floppy hats. If your hat is large enough to cast shade upon an entire family of woodland creatures, I probably have no interest in talking to you. The point is, it's hot outside. And when it's hot outside, humans tend to throw barbecues so that we can eat our food out in all of that heat. Instead of inside, where we have things like air conditioning, and a somewhat less-dense mosquito population. Leading brand-name scientists believe that this is part of an important evolutionary trend known as "doing stupid things because they're expected of you." It weeds out the independent thinkers and radicals from our population so that they can go on to do the truly important work of furthering humanity's intake of McNuggets. Whatever the reasons, the fact remains that you're going to get invited to barbecues, you're going to be expected to bring a side dish, and people will have already called dibs on bringing easy/obvious things like chips or potato salad. Welcome to baked bean country.

Ingredients:

1 lb. dried Pinto Beans 
28 oz. can of Crushed Tomatoes
1 largish Onion 
2 cloves Garlic
1/2 cup Dark Brown Sugar
1 TBSP Dijon Mustard
2 tsp Apple Cider Vinegar
2 tsp Worcestershire Sauce
2 tsp Rubbed Sage (Despite how it sounds, this is a real thing. You can buy it in supermarkets.)
1 tsp dried Thyme
1/2 tsp Red Pepper Flakes
1 Chipotle Pepper
Olive Oil, for the sautéing and whatnot
An unspecified amount of Salt
An equally unspecified amount of Water

So....that's a lot of ingredients. Some people might look at a long list of ingredients and become disheartened, thinking that the recipe is going to be incredibly labor-intensive and tricky to pull off. Others might see it as a challenge they can rise to, to really prove to themselves that they can accomplish whatever they set their minds to. Still others might think, "it's beans. How hard can it actually be?" These are the smart ones. Step one is to unceremoniously dump your beans into a large pot, which you'll then fill with water. Cover the pot, and let your beans soak for about 8-12 hours. While you totally have the option of using this time to sleep, or go to work, if you hover nearby your beans the entire time, eschewing responsibilities, common sense, and basic hygiene, you'll receive valuable bonus points that can later be exchanged for fantastic prizes (Prizes like eviction notices, cardboard box forts, and hepatitis). Once your beans have finished their soak, drain the water away, and replace it with exciting new water, to confuse and disorient your beans. Now it's time to strike. Turn the heat on to medium, and boil the crap out of your beans for an hour. Put a lid on the pot so that none escape.

I had something for this, but then I saw the deliciousness
and kind of lost my train of thought. 
While your beans are being viciously boiled, it's time to make the...everything else, I guess. Choppity chop up your onion and sauté it in your oil along with an average sized human's pinch of salt. Let it cook down until the onion gets translucent and starts to smell awesome. Then mince your garlic and add it in to the party. After a minute of stirring and salivating from the smell, add in your...all the other ingredients. I mean, chop up your chipotle pepper before you dump it in. But really, just toss everything in the pot along with a largish person's (Roughly Conan O'Brien sized) pinch of salt, and let it cook down for about 10 minutes. By now your beans should be killed to death, so take their corpses along with 1/2 a cup of the water you boiled them in, and dump them in to your sauce. Set it on medium heat and cook it for 10-20 minutes, or until it starts to look thick and kind of sticky. And delicious and whatnot. And that's it! Delicious baked beans, perfect to accompany any meal, indoors or stupid. Happy early summer!


February 23, 2017

Salmon Patties

The best salmon has a mermaid on it. Remember that, as
you're lured to your watery demise.  
They say when life gives you lemons, you should make lemonade. Unless you're allergic to citrus, in which case when life gives you lemons you swell up and die. The point is, we all have to make do with some unfortunate circumstances. For some of us, that may be an embarrassing medical condition, or a weird laugh, or maybe having to stay at work until after midnight because other people screwed up, and the people who should be saddled with responsibility dumped it on you, even though they sure as crap aren't going to pay you any more for doing their stupid jobs for them. You know, hypothetically. The point is, when you get home from your day of being embarrassed, laughing weirdly, or being stuck doing somebody else's job for them, you want to just sit down and do nothing. But you're stir crazy because your brain is working out ways to untraceably burn down your stupid workplace. So you need something to occupy your time and mouth. Something easy, delicious, and made from ingredients that are close at hand. Bonus points if it's something you grew up eating, so it soothes your soul and keeps your dumb workplace unburnt for another day.

Ingreidients:

10 oz. Canned Salmon (You can totally get those cans of salmon with the skin and bone bits still in it so you need to do extra gross work. Or you can, you know....not.)
1/2 a Standard-issue Onion
1/3 Cup Seasoned Bread Crumbs
2 Eggs
1/2 tsp Dijon Mustard
1/4 tsp Black Pepper
1 average-sized human's pinch of Salt
Butter

The first thing you're gonna need to do is somehow will yourself off of your couch and into your kitchen. Allow 20-30 minutes for the standard hemming and hawing about whether you're actually hungry (even though you haven't eaten all day), and whether it's a better idea to just go to Dunkin' Donuts (it isn't). Once you're in the kitchen, drain your salmon and melodramatically throw it in a bowl, even though you're home alone and nobody can see you. Take a grade-3 mashing fork, and mash it into bits. Next, choppity chop your onion down to size, and then throw it in the bowl along with your bread crumbs, eggs, pepper, mustard, and salt. Stir that nonsense together until you've got a relatively homogenous salmon-goop, which makes you really start to question whether you were actually hungry after all. Take a pan and melt some butter in it over medium heat.

Sure, you could use some garlic mayo, or ketchup, or...a
fork. Or you could just gobble them down without
pausing to chew. You know, like a duck.
Now comes the fun part, and by "fun" I mean "gross." Dig your hands into your salmon goop, and form patties, roughly 2 inches in diameter. For those of you who didn't bring your protractors with you to the kitchen today, the patties should be about the same size as the palm of your hand. Take the goop discs you lovingly crafted, and throw them into the pan of hot butter. Cook them on each side for 2-4 minutes, until they're good and brown. Be careful when you're flipping them, otherwise you won't end up with salmon patties so much as you'll have salmon garbage. Once they're done, go collapse in a heap with your prize, and pray for a better tomorrow. Bonus points if you remembered to turn off the stove!

November 22, 2016

Mashed Maple Yams

Sure, this is adorable, but it raises some disturbing questions.
It's Thanksgiving time again! Which is exciting for me, because it's my favorite holiday, despite the fact that it's basically celebrating the prequel story to genocide and oppression. Which, when you think about it, so is New Years. The point is, Thanksgiving is upon us and that means that along with eating copious amounts of Turkey and stuffing, we all subscribe to the mass-delusion that is yams with marshmallows on top. If you're one of those guilty parties, who always makes sure that a dish of sliced up yams covered in an impenetrable layer of marshmallows is at whatever Thanksgiving meal you're attending, stop it. Just stop. If I could smack you with a rolled-up newspaper via the internet, I would. Nobody wants that nonsense. Which is not to say that yams aren't awesome, but if you're gonna add sweet on top of sweet, you've got to be more nuanced in your flavors. Otherwise you end up with this gross cloying sweetness that's super off-putting. So, I guess what I'm trying to say is: your food is bad, and you should feel bad.

Ingredients:

3 lb. Yams (Or Sweet Potatoes. Or...whatever. They're really the same thing on this continent)
4 TBSP Vegan Butter 
1/4 cup Soy Milk
3 TBSP Maple Syrup
1.5 tsp Salt
1/4 tsp Cayenne Pepper
Cinnamon

You may be asking yourself "why would anybody willingly use vegan butter and soy milk in a world where cows have not enslaved humanity? Well, some people are vegans. And we want to make them feel like they're welcome in our houses on Thanksgiving by having food they can eat, even though we secretly judge them. Also, some people of the more jewishy variety, like myself, don't eat dairy products and meat together. Which means that we're either sacrificing the butter or the turkey. And I am not sacrificing eating turkey. The point is, shut up. It's happening. Get over it. Now fill up a large pot about half way with water. Then peel the skin off of your yams and toss them in the water, teaching them the valuable Thanksgiving lesson that they were wrong for having skin, and should try harder not to have any in the future. Then, as a warning to the others, crank up the heat and boil them until you can easily jab a fork into them with no resistance.

It may look weird, but it's awesome. Kind of like Jack White.
Exactly like Jack White.
Once your yams have been sufficiently skinned, drowned, boiled, and stabbed, drain the water out of your pot. Mash them into a pulp using any combination of: a potato masher; a large fork; several small forks; your hands, because...you know, you're a man; your mind; the will of a true warrior. Once your yams are mashed, and the burns you got establishing your masculinity have eased, add in the rest of your ingredients and stir until everything's incorporated. Throw that whole mess of gloppy goodness into a bowl, sprinkle some cinnamon on top of that sucker, and go to town on it. By which I mean serve it to your friends and family. Unless you're eating alone on Thanksgiving, in which case you should shovel all of it into your mouth using your already burnt man-hands, and then lie to your co-workers on Monday about what went down. Happy Thanksgiving!